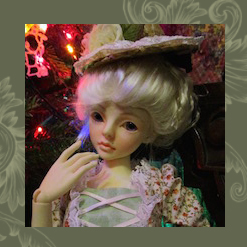
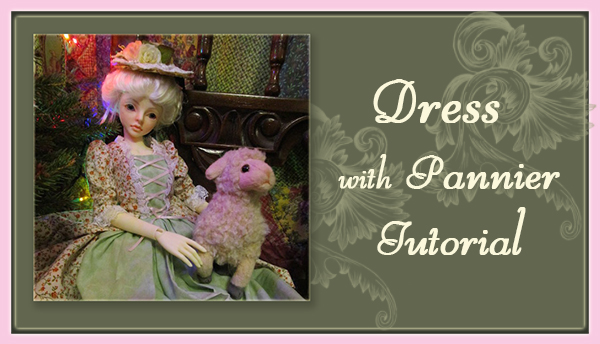
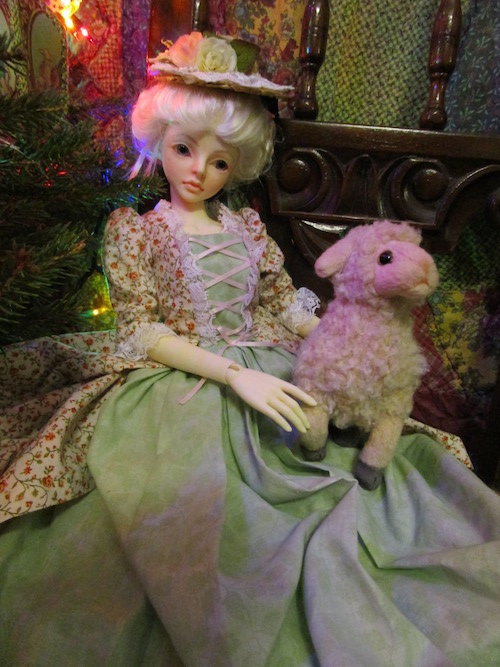
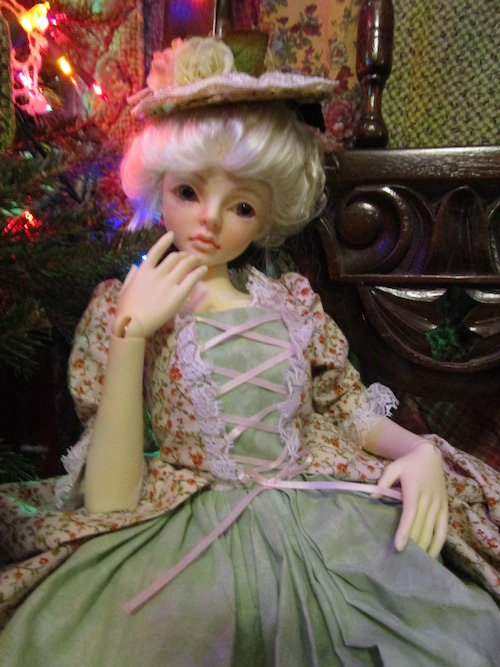
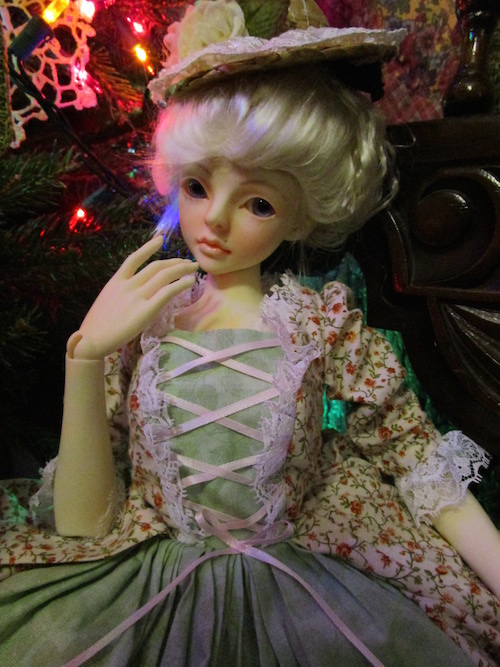
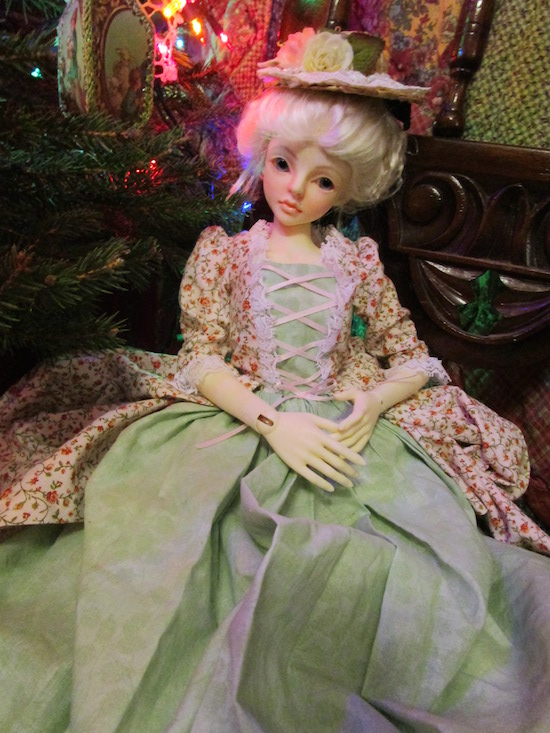
This is the final part of Rajendora’s tutorial series on 1/3 girl’s dress pattern-making. She has created a dress inspired by Dresden Shepherdess figures which is custom fit to Granado Void. The previous tutorials include Tutorial part 1: making a basic 1/3 dress and Tutorial part 2: adapting pattern to make a “princess dress”.
By Rajendora @ Sewing Box Designs
You can make panniers for any size doll with a very simple pattern, and just make ONE side for a bustle cage. (I’ll explain that at the end). Your basic shape is a ‘bucket’ that’s round on 3 sides and flat on one. You can make them from 1/4 a yard of muslin, cotton, plain or printed, and about 2 yards of 1/8 ribbon, along with some plastic boning and some trim if you like. Panniers are generally put on over pantaloons and under a petticoat so that the ridges of the boning doesn’t show through.
Note: I have to wonder, though; who in the 18th century looked at a passing pack mule with it’s loaded baskets (panniers were used to carry the long French baguettes from the baker to the market) and thought “OMG, THAT LOOK! It’s Just What I Need!”
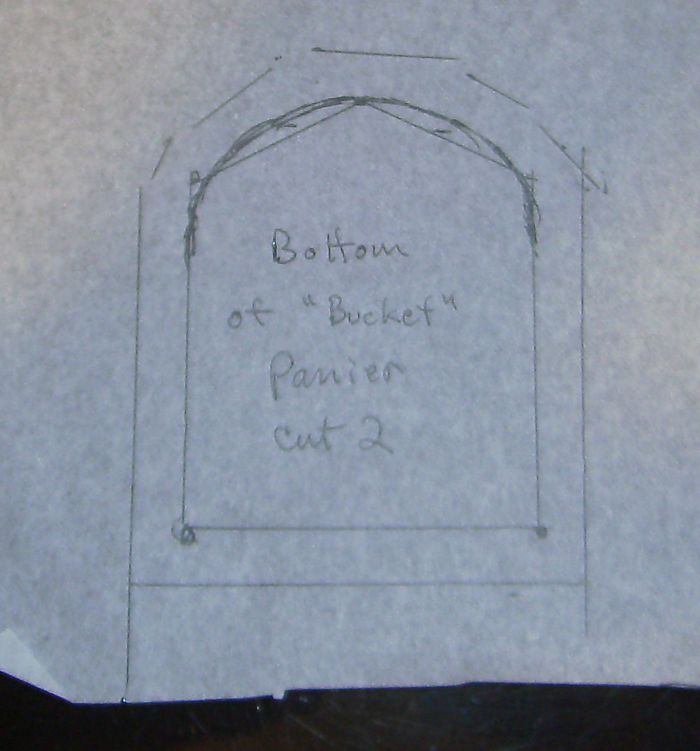
Starting with the pattern, you want a u shaped ‘bucket’ bottom, no wider than the thickness of your doll’s lower body from back to front. Depending on how crazy you want to get, is how ‘deep’ the U shape is, how wide it will stick out at the side of the doll. You might want to read the instructions through twice, so that you understand what I’m trying to describe better.
Patterning
So, make a U shape that is body width across, and from her hip to how wide you want for depth, and curve it neatly. The curve is the outer edge of the pannier, the flat goes against her hip and leg. Then add seams. I use my standard 1/4 inch seams. This is the bottom of the pannier, the base shape of it.
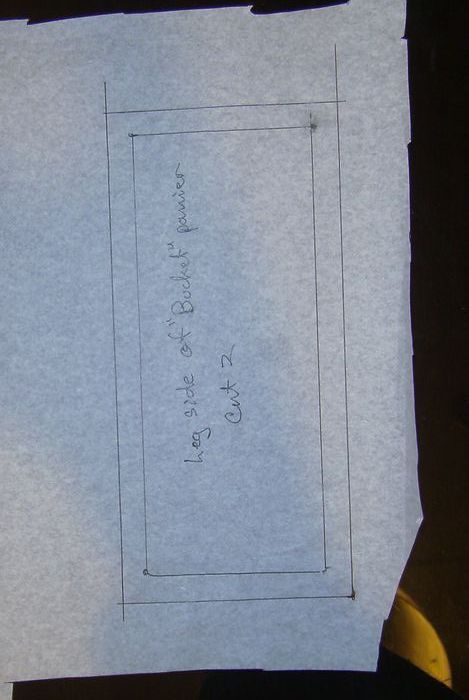
For the leg side, you need the flat edge of the bottom U shape, by however long it is from your doll’s waist to just above her knees or mid thigh at the shortest. Add 1/4 inch seams.
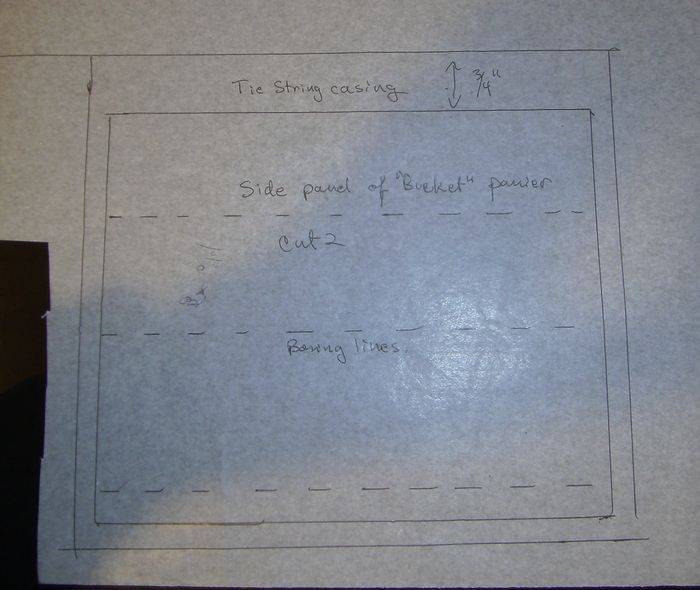
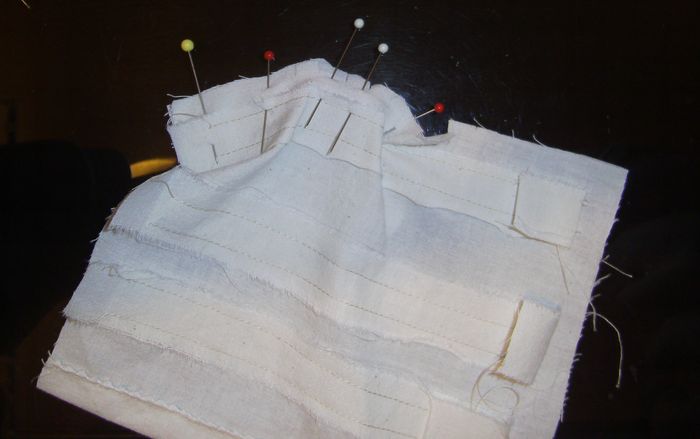
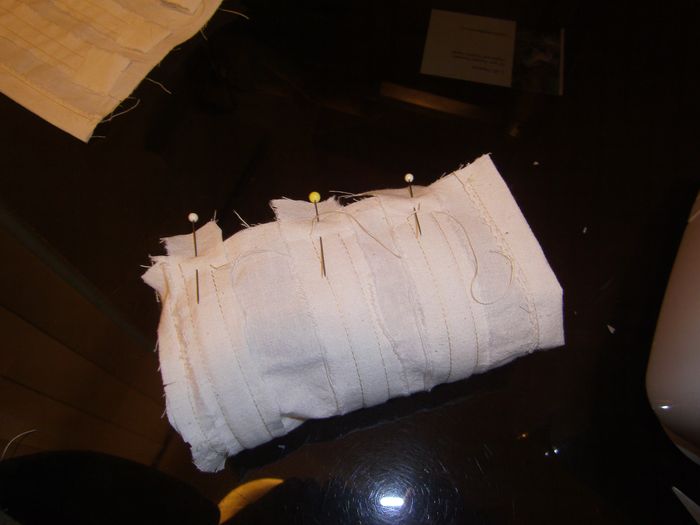
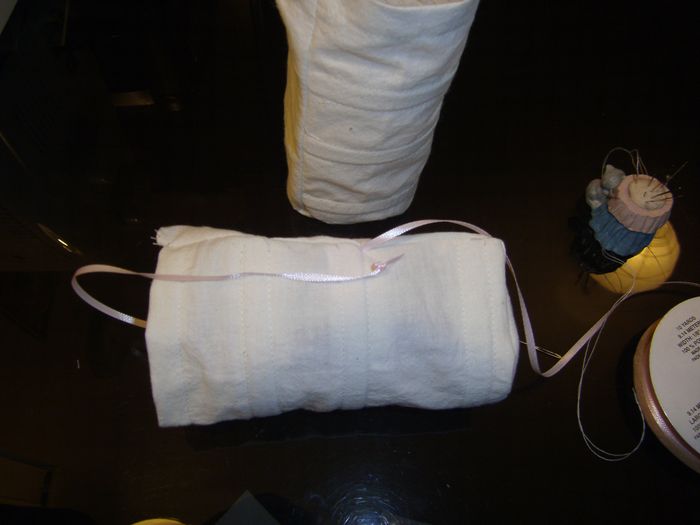
For the curved sides, you need a piece that will match your leg side in length, and your U shape around the bottom U part for the width. Add your 1/4 inch seams, plus, you’ll need a seam for the casing at the top for the drawstrings that tie on the waist. I put 3/4 inch seams there. You can see in the pattern piece I’ve also marked where 3 strips of boning will go. This depends on how soft or hard you want the top curve of your hip extensions to be.
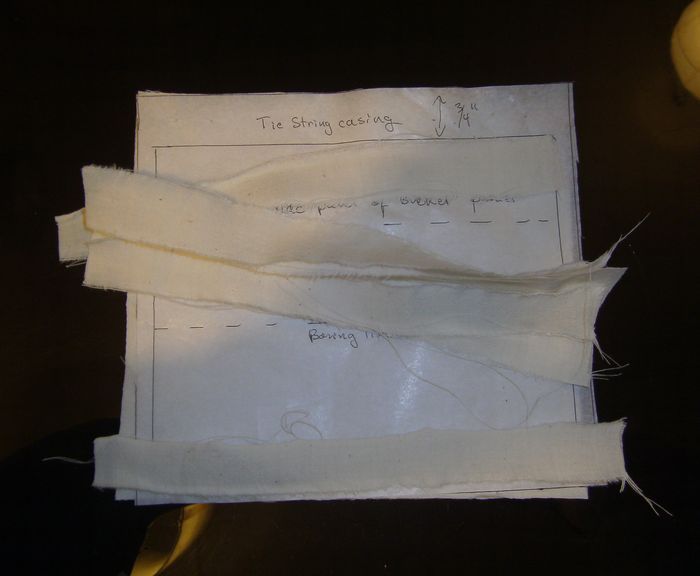
Now cut six strips of boning to fit the width of your curved side pattern. I make my own by cutting up opaque plastic bottles. That way I can control the width and it’s actually stiffer and less expensive than the boning you can buy at the store. If you make your own, it can be anywhere from 1/4 to 1/2 inch wide and work nicely. But you need no less than 3 strips each pannier bucket.

You’ll need strips of cloth or bias binding to make the channels for your boning. Cut six just a half inch longer than your side piece. It doesn’t matter if they aren’t pressed or edge finished, they will be sewn inside the bucket and receive no wear and tear.
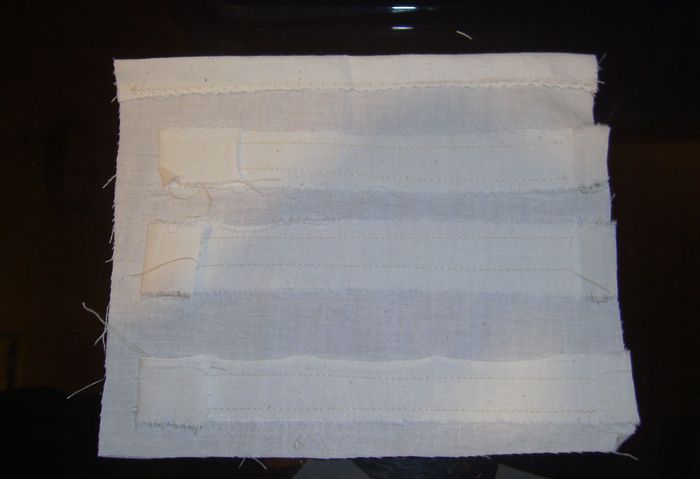
Mark and sew the strips on as shown, leaving one side not stitched all the way to the edge. Press that side back so it doesn’t get caught in the seam when you sew up the bucket.
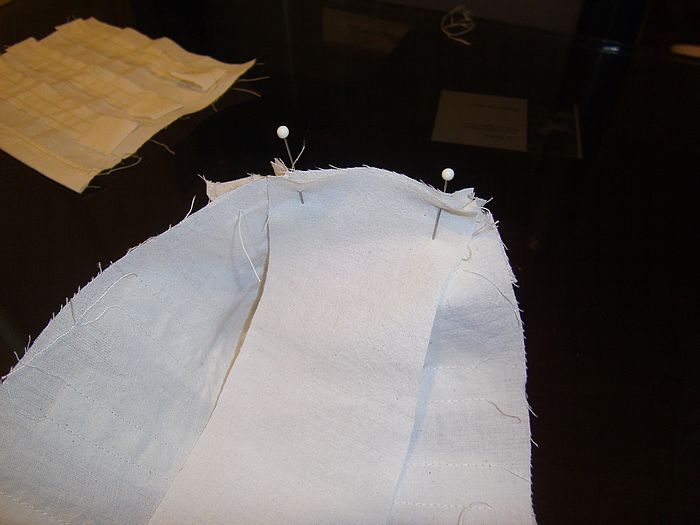
Mark the middle of your base U shape and match it to the bottom of the side piece.
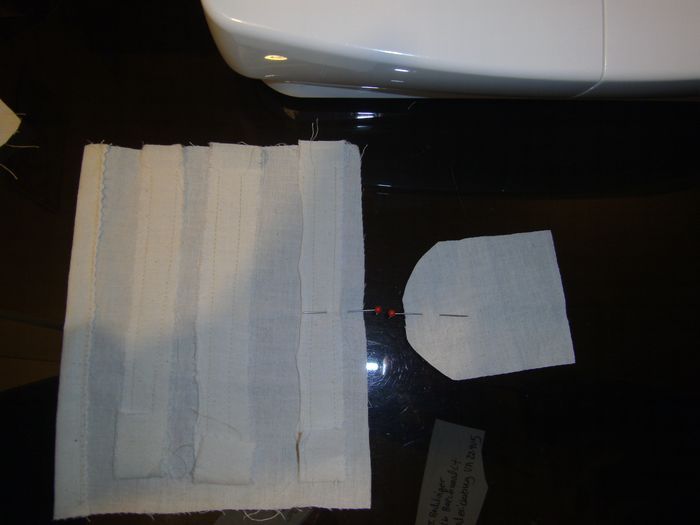
Clip the edge of the side piece half way into the seam allowance, a mere 1/8 inch, so that it will curve more easily, and pin it around the U shape. Sew it on.
Now take your leg side piece and pin and sew the bottom of it on to the straight edge of the U base.
Pin and sew up the side of the leg side piece and the side of the curve piece that isn’t folded back. This will close one side of your boning channels.
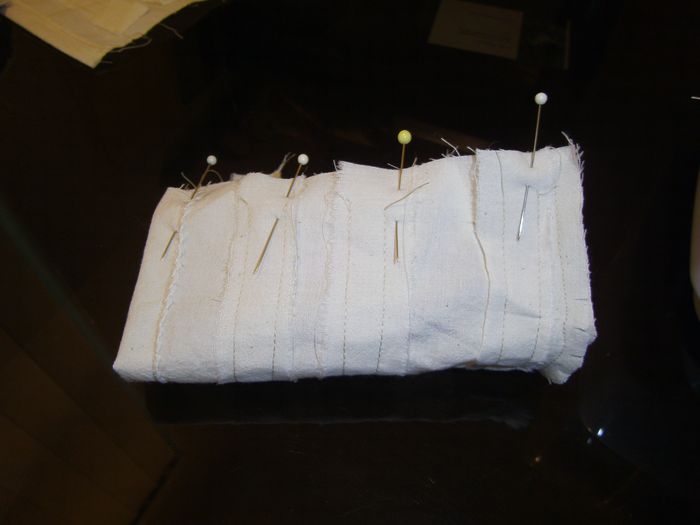
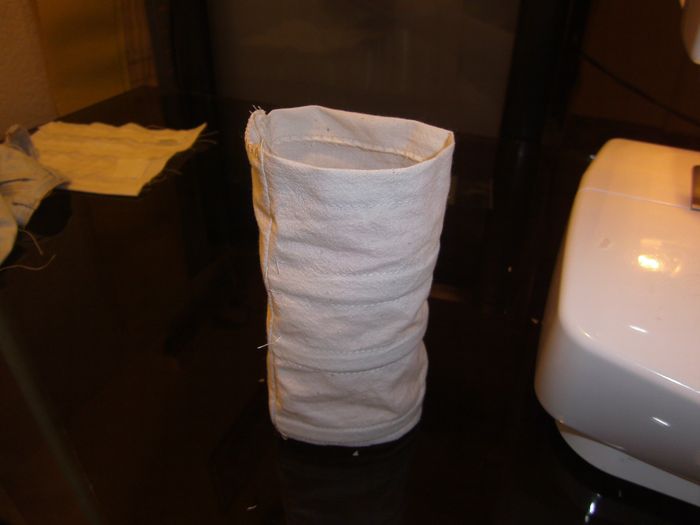
Now slide your boning into the casings. As you can see, I’ve curved the points off the ends of the boning. This helps to prevent wear and tear on the inside of the casing. If you have to cut your boning down a tiny bit, do so. It’s not going all the way to the seam. It just needs to be almost snug to the sides.
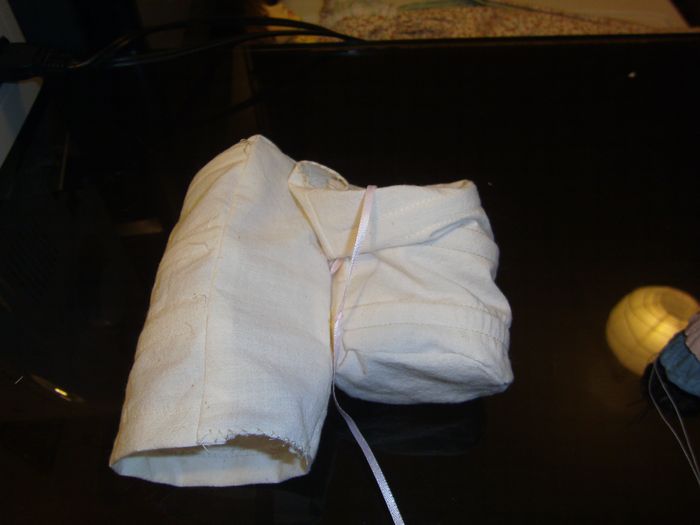
Unfolding the ends of the casings, pin and sew the second side seam now.
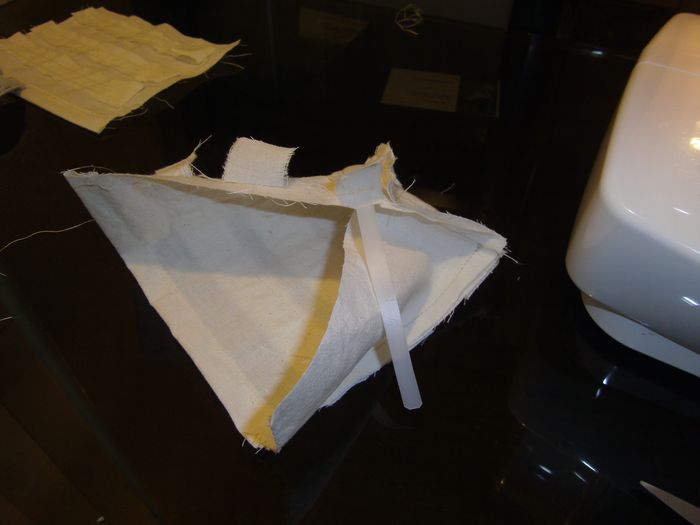
Turn the finished bucket right side out. (This is roughly what a bustle cage looks like as well.) Now, make the other side the same way.
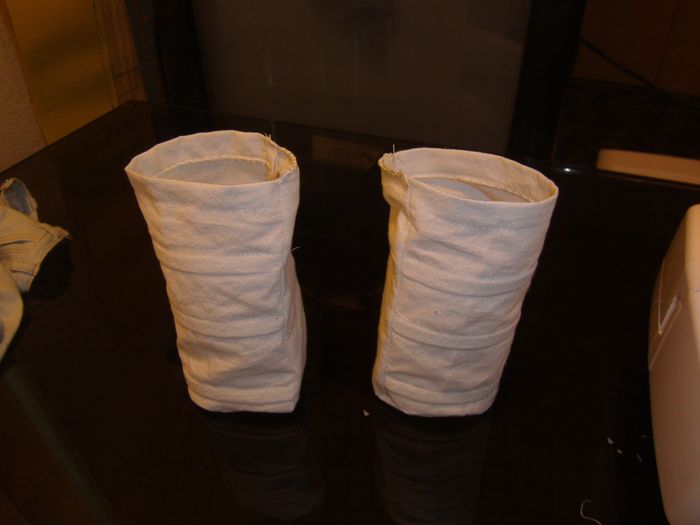
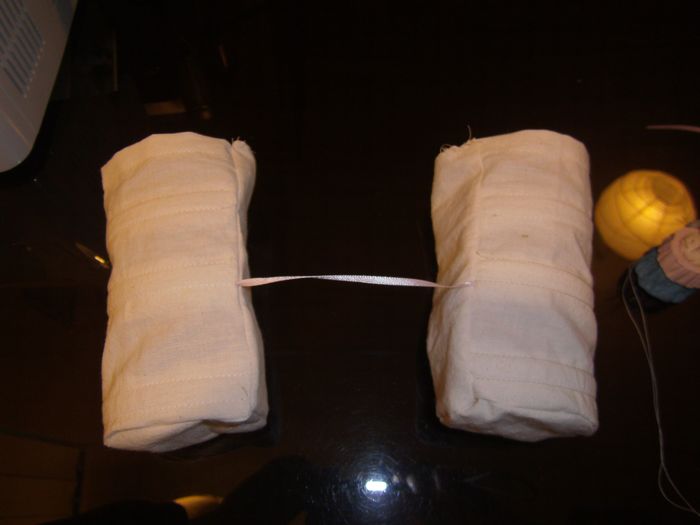
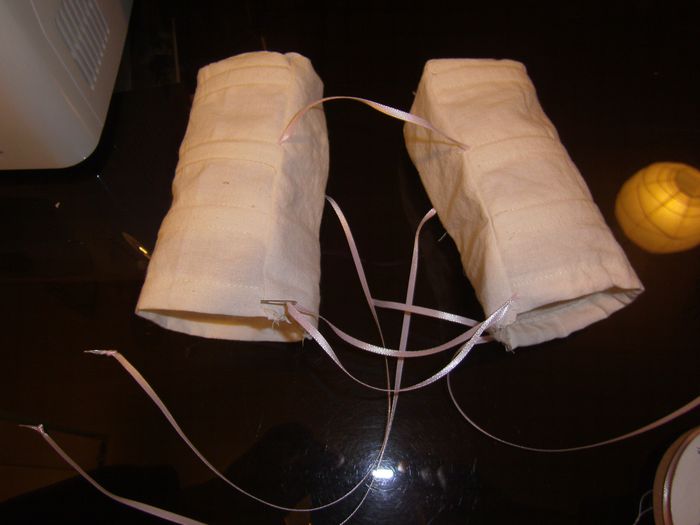
You should now have two buckets with the flat sides facing inward to each other.
Take a strip of ribbon and a tapestry needle and thread the ribbon into it. A tapestry needle is rather dull at the point but still works for sewing through fabric. Wonderful things for doll work. You can use them to weave in ribbon, and sew in tiny cord elastic.
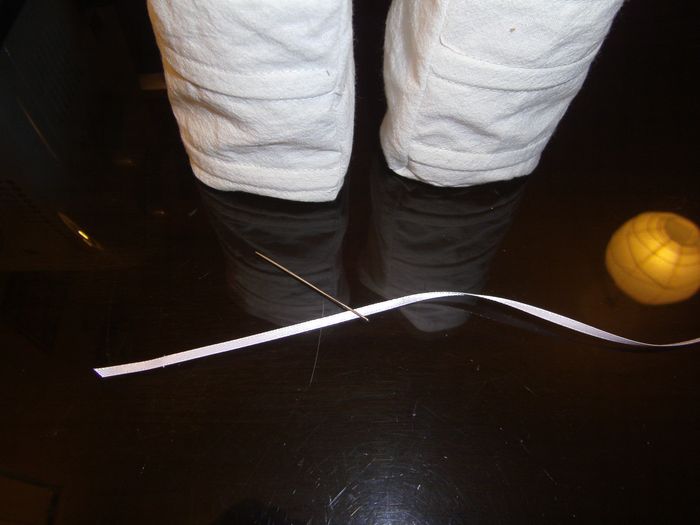
Stitch the ribbon into a bucket right above or below the middle bone casing and tie a good triple knot in it. Pull it so that the knot is snug to the inside of the bucket.
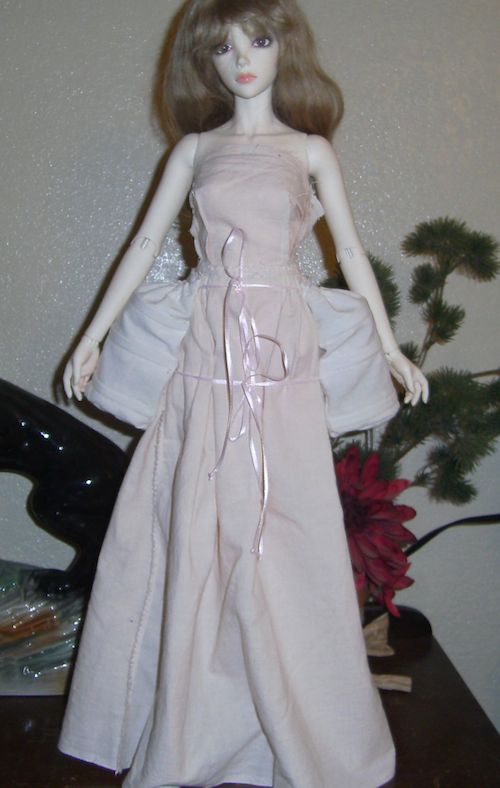
Now cut a good length of ribbon and sew the other side through the other bucket at the same place, opposite, joining them together. Before you cut the ribbon! Measure the panniers in position across the back of your doll’s thighs and tie the ribbon to snug fit but not too tight. This forms the part of the back that keeps the panniers from being pushed to the front. Do the same with the front, but with two pieces of ribbon, so that you can tie a bow across the front of her thighs.
Now thread a length of ribbon through the top casing so that it goes all the way around her waist to tie in front. The tapestry needle will help you slide the ribbon through to the casing.
When you’re done, you should be able to tie the pannier on at the doll’s high hip, just under her waistline, and across the front of her thighs as shown. You don’t want it exactly AT the waist, because the bulk will interfere with the fit of the waist of the dress she’s wearing over it. Same thing with pantaloons and petticoats, you want them to be between waist and hip hugger in fit.
Karina is modeling a pair over a test muslin.
To convert the pannier concept to a bustle, take a good look at the shape of a typical period bustle. This one is from the Metropolitan Museum of Art.
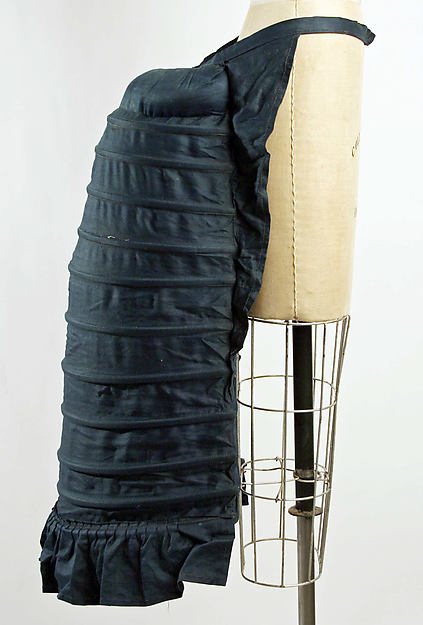
It’s just a longer, more boned version of the pannier’s bucket shape, with a bit of ruffle at the bottom.
Simply make the U shape as wide as your dolly’s bum and lengthen the side pieces. I would keep the ribbon waist and thigh ties, rather than the complicated arrangement on this one. You can adjust the projection in the back by making your boning shorter at the top and letting the bucket gather on the boning. Adjust it before sewing up that last bucket side seam.
The key is to use remember not to start the bustle too high on her backsides. Note that this bustle has a bum pad at the top. You probably won’t need that with a doll’s clothing, because the outfit would not be heavy enough to bother with it. I wonder if anyone ever rested their drinks on the backside of the lady wearing this one? ~_^
Shepherdess dress with panniers by Rajendora of Sewing Box Designs. The doll is 1/3 Granado Void.
The plastic strips are a great idea. I’ve seen too many vintage dresses that were damaged with rust from metal hooks and eyes or snaps, and in my humid climate I want to keep metal away from dolls.