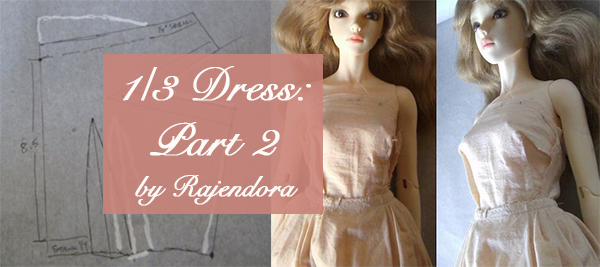
Basic Dress Pattern Tutorial Part 2
By Rajendora @ Sewing Box Designs
There are a lot of dress bodice styles out there, but the ones used most are the basic, with one or two bust darts, and the princess. These two can then be modified to what ever design elements the stitcher is looking for. Once you have your basic dress pattern custom-fitted to your doll, you can start experimenting on your own with the confidence of knowing that whatever you do, your pattern will fit with only a few changes for the type of fabric and design you want. You are in control.
This time I’m going to work with the simple princess variation, as it lends itself to the more popular outfits in Lolly, Goth, and Steampunk, as well as a multitude of historical and fantasy based styles.
The first thing to always keep in mind is how the body is sectioned off into quarters and eighths in patterning. You’re taking the 3D shape and converting it to a 2D pattern. Front right and left quarter, back right and left quarter. To make a princess bodice, you split the quarters into two and make eights, which allows for a much closer fit all over the torso.
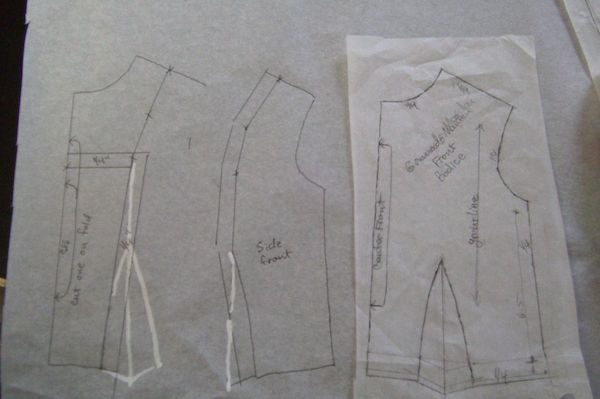
I’m going to be making an 18th century gown, and I need a princess pattern. The bodice will have a fake front stomacher with lacing across it and a low square neckline. Starting with the front bodice, first mark where the new neckline is going to be, remembering to add a seam allowance. To make a simple princess bodice, start from the bust dart and split the pattern, from middle shoulder seam to the middle of the bust dart.
Now adjust the bust dart to a regular seam by ruling it out, cleaning up your angles as you please, either a straight line or a soft curve, whichever. You’re the one in control of the design here.
The bust dart is now converted to a seam.
Remember to add your seam allowance on the new seams, but not the continued use of the basic bodice seams.
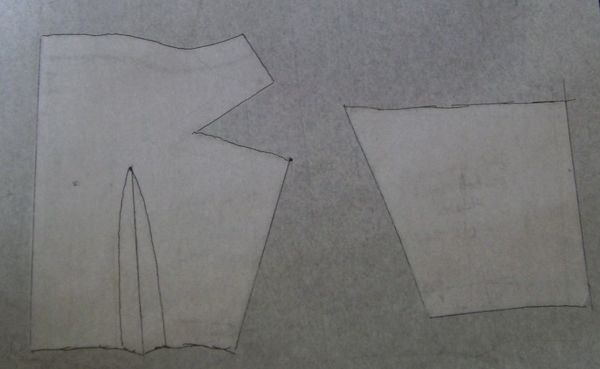
Do the same with the other half of the princess line bodice. You can see the changes where I’ve used the white-out.
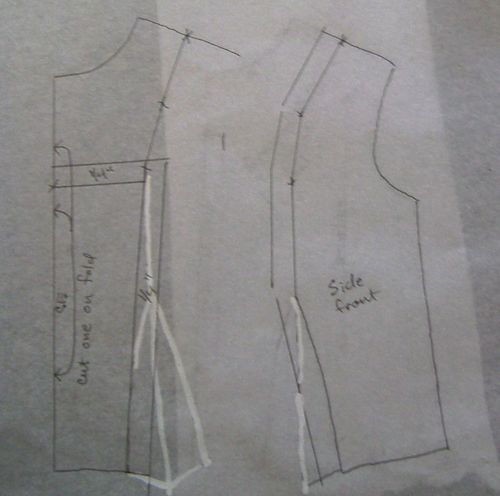
I’ve placed the base pattern beside the redrawn pattern so you can see how that was done. The main thing is to not lose any of your base pattern surface or seam allowance, and your garment should fit your doll easily with a few minor adjustments caused by the fabric you use.
With your fitted basic pattern, you can add a front opening and close the back opening as well. In this case, the back needs the shoulder seam and neck altered to match the new front design. I’m just going to short-cut the back and leave the dart as-is, but if you want, you can do the same as the front, split it and add a seam. The shoulder seam must match the front piece shoulder seam.
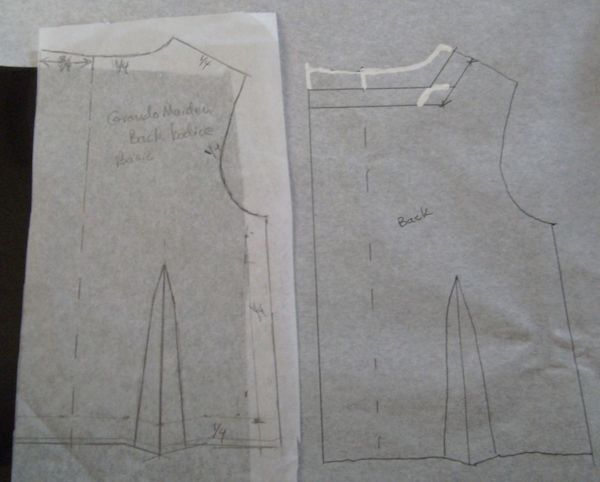
Be sure to copy all your construction markings and label your pattern pieces.
Sleeves
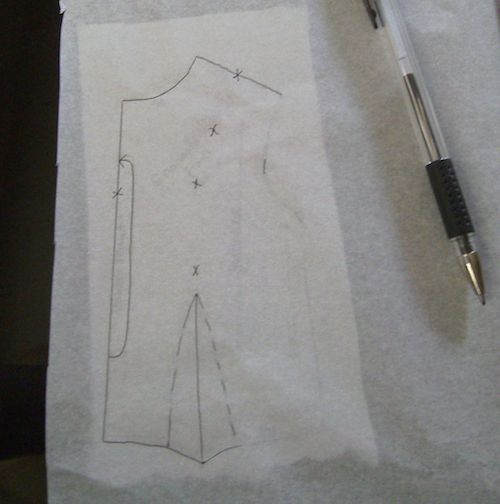
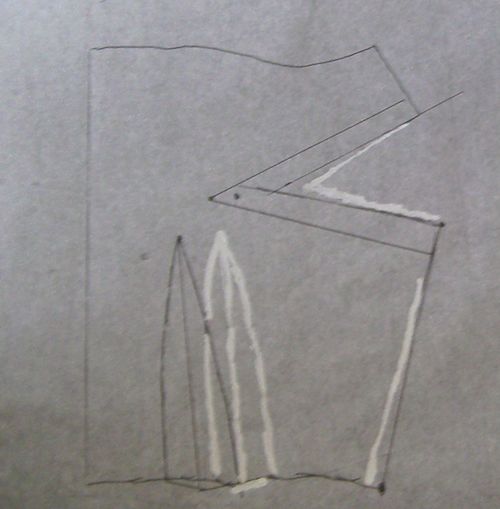
Next, I want to add a bit more of a puff in the sleeve for this dress, and to shorten it without adding more into the sleeve otherwise. To do this, I use the pivot method.
The photo will show you roughly how that’s done, but the pivot point depends on where you want to put it. You trace half the sleeve, then pivot the base pattern as much as needed to widen it at the top, and fill in the missing lines, checking to make sure you haven’t lost or gained too much where you don’t want to, such as the doll’s hand not going through the sleeve.
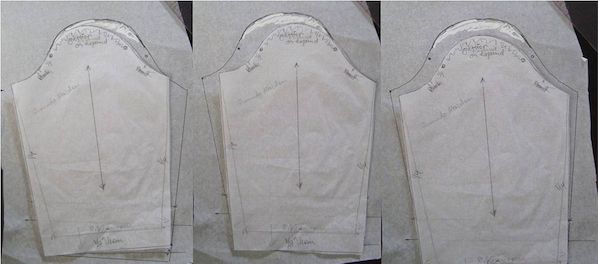
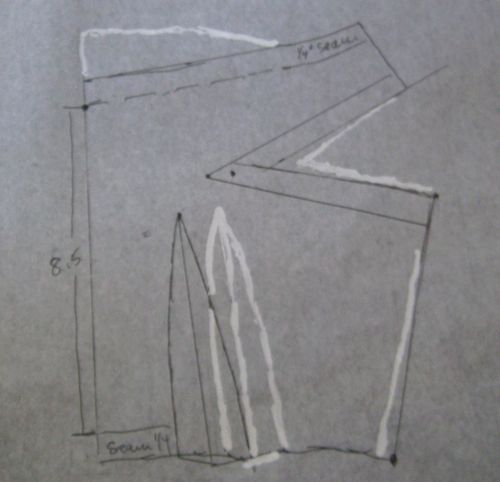
True-ing up seams on your pattern means to run a check to make sure your seams will line up evenly. In this case, the sleeve top is fine, but the bottom became warped. There is a 1/2 inch difference. Split that, and move the bottom seam over 1/4 inch. Retrace the pattern piece, and fix the problem. Be sure to check all your pattern pieces to true up the seams.

You will now have a bodice that can be used for a new variety of dresses simply by changing the skirts, and you now have some ideas on how to create a variety of sleeves.
Altering Existing Patterns
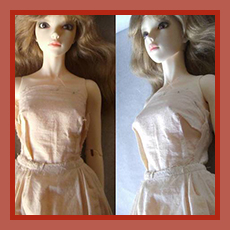
In this case, I have an SID small bust girl who fits into a Soom Super Gem pattern but with a few issues. The SID waist is a fraction larger, and the bust front narrower than the Soom girl. She would still fit the pattern with a little letting out at the waist, but the over all design would, frankly, result in something a conscious person wouldn’t wear to a Zombie walk.
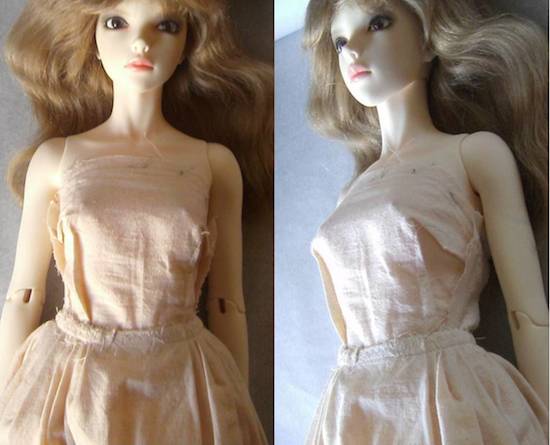
Also, while the SID girl patterns available come in one size, the last time I looked, the girls have three bust size choices; the increase being all to the front. You can alter SID patterns to fit the Soom by simply reversing what I do here. I’m taking my Soom pattern to fit to my SID small bust girl.
Start by tracing the existing bodice pieces.
From the fitting of the SID girl, I know that she needs 1/2 inch more in the waist, and the under-bust dart needs to be moved in 3/8 inch, while the side bust dart point must come in 1/4 inch.
Now I want to lower the front neckline. Measuring the doll from the waist up, I want her neckline to be at 8.5cm, not too high, not too low. Her side seam height is fine. So I mark the new top line and blend it into the side seam top line. Remember to leave the seam allowance alone and add it to your new neck line.
I check this against the pattern fitted to my doll already and make any other changes in width and height as needed before even cutting out any fabric, even to make a muslin test.
Now here is a quick trick to increasing and decreasing busts for most variations in BJDs. Because most companies just add on bust size like a surgeon putting in implants, you can just fix that one little area like a bra cup size. Working from the center front seam of the bodice piece, simply add or subtract half the difference in distance between the nipples. Then move your side bust seams, if used, half that distance in or out as needed. You may need to move your neckline up a bit and your waist down to allow for the much larger bust, but it won’t be by much. Always check your changes with a paper towel test.
Skirts
Skirts can be complicated, that’s the fun of them, but there are plenty of tutorials online for drafting skirt patterns. In this case I’m matching the princess bodice with a full gathered skirt, suitable for the same time and style range, 18th century to modern prom. The rule for a nice gathered skirt is: 3 times the amount you want to go around.

Multiply the doll’s HIP measurement, not her waist, by 3. You can break that up into as many panels as you like, but the end product must have at least a 3/4 inch center back seam to match the bodice back seam. (If you have changed the opening of the bodice, do the same for the skirt.) I normally allow a 1/2 inch hem for almost everything. Do not forget to add a 1/4 inch seam at the waist to seam it to the bodice. Be certain to mark quarters when you cut your skirt if you ‘re not putting in seams. One quarter to each quarter of the body. You might find pleating better than gathering for the smaller dolls.
There is a nice fat textbook (160.00 USD the last time I was forced to purchase one!) for all kinds of patterning changes for fashion designers, but search for patterning instructions and you will find them everywhere on the internet. The nice thing about this tutorial is that you can now have a pattern that you know fits your doll, and making the changes will be so simple! No more scanning the little pattern piece diagrams in printed people patterns and playing about with the printer settings. Save yourself a load of misery (and ink and paper!) by just using your base pattern and drafting them from the start!
The final dress and an extra tutorial will be posted sometime this week.
1 thought on “Basic 1/3 Dress: Part 2”