Modern Bra and Panties, Men’s Boxers
By Rajendora @ Sewing Box Designs
The thing to remember about underwear is that it’s a lot simpler under all the lace and Lycra than you might think. Start simple and then go nuts. I’m going with the very basics for the intermediate stitcher here. If you have sewn teddy bears and things, you can sew lingerie for your dolls. It’s basically knowing how to sew curves and circles, along with applying elastic and casings. The real fun is in the fabric you chose and the trims.
Bra patterning
For the main parts of the patterning, refer to my previously posted bikini tutorial. Trace your doll’s bust by folding a piece of paper over it and folding over a dart to shape it as shown, and mark it to the finished look of your bra cup, making sure to put marks where you want the straps and center to be.
Retrace this piece and add your 1/4 seam allowances all around. Once you have your bathing suit bra cup pattern, you will need to measure and draft for a bandeau. Do this by taking the under bust circumference of your doll, and drawing the curve of the bra cup tracing (not the pattern with seams added) as shown.
Take a strip of paper longer than your under bust measure by a few inches, fold it in half and using the bra cup tracing to draw your curve. Using the center point of your tracing, line it up with the center of the paper strip, and trace to where your finished dart line will be.
Then rotate the tracing and continue your curve.
Now add your side piece in at the height you want it to be, and then finish your half bandeau by adding your side seams and leaving about an inch past one half of your under bust circumference for the overlap later. You’ll want at least a 1/2 inch under the bra cup to allow for 1/4 seams. You can make this narrower if you want an under wire or push up bra look, along with changing the pattern piece shapes of the cups.
Now you can fold your paper in half and finish cutting out your bandeau pattern.
Panties Patterning
Referring back to the bikini pattern, use that as a base to draft your panties. Depending on your design, you’ll simply add length of sides to your own discretion. Remember that the back of the panties is going to be slightly deeper (from top waist to seated bottom) to allow for the doll’s bum. Be sure to test fit the pattern on the doll and cut out any extra bits that interfere with her leg sockets, without losing your seam allowances. Or trace the pattern same as with the bra cup and add seams later. There really are no set in stone rules for patterning; whatever works, works, as long as you have the basics: It fits, it has seam allowances. In this case, I’ve left seam allowances for elastic top and legs.
Sewing the Bra Top
Start by sewing the darts in the bra cups, trimming off 1/8 of the seam, and over edging around all your pieces. I’m using a bright blood red cotton for this project so I’m not using a lining, but if you use lace or something like that, match the under fabric to your doll’s skin or a contrasting color for design variations.
Lining up your bra’s darts carefully, pin and sew in your cups as shown. Be sure to trim your seams down to 1/8th of an inch and zigzag the raw edges and press them. You can use a folded wash cloth as a pressing tool to get the curve pressed nicely, even with a full size rather than a craft iron. Test fit the top on the doll at this point and make sure you have things right. Because the doll I made this top for has closely positioned breasts, I compensated by sewing a little seam up the middle to ensure a matching fit.
If you’re using a ribbon for straps, or making your own, cut 2 pieces about 6″. Press the top of the cups and bandeau down 1/4 of an inch. Pin any trim and ribbon shoulder strap on and top stitch it into place. This will help finish the edges nicely.
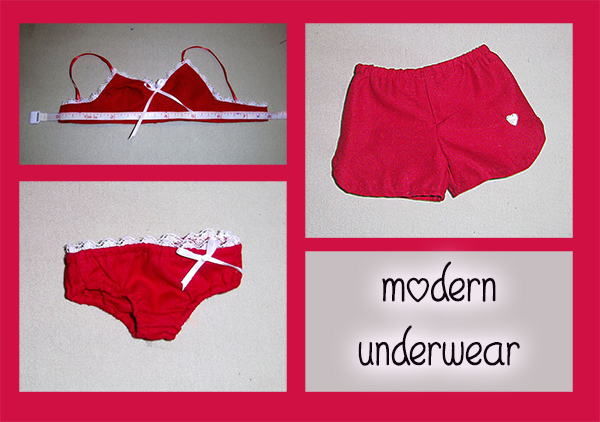
You can then press up the bottom 1/4 inch hem and top stitch it down. After checking to be certain there is an 1/2 inch overlap, and marking where your straps will fit the doll best, cut off any more than 1/2 inch excess on the back straps, allowing for a half inch overlap, fold over and stitch them to finish. Sew on hooks and eyes or snaps to close the bra with. Sew your straps in place. You can then sew on ribbon bows or a little flower or some beads. Once you have your prototype bra, you can go nuts. Some stitchers use jewelry bits to make the little sliders on the straps and bra hooks rather than using snaps or hook and eyes.
Sewing the Panties
Once you have your paper pattern fitted to your satisfaction, and your fabric cut out and over edged, start by rolling the leg edges, allowing for elastic. If you have a machine that actually likes elastic, you can find a tutorial on YouTube for sewing elastic on lingerie, but I’m using a casing method here.
Now for the ‘fun’ part. Using a dull pointed tapestry needle with a large eye, threat it with your elastic (1/8 or cord) and slide the needle through the casing and pull it through, leaving plenty of extra to cut off later.
Next sew up the side seams, test fit your panties on the doll and pull up the elastic snugly and stitch it in before cutting in case it slips loose, then trim off the excess.
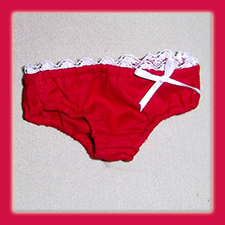
Finish your panty tops either by applying and folding and top stitching elastic or making a casing. I added matching trim on the top of my project, and a ribbon bow.
Boxer Shorts
Refer to my summer shorts tutorial for the main patterning instructions. The only difference you’ll see will be in the length. Your boxers will be made the same basic way, with one exception, you can change the length and how high the waist is. I made jogger’s legs (curved and slightly open at the side), as tiny a hem as I could, and embroidered on a white heart shape. You can find cute seasonal prints in the quilting fabric sections of the better fabric stores like JoAnn’s to make boxers from.
Here are some links to real lingerie tutorials for inspiration and further help.
Petit Main Sauvage
http://petitmainsauvage.blogspot.com/ Use the search this blog for “bra” and you’ll find all her posts on construction and design changes. The copy pasted search link doesn’t work for me so you’ll have to do it.
A Few Threads Loose
http://afewthreadsloose.blogspot.com/p/how-to-and-lingerie-sewing-techniques.html
She has tutorials on making lingerie and trimming.
Last Summer I made my first bra for myself from a KwikSew pattern (http://kwiksew.mccall.com/k3594-products-20137.php?page_id=5564) and this tutorial is based on that pattern.


1 thought on “~Modern Undergarments~”