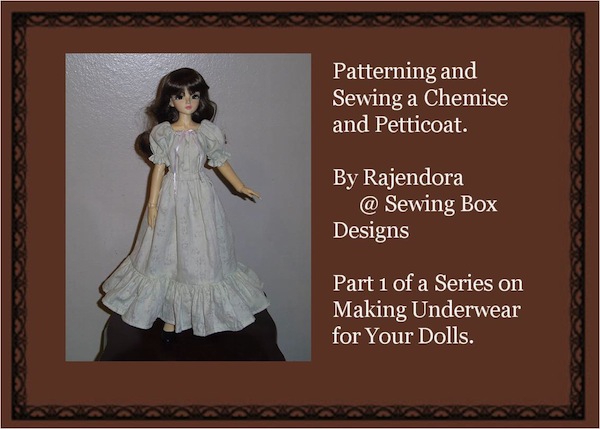
How to Pattern and Sew a Simple Chemise and Petticoat
Part 1: The Chemise
By Rajendora of Sewing Box Designs
This is the first of a series that I will be doing on historical underpinnings and then modern underwear. All you need to know to start with is how to work a sewing machine, and measure your doll, and draw lines as indicated to make the patterns. The sewing is basic straight stitch and zigzag. The aim of these tutorials is to give you a basic grasp of the methods of patterning and construction so that you can then take the basics and move along to your own designs. Keep in mind that I’m not a trained teacher, I’m just passing along what I’ve learned by study, research and working in theater costuming.
~~~~~
What we think of as historical underwear for women is collectively known as underpinnings. We’ll be starting with the chemise and ruffled petticoat; then moving on to how to pattern a corset (both under bust and over bust) and then how to make a cage crinoline.
Underpinnings shaped the body and garments, which makes them different from modern underwear. When chemises and petticoats were popular, the chemise acted as a t-shirt or when longer, a slip. (Google “Cutty Sark” if you want to find out about history’s most chemise that was a bit too short for the lady wearing it, ‘sark’ being a colloquial term for chemise.) The chemise protected the other garments from sweat and the body from the construction of the corset and is also known in other variations as a peasant blouse. The neckline and sleeves were finished with draw strings to raise or lower the neckline or length of the sleeve as needed for garment neckline style, or to nurse children.
As for the petticoat, throughout history, skirts have taken many different shapes; cones, bells, tubes, whole sofas (Marie Antoinette, I’m looking at you, girl). The petticoat and crinoline helped make those shapes possible. A basic petticoat is going to be full enough to provide some under the skirt, or help pad out the shape of the crinoline.
~~~~~
Patterning and sewing the Chemise
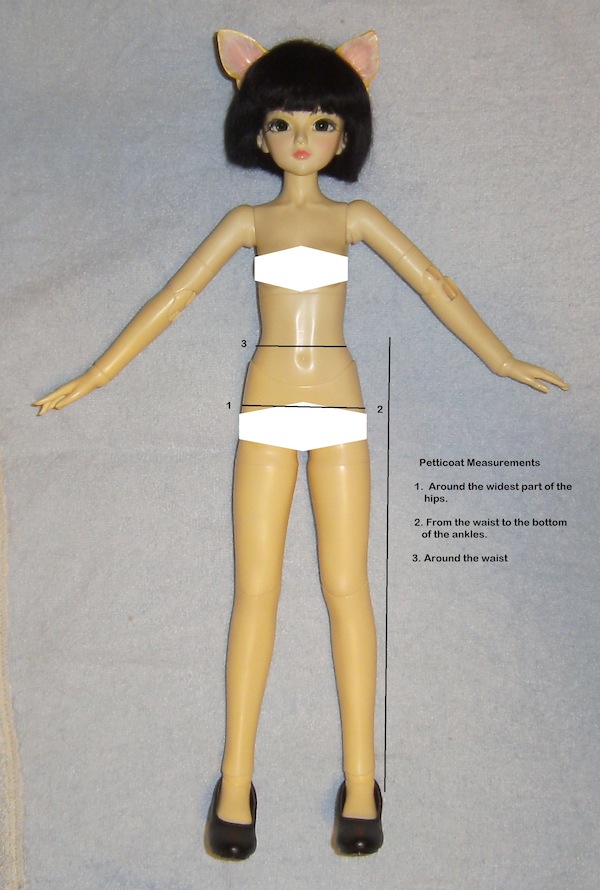
Using a thin tape measure, for the Chemise, you’ll need these measurements.
1. Across the shoulders, including the arm.
2. Across the bust from side to side. (You’ll be using the same measurement for the back).
3. From the side of the neck, down under the armpit and back up to the side of the neck. Make sure you leave room for the doll’s joint movement, you want this below the opening in her side for the arm joint.
4. The length of the finished sleeve. 5. Around the upper arm. 6. From just under the collar bone to the widest part of the hips. This will be your front length. 7. From the shoulder top to the widest part of the hips in back. This will be your back length.
Now that you have your measurements, get out your ruler, an angle measure, pencil and paper. I use doctor’s table paper. It’s the least expensive paper you can find for patterning, a whole roll lasts me a year for people and dolls. For smaller dolls, you can use a few sheets of graph paper.
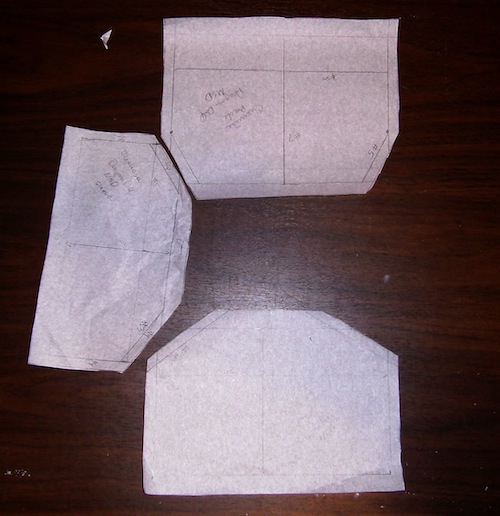
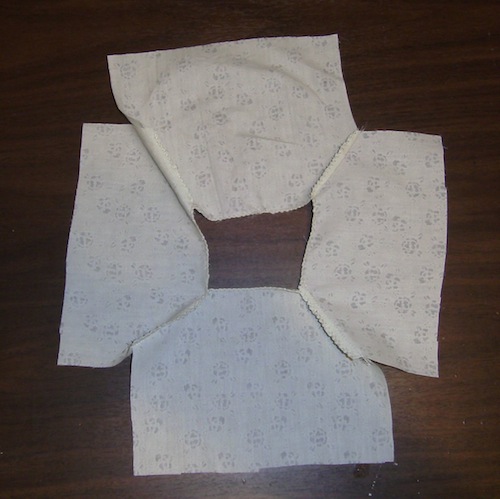
Starting with the chemise, you need 3 pattern pieces, shaped like odd hexagons. The sleeve, and the back and front. The back will be a bit longer than the front, but the side seams will be the same length from the armpits down. This is a rough example of what they will look like.
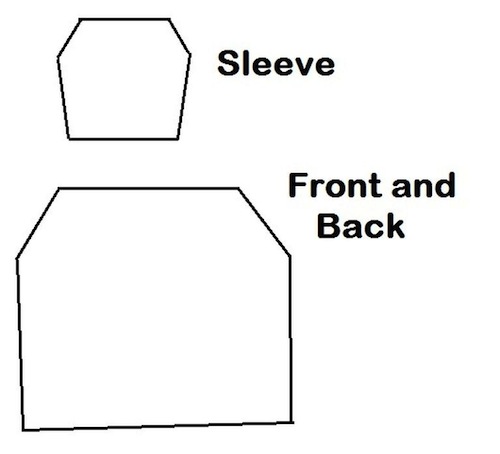
The Sleeve:
Leaving yourself enough room to work, the width of the sleeve will be the measurement around the upper arm, #5, times 2. Now draw your length, #4. For the slanted arm hole seam, you’ll use half the #3 measurement. Angle it at 40 degrees on both sides. Draw your sleeve side seams straight down. Then add your seam allowance. You’ll want 1/2 inch on top and bottom and 1/4 inch for the armhole and side seams.

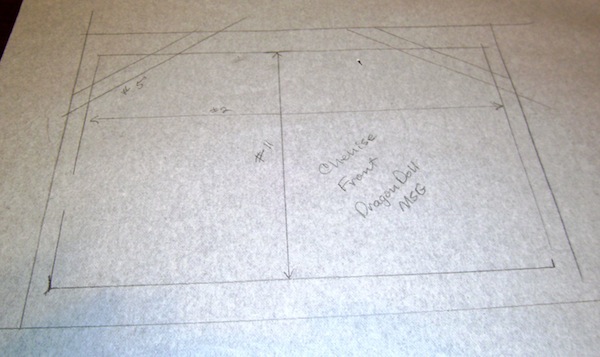
The Front:
Now using the #2 measurement times 2, draw your width. Using the #6 measurement, draw your length. Using half the #3 measurement again, draw your arm hole seam. It can be the same 40 degree angle as the sleeve. Now draw in your side seams and add 1/2 inch seam allowance on top and bottom, and 1/4 inch on the armhole and side seams.
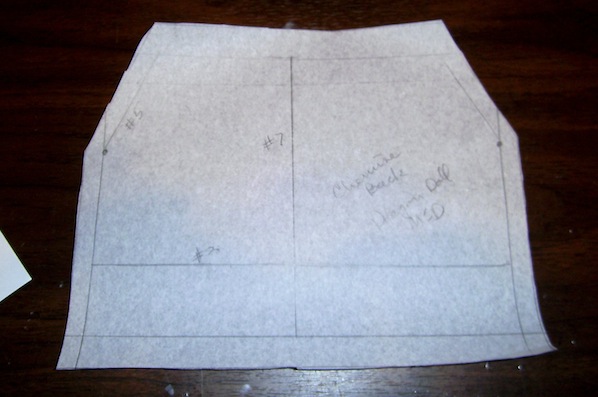
The Back
Is not exactly the same as the front. Using your #2 times 2 measurement, draw your width. Use the #7 measurement as your length. Now lay your front on the back pattern and make sure your side seams to armpit are the same from the hems up. Use the same 1/2 of #5 measurement to draw the armhole seam, but the angle will be sharper at 60 degrees, because the back neck is higher. Again, your side seams should be the same length. Also, remember to add 1/2 inch at the top and bottom and 1/4 inch on the armhole and side seams.
When you’re done, your pieces will look like this.
Assembling the Chemise.
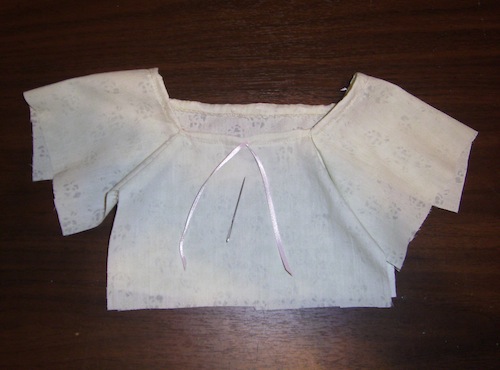
Pin your sleeves to your front and back pieces and sew at 1/4 inch. Zigzag edge your seams for a soft flexible over lock.
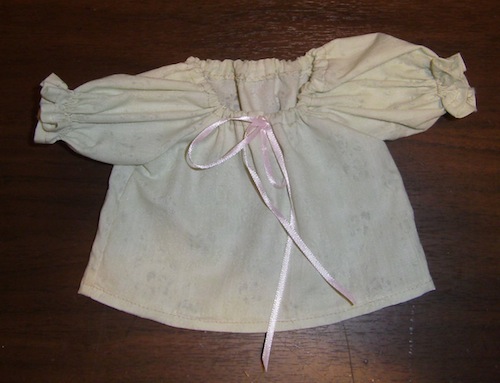
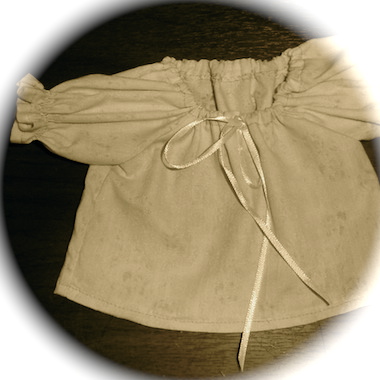
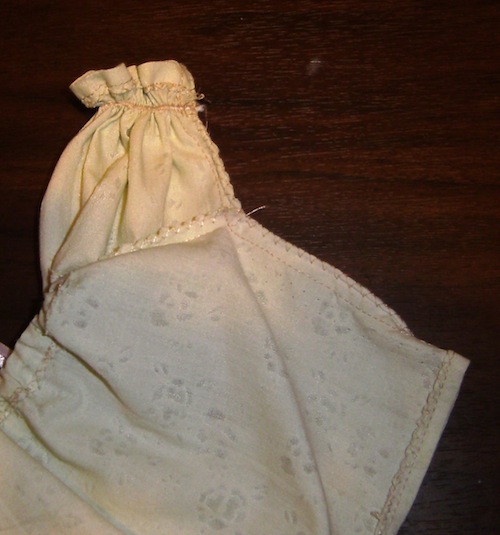
Zigzag the neckline, and press it down 1/2 inch. Stitch the seam at 3/8 inch
Using the #1 measurement, double it and cut a piece of 1/8 ribbon. Using a large eyed needle like a tapestry needle, run your ribbon through the channel and stitch the ends out the middle front.
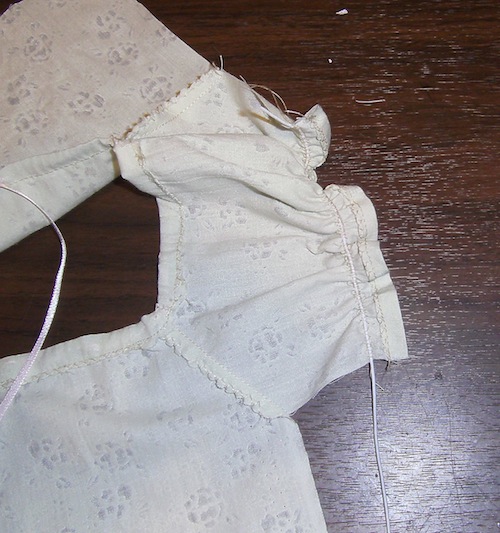
For the hems of the sleeves, you can use this trick. Zigzag the edge and hem it at 1/4 inch. Now press it up at 1/4 inch again. This will be your guide channel. Lay a strand of cord elastic on the pressed fold and zigzag over it so that the needle doesn’t stitch the elastic. Clip it and leave the ends loose for later.
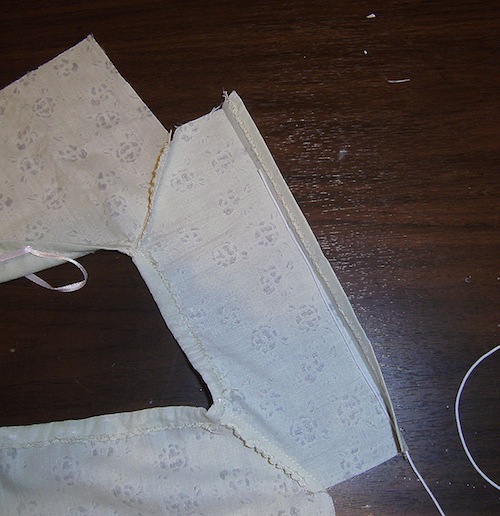
Pin and sew your side sleeve and bodice seams at 1/4 inch. Be careful not to stitch through the elastic strands. Zigzag for a soft over lock finish.
Zigzag your bottom hem edge and press up at 1/4 inch. Stitch it at 3/8 inch.
Now slide the sleeve up on your doll and pull the elastic until it’s snug on the arm, but still fits over the hand. Pinching it in your fingers, slide the sleeve off the doll and using a very tight stitch, stitch over the elastic to hold it in place firmly. Do the same with the other side. Cut off the excess elastic.
Pop it on your doll, and adjust the draw string as you like.