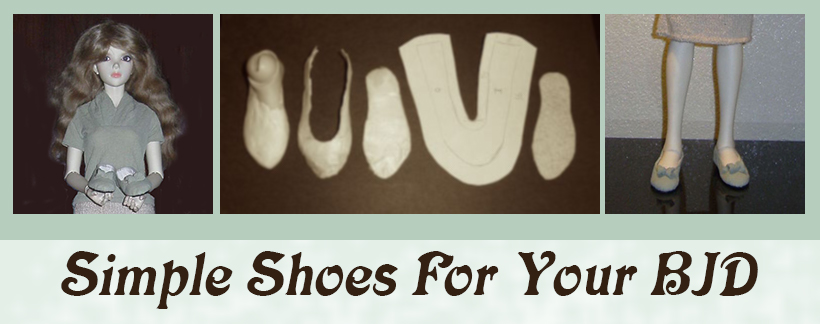
Making Simple Shoes For Your BJD
By Rajendora @Sewing Box Designs
~~~~~
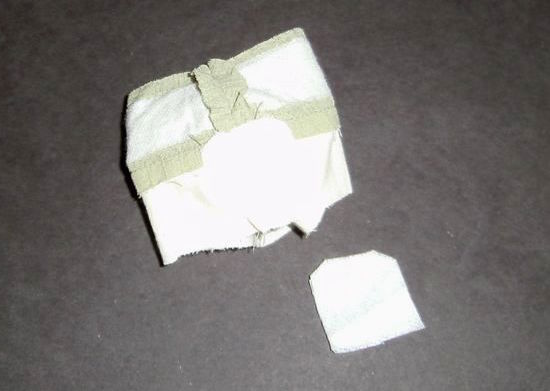
You can pick up a simple slipper pattern pretty much by googling anywhere online for your doll’s basic size, but the best way to have one fit is to make a custom pattern for your exact doll. Simply wrap up the feet with tissue and masking tape and then draw your shoe shape on the masking tape, then carefully cut the pattern off, add seam lines, and start sewing.
This tutorial is a combination of quite a lot of ones I found in an effort to keep up with my growing barefooted crew. I have been through a lot of failures in this process, and it’s a bit rough, but if you persist, you get better at it, or find ways to do it the way you want. Quite a few people have ended up selling their shoes after learning to make molds and their own soles or platforms.
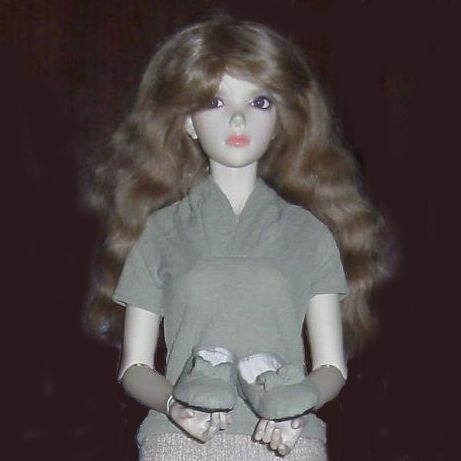
Of all the tutorials I tried out, one thing I did find is that the larger dolls shoes take more shaping to look realistic than the small ones. You need a closer fit and toe-tip support. The shoes in this tutorial were made for an Iplehouse SID flat foot. I wanted to put a standard heel on my flat foot doll. To do this, you simply slant the actual heel to work with the doll’s ankle the same way your feet work in your own heeled shoes.
List of supplies:
- LaDoll or other air dry clay. Something that can be added to or sanded to shape, as well as removed from your doll’s feet without shrinking in the drying process.
- Fabric for uppers, trims, etc.
- Iron on interfacing. You can layer it on for stiffer support if needed, but get the medium weight. I used the thin and had to really pack it on.
- Fake leather for soles. The fabric backing sticks better than real leather.
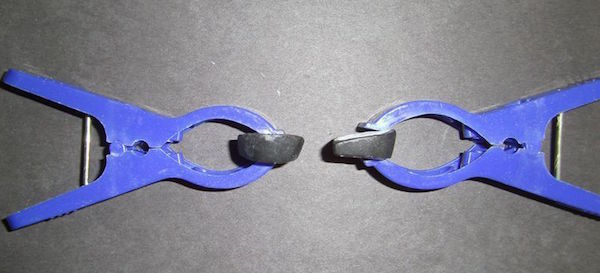
- Some plastic clamp type clothes pins. The big kind are great.
- Strips of plastic (cut up a thick ziplock), for clamping your work to dry glue.
- Some serious glue. Hot glue will not work. I think the best for this type of project is Gorilla Glue. I used Aileen’s Tacky craft glue, and it took forever to dry in the cold weather, and I had to reglue it, but it finally stuck. Next time, Gorilla Glue.
- A craft iron helps a lot, but you can use the tip of a normal iron.
Making a Last
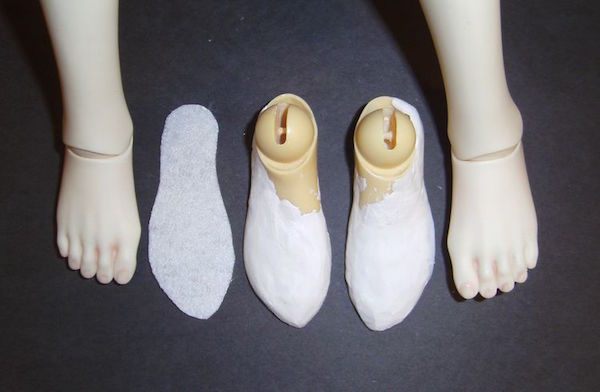
You can use your doll’s bare feet for simple slippers or make ‘lasts’ for fancier shoes, which allow you to shape the toe end into points or squares, or whatever. The clay will also come in handy for making the little points fill out in shaping the toes. If you have a pair of dress pumps (high heels) you can pinch the toes and see how there is extra shaping stiffening in them. You can either make the last from scratch if you are an adept modeler, or just cheat and pad up the spare feet to match your doll’s feet. I padded.
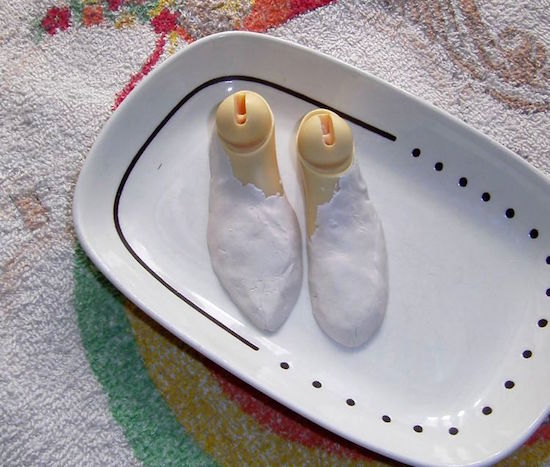
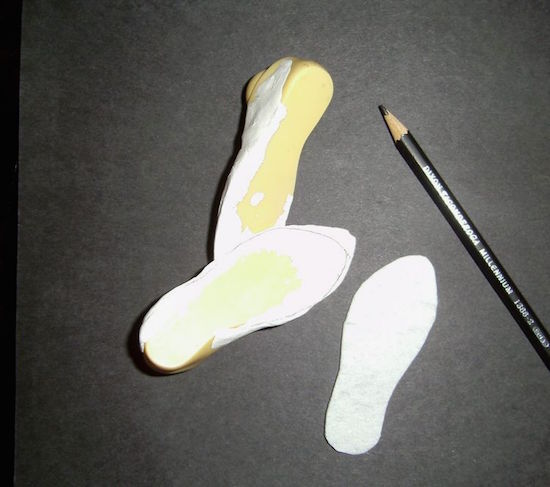
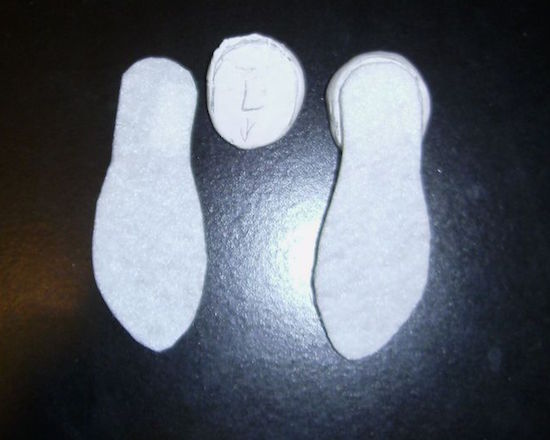
Remember that the shape of a shoe is not the shape of your real foot. Take a good long look at the way your own shoes fit your feet, and the shape of the shoe you want to make for your doll. It really helps to trace and shape the sole for your shoe now. You can then use this to help shape the last, as well as pattern the sole and insole pieces. The lasts themselves don’t have to be perfect and pretty, they just have to be good enough to make both shoes in a pair look the same and fit. I used LaDoll clay because I can just crack it and knock it off later, wash them, and have my doll’s feet back after I have the pattern. I cleaned the pair you see up a little when they were fully dry and made the points more even by holding the bottom of the lasts together. In the photo below, you can see how I used the sole to retrace and shape the clay of the last.
Now, tape your lasts up and make your pattern. You will have to adjust your pattern, and different fabric will need fitting differently. So this is just your basic pattern, fit your uppers each time along the way.
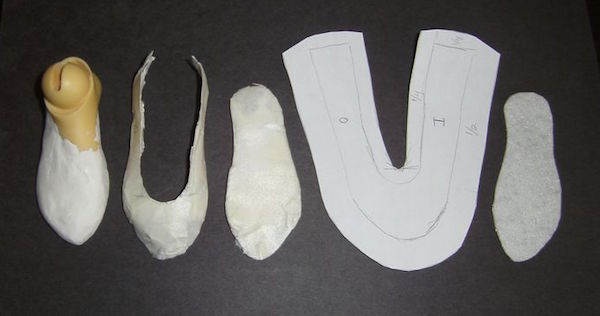
Once you have adjusted your pattern, and decided on your shoe shape; flat, platform, or heel type, etc., time to make your shoes.
You will need to cut out for each shoe:
• Fashion fabric for the outside upper.
• Lining fabric for the inside upper.
• A cardboard sole to glue to.
• A craft foam lining is good not just for realism, but for keeping your doll’s feet stable when she/he wears them.
• Two or three layers of interfacing trimmed down.
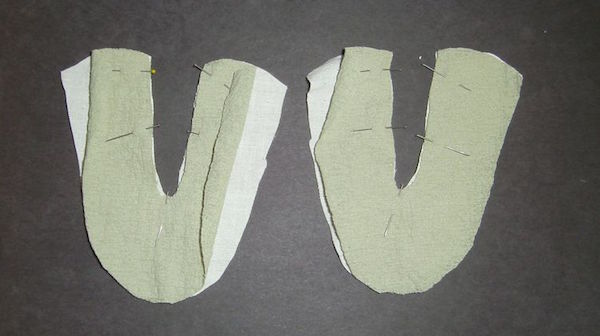
Make certain the straight lines of the weave of the fabrics (the grain line) are lined up with the middle front of the upper. The bias at the sides will help you stretch and curve the fabric down around the toes for a smooth fit.
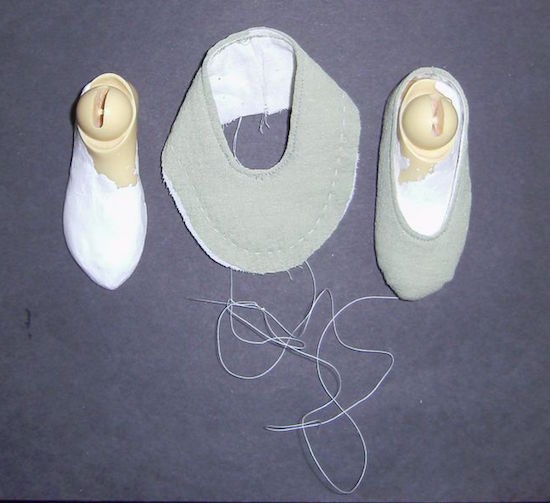
Pin your lining to your fashion fabric and sew in a tight stitch along the inside curve. Then clip and turn it for a good pressing. You want that front curve perfectly even and symmetrical on your pair of shoes. Clip the curve almost to the stitching and turn and press. Check the fit on your lasts, good and tight, and make any adjustments to the back seam. Remember to mark the changes on your pattern.
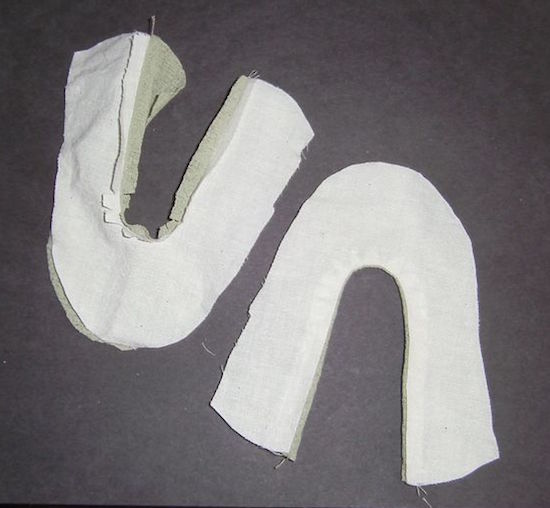

Place and iron on the interfacing on the inside of the lining so that the edges of the interfacing will help you mark the stitch lines for gathering under the sole later. About 1/4 inch short of the edge. Iron it to the upper and lining if you have thin interfacing.
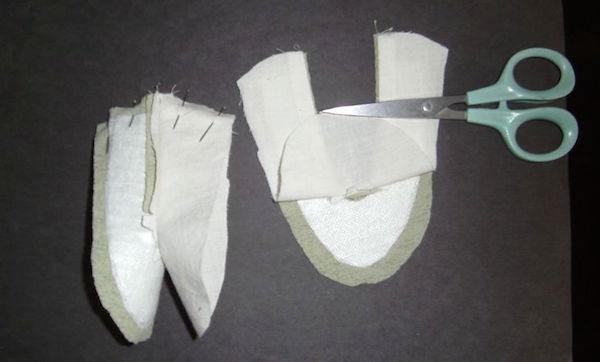
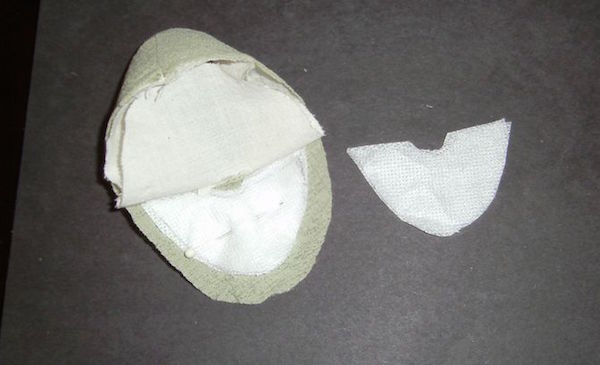
Now open up your uppers and sew the back seam. Cut a rectangle of interfacing or two and iron them over the pressed open seams to create that stiff shape support on the back of the heels of real shoes.
Press, trim off excess along the back seam, and check the fit again. Press the top opening and carefully top stitch around it. Now you have almost all of your upper.
Place your cardboard soles on the last, and secure your uppers to the lasts with a few pieces of tape. Make sure they looks symmetrical when side by side.
Using a doubled thread or quilting cotton, which is usually thicker thread, hand stitch around the bottom seam, just under the edge of the foot, from heel around to heel again. Pull the strings tight, so that the fabric wraps around the edge of the foot, but make sure your upper stays exactly where you put it. This step can accidentally change the shape of the shoe if that upper isn’t secure.
Using the tip of your needle, distribute the gathers as evenly as possible around the shoe bottom. Now flatten them with the iron. Let the fabric cool off and the gathers set. If the gathers pop up again, flatten them again. They need to be as flat as possible.
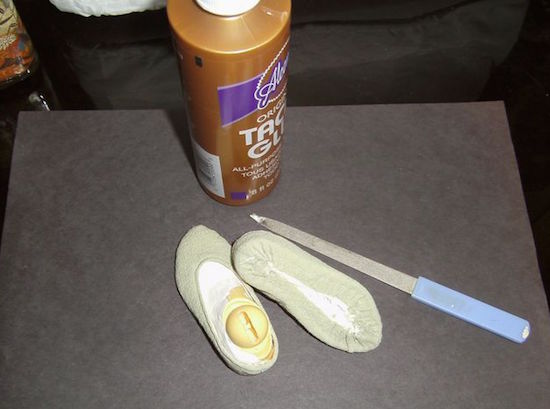
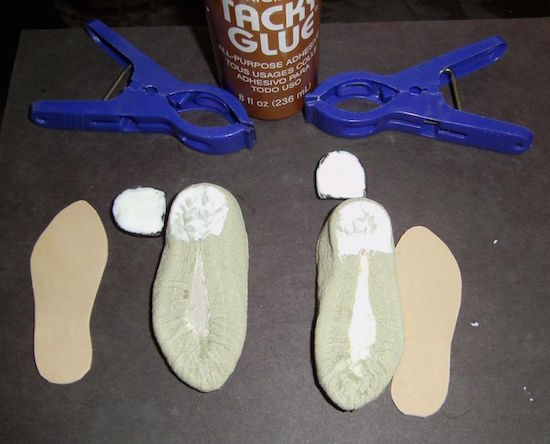
Take a tooth pick or fingernail file, dip up a small amount of glue and slide it under the fabric to glue it to the insole. Avoid a lot of excess glue in this case. Wipe off any glue that escapes, and let it air dry a bit until tacky – about 15 minutes. Add more glue sparingly if you need it. Then put a piece of scrap plastic over the sole, and clamp it with a clothes pin to dry. You should be able to easily peel off the plastic when the glue is dry without damaging your work.
Now while those dry, make your heels. You can carve them from craft balsa by stacking, gluing and carving them from thin layers, or just make them from polymer or air dry clay and then sand them into shape. You can also make platforms. Check them with the uppers on the doll’s feet to make sure the doll can stand up in them. Adjust by shaping the top of the heel or platforms.
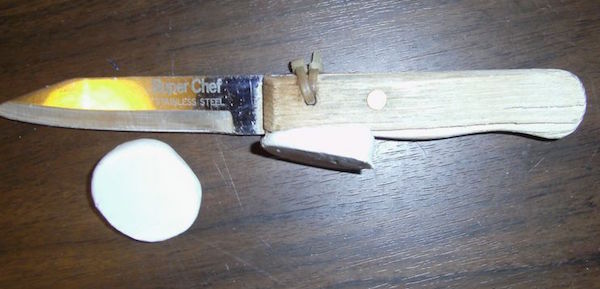
I rolled out some clay and cut the slant shape with my trusty old kitchen fruit knife, then let it dry and re-carved until they were the same. This photo shoes the slant of the basic heel shape. Trace the sole on the clay to make sure you get the heels as closely the same as possible and match the right/left slant of the shoe upper. And make sure you mark your left and right heels.
After a few carvings, I had the slant and thickness that worked best with my doll’s flat feet. Make sure you carve the back of the heel into a slant to match the angle of your doll’s tilted foot. If you are using a paper-mâché clay like LaDoll, let them dry for two whole days before painting and sealing.
This is the back view of one heel and side view of the other, after the first coat of paint. You can cover a heel with matching fabric, but I went with black for my pair. I then sealed them with clear gloss.
Covering with fabric is a tricky job, but if you dip the fabric in water thinned glue and shape it tightly over the heel from back to under the foot front, and leave a tiny fold somewhere unobtrusive, it can be done. Check out a pair of real shoes and you’ll see how it is done. You can also paint the heel to match your uppers or whatever color you want.
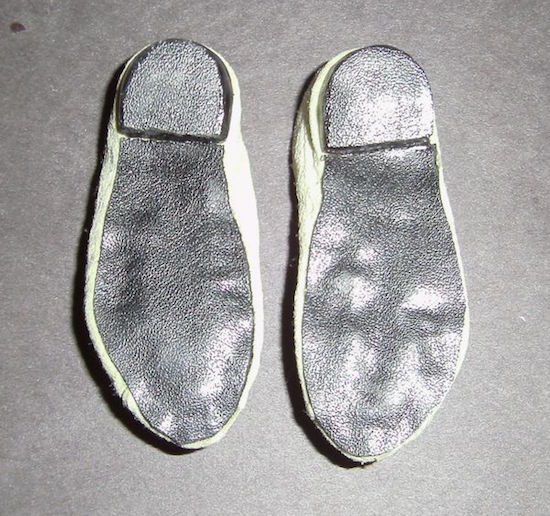
After your uppers and heels are dry, applying the sole can be done a number of ways. You will want your sole to overlap the shoe edges a little so that you can trim it closely later when the glue is dry.
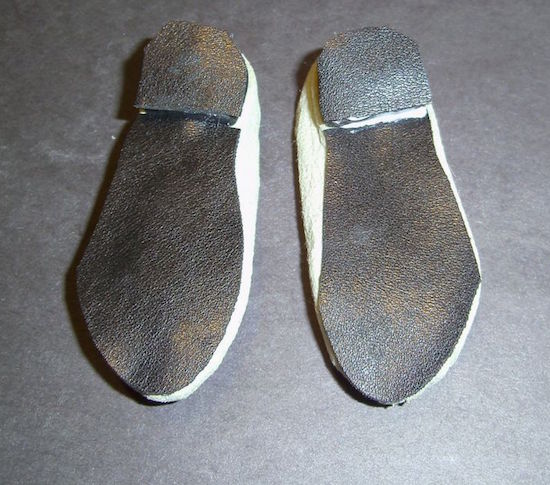
Once your glue is dry, take small, sharp scissors and carefully trim off the excess sole to just under the edge of your foot line. Note my heels are slightly twisted, which made the doll they are for stand up more securely.
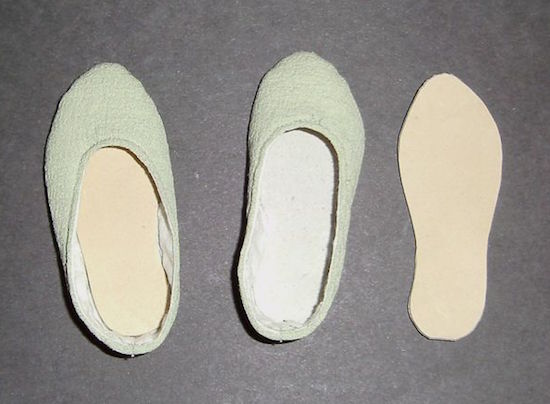
Insoles keep the doll’s foot from sliding around in the shoes, and I put pads in the toes to fill out the shape of the points and make her foot stay put. If you have rounded toe shoes, this might not be so necessary.
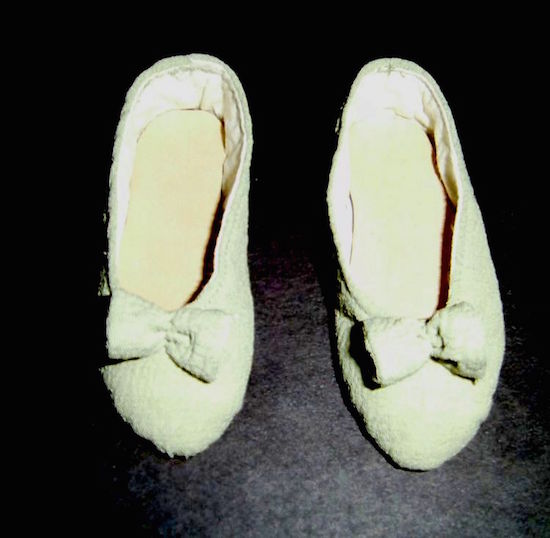
Now you can put little beads or bows on your shoe. If you want to make a really fancy shoe, piece work the fabric, or embroidery, or beading before cutting out the upper. It makes it so much easier to do tiny detailed work. Sew any ribbon ties or straps into the seam when you sew the upper edge and back seams together. This is also a good fix for first try shoes that come out a little loose. Simply adjust your pattern and try again! ^_^ You can also make sandals by gluing ribbon between a fabric wrapped insole and outer sole.
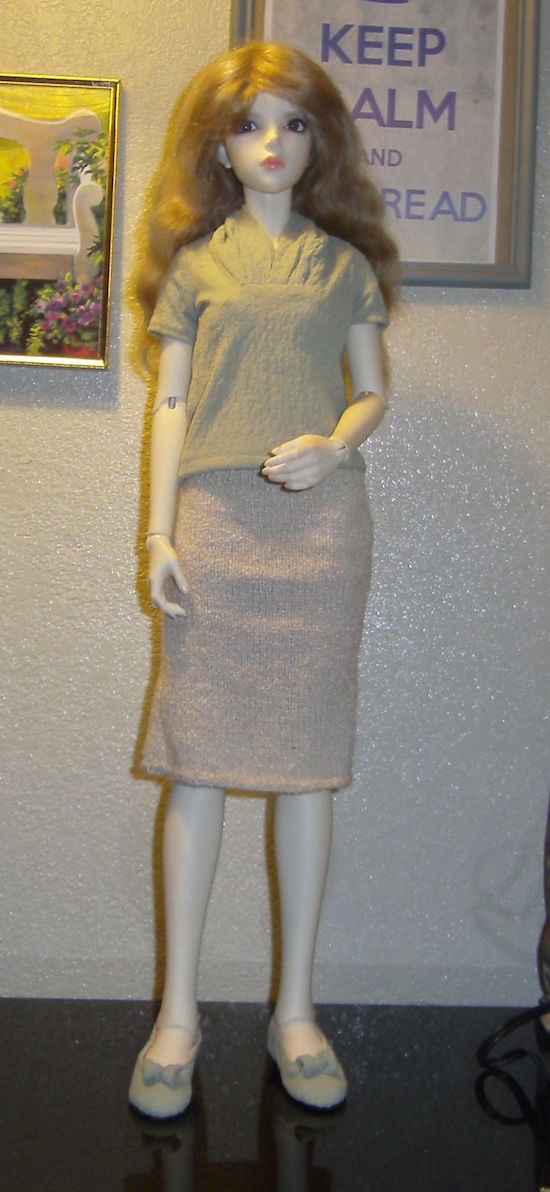
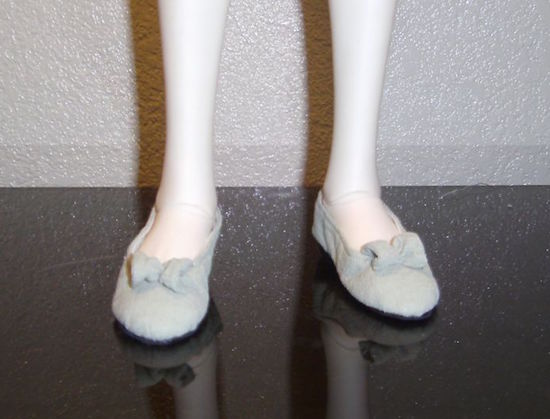
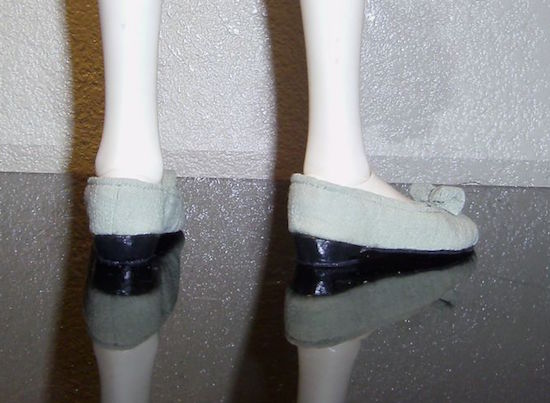
And the finished product. A little loose, but serviceable. She stands securely in them, and I know the next pair will be even better. One thing I think I will try is iron in applique glue sheeting for a stiffer upper. Experiment with the process until you find the best way to do things for you!
Boot are a little bit different in shape to make but when you are comfortable with the whole process, it gets easier every time. You can also get molding kits to make your own sole/heel/platform combinations, or mold your own lasts.