
By Rajendora @ Sewing Box Designs
Knitting is nowhere near as complicated as it looks. It is two main stitches, the knit and purl, which mirror each other on the other side of the knitted fabric. Everything else is just using these two stitches in combinations. Granted they can make you think you’ll tie your fingers in knots trying, but start with large needles and yarn, practice, then work your way down. Some of the better video tutorials actually use huge, neon yarn, so that should give you a happy starting place.
To make a knit garment pattern, designers start with a paper pattern and fit a mock-up of the garment. Then they measure and translate those measures into the knitting pattern chart, which at first glance to a novice knitter can be horrifying. Don’t freak out. It’s like math, once you know the formula, the equation, it’s easy to solve or change around to get what you want.
So first, take a basic sloper pattern you know fits your doll.
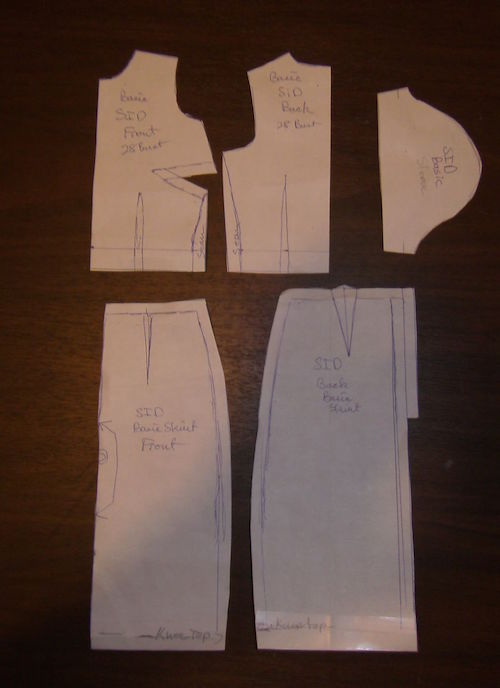
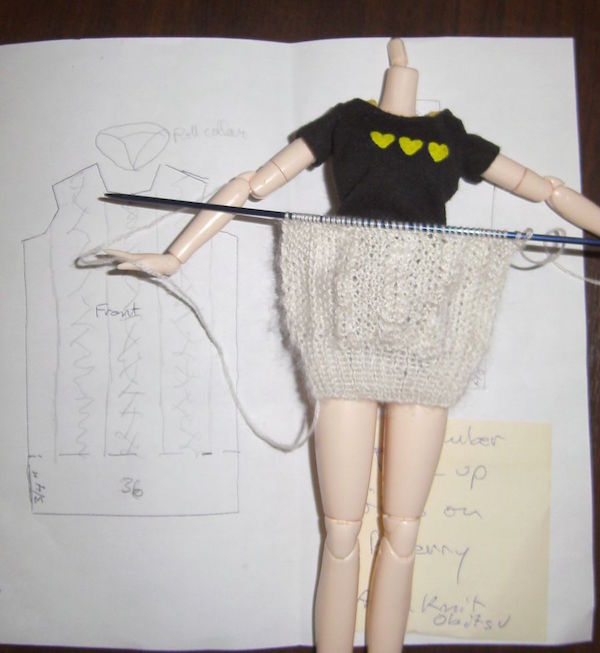
Now, think of a t-shirt. It’s just a tube with some more tubs for sleeves; but how narrow or wide that tube is controls the fit to your body. All you need to do to make a t-shirt fit tighter is curve in the side seams, no need for darts or other things. So first, turn your paper pattern into a series of flattened tubes, rectangles, and triangles. Later you can manipulate the fit by decreasing or increasing stitches, or changing the surface pattern stitch where you please. I’m starting with the skirt, it’s a simple tube with a little shaping for the doll’s hips and waist.
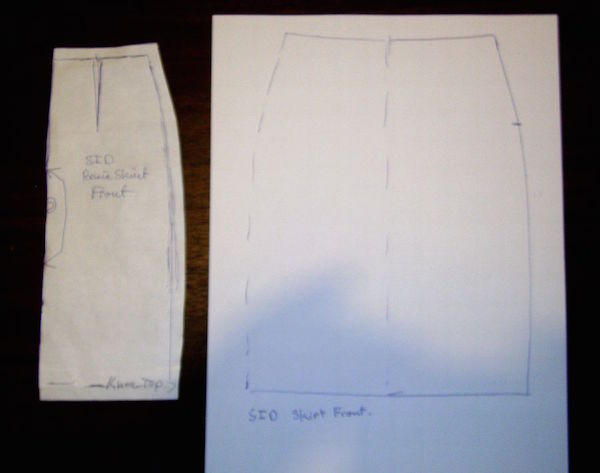
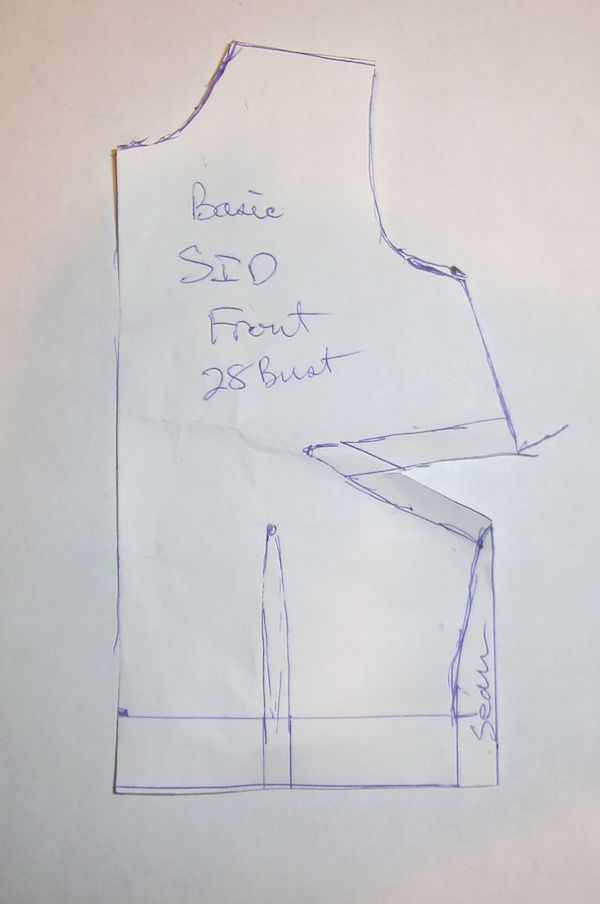
Trace around your pattern on a sheet of paper, leaving enough room around the tracing to make notes and changes as you go.
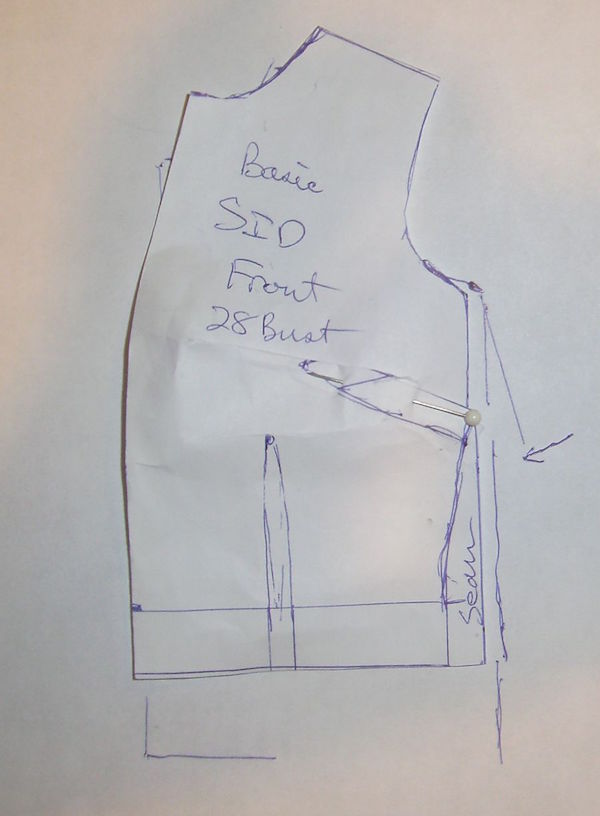
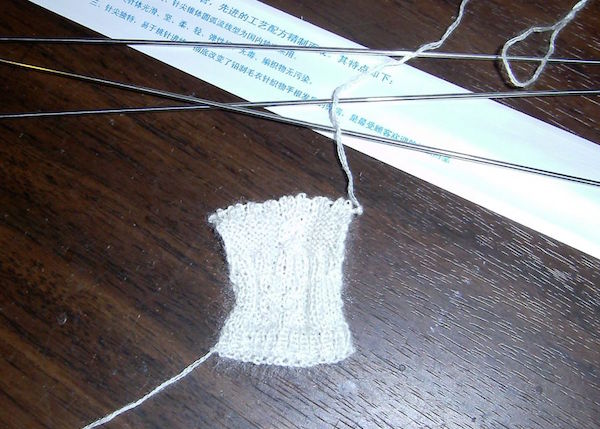
Since this is knit and will stretch, you will need to remove darts and loosen up the garment in some places. Here you can see how I took the darts off the top of the skirt at the side waist. I knit up from the bottom and decreased the side seams to fit into the waist, leaving enough stretch to go over her hips while fitting at her waist.
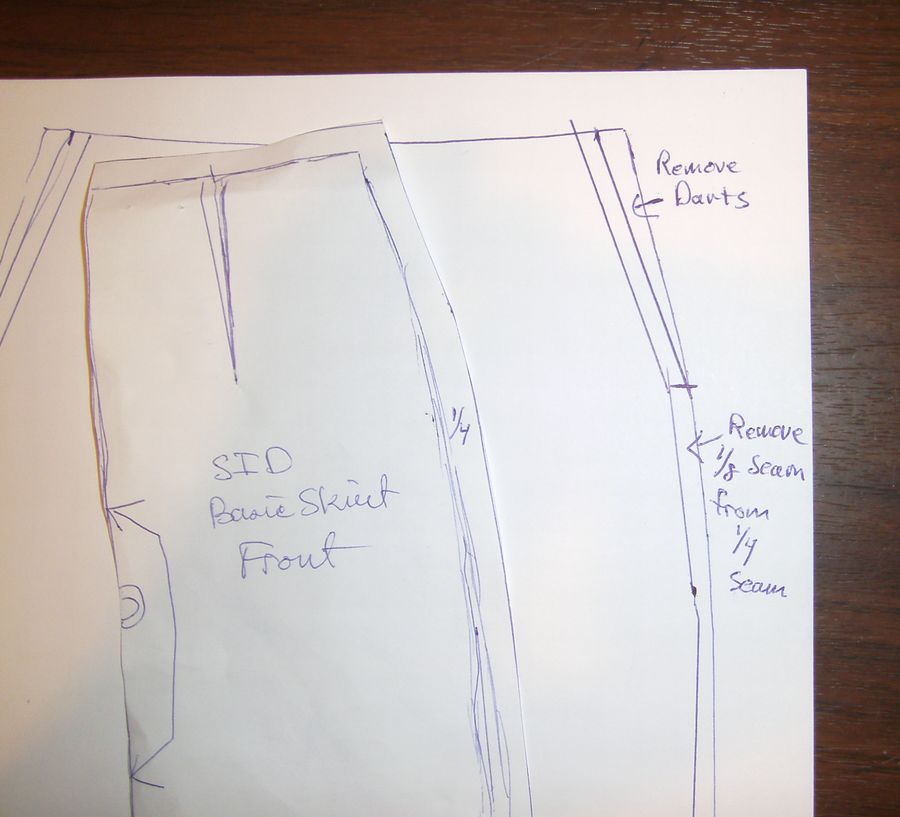
Because knitting has less seam allowances, after you have remade your pattern, and most doll patterns have at least a 1/4 inch allowance, reduce that to 1/8 of an inch. You’ll either be sewing your pieces together by hand or using a machine, and that little less will eliminate bulk in the seam you can’t just trim off with scissors. If you are extra cautious, make the pattern up in t-shirt fabric to check it before knitting.
Measure your resulting pattern and mark it. As you can see I’ve marked where the stitches have to be decreased to form the shape and put in “?” for how many stitches.
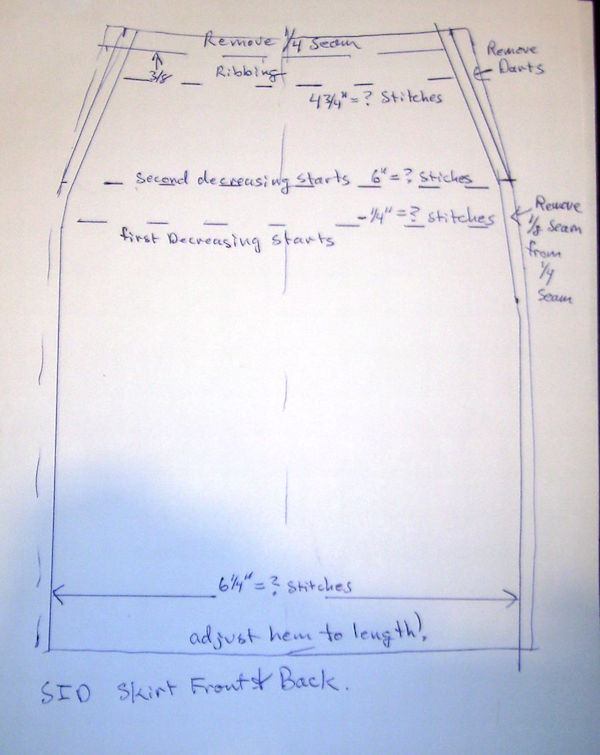
I’ve put a ribbed band on the waist rather than elastic. Ribbing makes a closer fit, while keeping the same amount of stitches, and is normally done on a need at least two sizes thinner. Ribbing is normally used at the neck line, cuffs and waist. I’ve also used the same pattern for the front and back, but if your doll is extra curvy, you might work the back in two panels and fit in a zipper. You can also buy very fine stretch elastic for making sock tops to knit into your ribbing, which is a trick of knitting along with the yarn under the loops.
Follow the same procedure for making a jacket pattern. Trace your pattern, then close up your bust darts and remove the waist darts, going for that tube shape. You can then add an extra overlap in the front for buttons or snaps after you adjust your pattern to your own design.
Trace your pattern.
To remove the dart, pivot the pattern on the dart point and retrace moving the line of the dart in to the side.
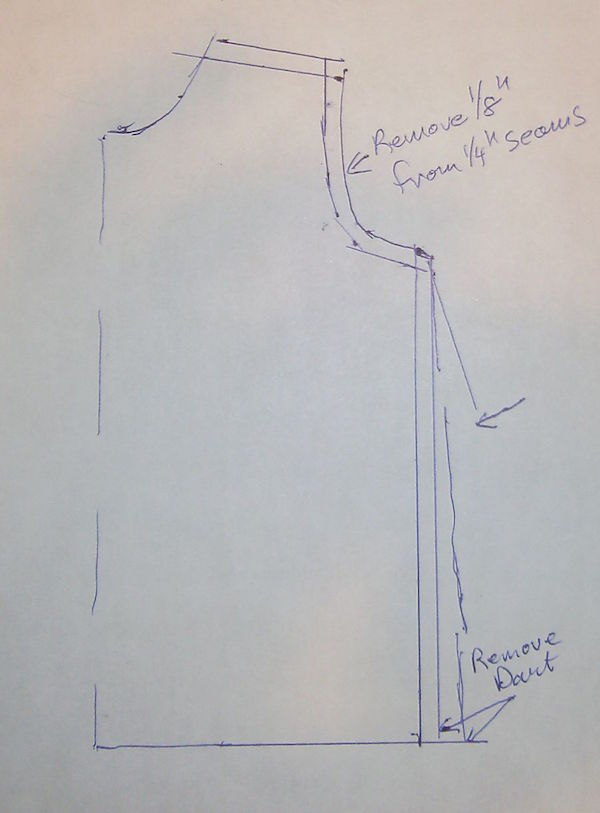
Now straighten up your side seam and remove any waist darts as you please. I’m going for a loosely fitted jacket here.
The back of the jacket is simplified now, just copy the new front, adjust the neck and shoulders according to your original fitted pattern, and remove 1/8 of the 1/4 seams from everything. Collars can be added on by knitting to the pieces you already have and sewing them on to the garment. No need to go all crazy and pick up stitches and knit from there, unless you’re super good at knitting already it looks neater to sew them on. I always get holes in odd places by over stretched stitches when I pick up stitches.
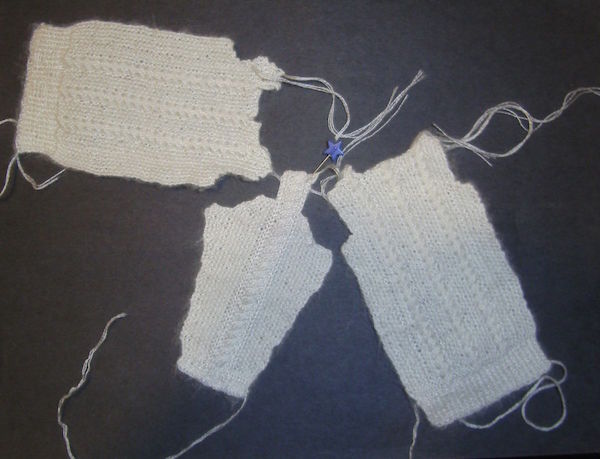
Sleeves are easy, just trace your pattern, trim your seams and knit from the cuff up, increasing as you go, then decreasing to make the top curve.

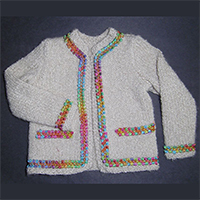
Chose your yarn according to what looks real on your doll. This is super fine on an Obitsu, and the needles were too big, they made it look too sheer, but the yarn looks bulky on the Obitsu!
Mostly sock, baby or super fine. Baby yarn looks bulky, so take it from there. We’ve all seen the atrociously bulky fashion doll clothing made from baby yarn. It’s just not fine enough, but baby yarn on an SD or larger will look perfect for Aran (Irish) sweaters! Needle sizes for BJDs should start at USA 1 and go down from there. I’ve actually used a pair of dulled end hat pins for one project, and it’s an old trick for doll house (1/12 scale) knitting. To dull the ends, just patiently gently sand them on a knife honing block until you get a rounded smooth point. If you want to use them on your hats still, this doesn’t do much to change that, but it does prevent scraping your scalp as badly.
Note: Yarn is sold by the ounce, usually in 50 oz skeins (grams are also marked on the lable). Once you have figured out how many ounces you used in a project make a note of that on your pattern, this will help you with future projects. If you have a ball of random yarn you purchased, or have left over from making socks, this is a good way to tell if you have enough yarn to finish the doll project. Start with the back piece first, usually the largest. If you can get a food or postal scale, (or go down to the post office and just use the postage machine) weigh your skein, then your finished piece, and deduct that from what’s left. This will give you a good idea of whether you have enough to finish all the pieces by estimating.
Once you have chosen your yarn, knit a test swatch at least 2 by 2 inches. Then count how many stitches and rows it takes to make a square inch. This is your gage. Tag your sample with the yarn type and needle size, and save it for later projects. Also keep the label with it when you are done with the yarn ball.
Now you have your numbers to plug into your measured pattern. If you need to go smaller or larger with needle size to achieve your surface effect, knit more sample swatches on different size needles, and be sure to label them for your records. The most important part is to get the correct scale visually for you doll.
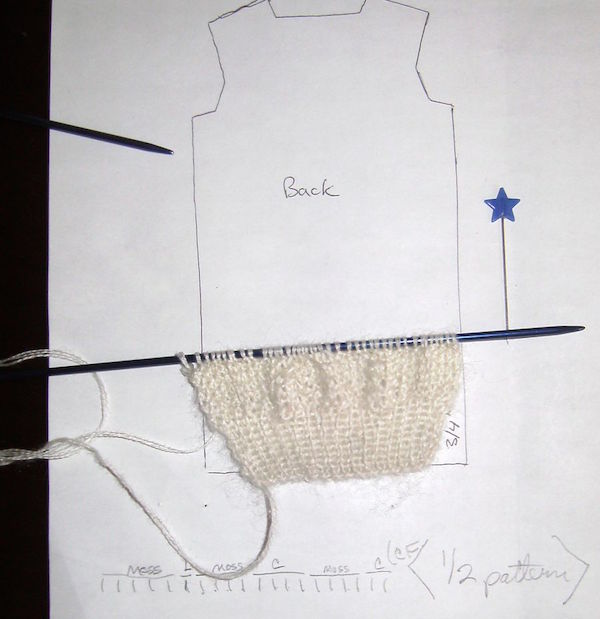
Say your swatch works out one inch equals 10 rows by 7 stitches. Mark you paper pattern off in a grid, and go from there. Increases and decreases are best kept at the edges of the pattern piece; remember your ‘tube’. You don’t need to write out every last stitch in a complicated chart. Simply mark your increases (see above figure X) where you need them and measure against the paper as you knit. If your pattern is 6 inches across (including the seam allowance) you know you need 6 X 7=42 stitches across. Minus the inch amount when you get to a decrease tells you how many stitches you need to knit off to make the curves and at what point. Split them in half, evenly on each side.
Once you have your knitting pattern sorted, it’s time to knit!
An edging is important. Ribbing is a way to control a horizontal edge. It’s as simple as knit 1, perl 1, repeat all the way across. There are variations in ribbing, 2k/2p or 1k/2p or so forth.
Vertical edges are kept flat-ish by using a knit 1 on both the right and wrong side edge of every row. This creates a beaded effect on the edge that makes it easy to keep track of row count as well. It also looks nice to sew on a zipper if you knit a hoodie, or a zipper in a skirt, so remove the seam allowance and replace your fly edge on skirts and pants with this edge stitch when you knit.
A very blurry close up of the knit back and front edge on an inside seam.

Be prepared to unravel and change your pattern note a few times even when you knit from a tested pattern. That’s just the way it goes. It’s something I’ve learned to accept with a sigh and some judicious swearing. No pattern is perfect! It’s okay to make changes and corrections. Some surface design pattern stitches, like cables and fancy lace work, can mean adding or decreasing a stitch or two to make up for contraction or relax caused by the surface pattern. I add one stitch for every cable to my horizontal measurements because the twist part of the cable eats stretch. So prepare a swatch test with your chosen surface pattern as well and adjust your notes and figures accordingly.
The first time you knit pieces of your garment, pay close attention to fitting. Some people knit with even tension all the time, some knit tighter when they are a bit stressed, or loser when sleepy. Even tension is ‘a thing’, and you want to knit like a machine.
Simple increasing is done by knitting twice in on stitch. Decreasing is done by either knitting two stitches together, or yarn over and slipping off a stitch. To do this, you knit or perl a stitch, then slide that stitch over onto the next stitch. A lot of insanely pretty lace patterns are made by increasing and yarn over stitches, as well as simple button holes.
As you knit, lay your project flat on your paper pattern. Keep track of your shaping changes as you go. I use a multi-color ink pen to make changes.
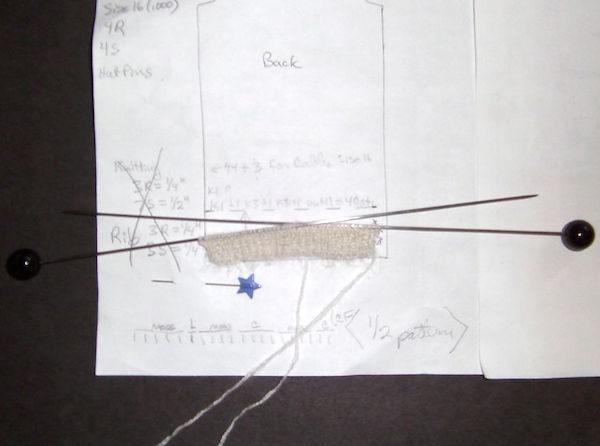
Another good reason to start with the back first is that when you start the decrease shaping for the arm hole, you are also making that part of the pattern for your at least half of your sleeve cap shaping.
Most of the time if you drop a stitch you can hook it back up again with a crochet hook, but some times, it’s saner to just unravel and start again. If you’re careful and your yarn is the ‘sticky’ kind, you can unravel and pick up the loops right where you want to. Silkier stuff can be a losing battle. The trick is to find your mistake, grab some masking tape and put it across your knitting a row above where you want to unravel to, then pick up your stitches one at a time as you unravel that last row from the tape. Don’t leave the masking tape on your project more than a few hours though, it will leave sticky, but a lot less than any other kind.
Once you have your pieces, you can sew them together by hand using a strand of yarn and a tapestry needle with the joining stitches recommended by knitting books or tutorials online, or ‘cheat’ and sew them up by machine. You’re simply using the knit pieces as ‘stretch fabric’, no big deal. Use more pins than normal, and long ones that will hold the things in place better. I use 1 1/2 inch quilting pins. Sew a very fine 1/8 inch seam and loosen your tension so that you don’t have the fabric bunch up or stretch out on the machine. It’s hell to unpick sewing machine stitching in hand knitting so go carefully.
After you have your seams, lightly steam press them with a low setting. Make your garments up the same as you would a regular fabric. Once your garment is together, you can press again according to the setting for your yarn content. Remember wool and natural fibers can shrink or felt up, so go gently! (Note if you want a felted look jacket or something, just go the easy route and make it from polar fleece! It’s much softer and natural looking on a doll rather than still real felt.)
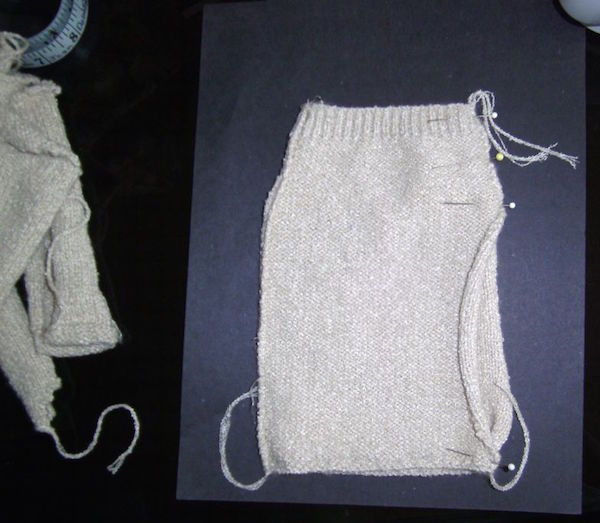
In this photo you can see one side of the skirt is sewn and the other is being pinned to sew. When you are done sewing up, thread your yarn tails into a tapestry needle and work them into the seam then trim them off at least an inch long so they don’t unravel. I leave them out to help me gently pull the fabric under the sewing machine foot. It really helps to sew from the middle of the seam out rather than straight down one side. This keeps the fabric lined up and stops a lot of the twisted seams that you often see in cheap t-shirts (the ones that never quite fold up right for packing or putting in a drawer a la Marie Kondo organizing.)
And here is the jacket’s seams.

Some Notes on Trim.
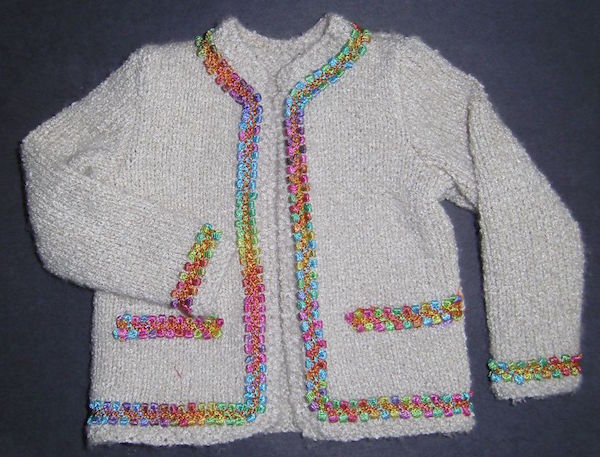
The prettiest trims and braids can be a pain in the butt. Measure your amount, then wrap tape around it and cut in the middle of the tape. Leave the tape on until the trim is sewn into the seam and then cut off the excess. Try to finish all your trims in a seam because folding it under and top stitching is also a pain. You have been warned.
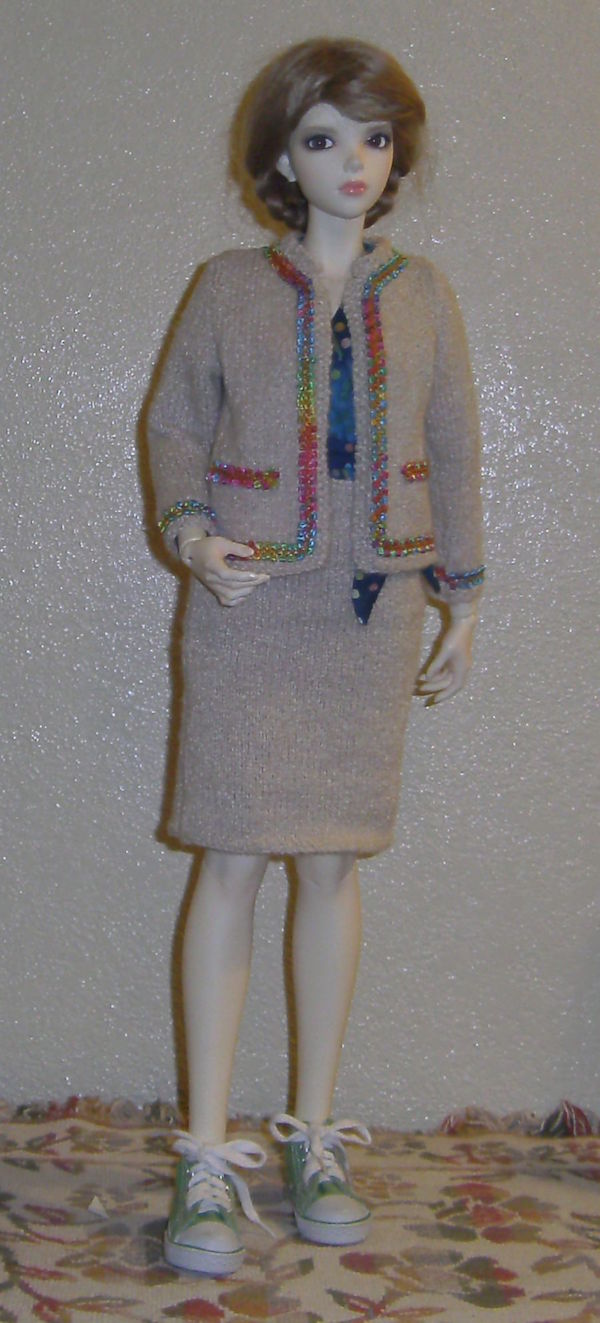
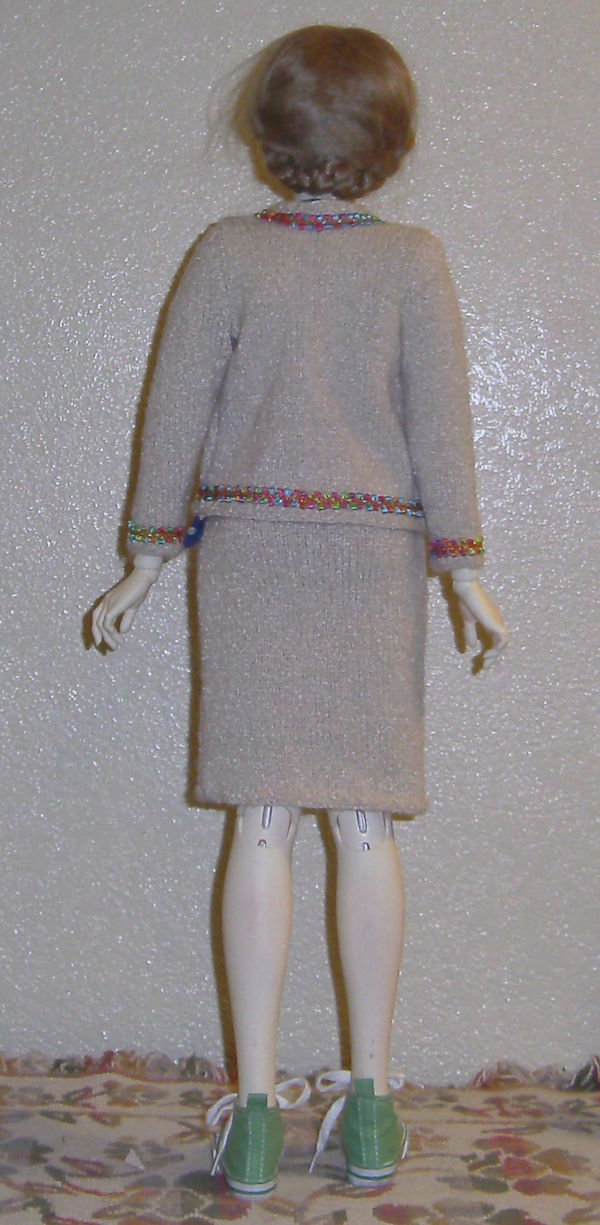
This is knit, so when you put trim on, as shown in the suit photos, you need to remember to allow for stretch over heads, hands, etc. Measure your trim to go over the area, like around a spread hand, then pin it to your sleeve ends by stretching them to match the trim.
Supplies Links:
BEST YARNS EVAH! https://www.etsy.com/shop/NaRoKnit
(They were on break when I got the url but will be back.) You can buy one skein at a time (not ten and twelve packs) and shipping is sane. The ‘Ice’ super fine I got for the Aran sweater is so soft and fluffy! If you want to knit amaguri kittens for your dolls, use this stuff!
Size 1 USA sock needles: Hobby Lobby
Size .OOO super fine needles:https://www.etsy.com/shop/SweetCraftyTools
The hat pins were my mother’s.
YouTube links:
How to Knit: The Basics
Very Stretchy cast on (the best method)
Stitch A Day: Tutorials on Different Stitches, including Cables and crochetting.