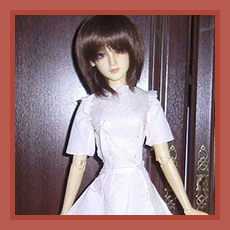
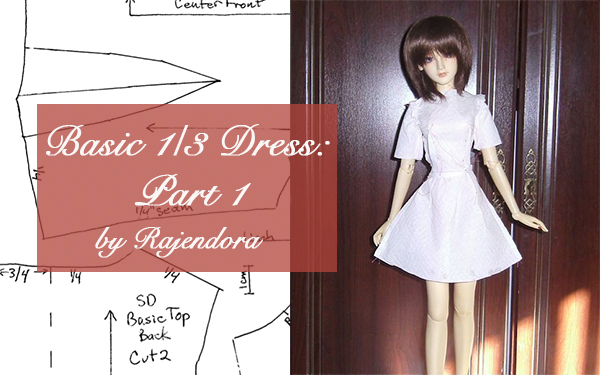
Basic Dress Pattern Tutorial
By Rajendora @ Sewing Box Designs
First of all, one size does not fit all, and how well we of the BJD community know that. With the constant re-sizing of bodies, it’s difficult to keep track of what fits who.
Most ‘people’ pattern companies, like Vogue, Burda and Simplicity have a basic fitting pattern in their dress section, which instructs you how to fit the pattern to your body, and then use that pattern to alter all their other patterns in your size range.
This tutorial comes with a basic pattern for you to do the same for your SD size doll. Tthen you can use the same pattern to adjust the doll clothing patterns you buy online, or make them yourself from your basic pattern. We’re going to first work on fitting the dress pattern to your doll. Then in the next tutorial, I’ll show you how to use the base pattern to change design elements.
Download the pattern PDF and print as instructed. The pattern fits on an 8.5 by 11 inch sheet or ‘letter’ size paper. Print it without margins or resizing. There are check marks in inch and centimeter so you can make sure your print is the correct size. Remember, this will not fit your doll perfectly. (Unless you have a first generation Dragon Doll SD girl, that is.)
To make your test fitting dress, you’ll need pins, cellophane tape, a roll of good paper towels, and a needle and thread, or a sewing machine that can do long, easily pulled out stitches. Set your machine for the longest stitch you have on your machine, then loosen up the tension just a bit more than you normally use, and it’s basting. Remember, you’ll be taking the test dress apart again to make your final pattern.
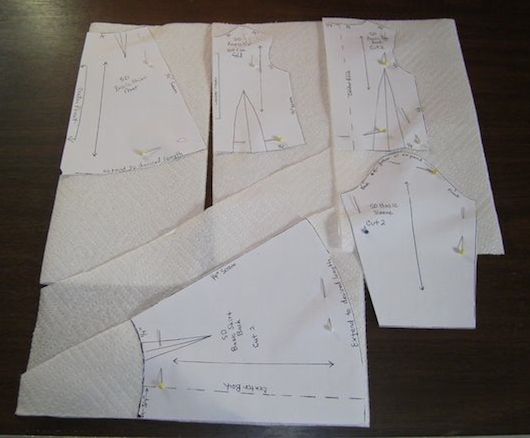
Cut out the pattern pieces from paper toweling. If the perforation lines are in the way, just tape them up. Cut the front bodice (one on the center fold), a back bodice (two) a sleeve piece (two ) a front skirt piece (one on the center fold), and the back skirt piece (two). Please remember to line up all the pieces with the grain lines even on a paper towel: don’t break a good sewing habit now. If the paper has a direction, it will help you line up things better when you are altering the pattern. I shortened the sleeve to fit it on the paper towel.
I’m using my Dragon Doll girl Jiji and my Soom body (older body), which are both SD, as examples of how to change things you’ll run into. (My Only Doll girl head’s face up is on hold until I have time to paint her up.)
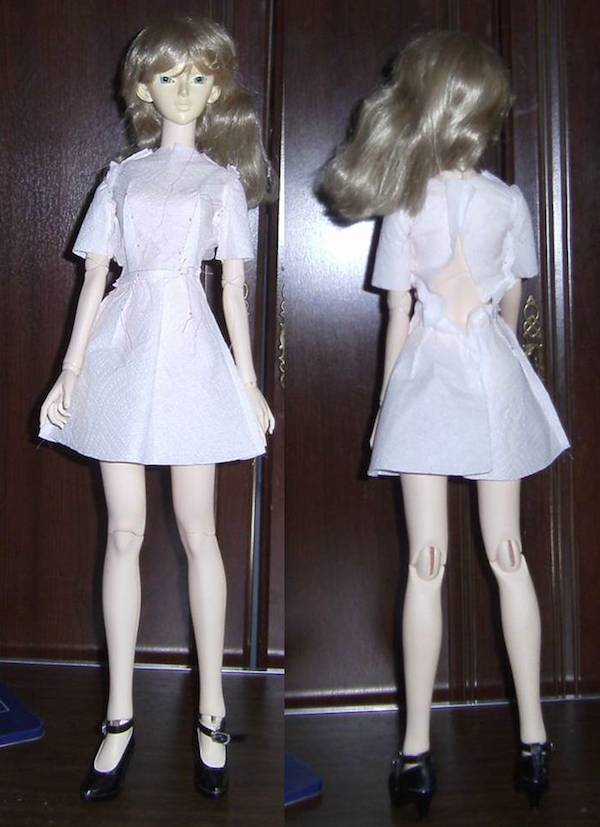
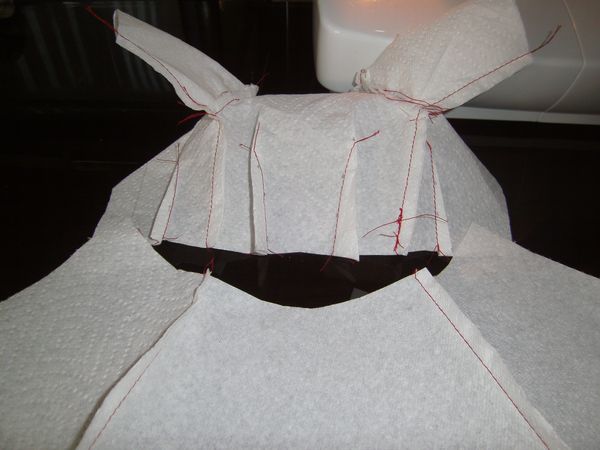
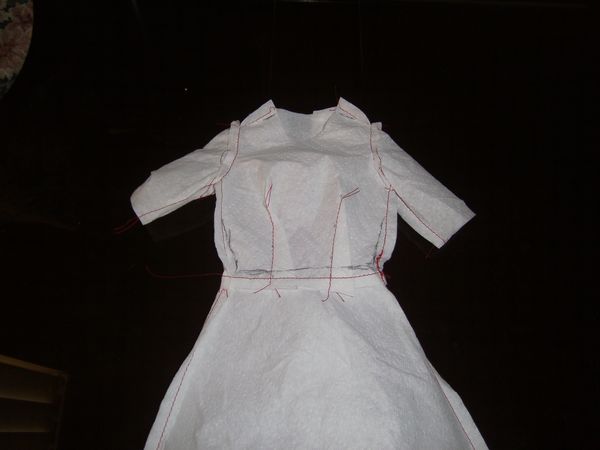
Using a long stitch setting or hand sewing, assemble the dress: sew in the darts, the shoulder seams, sleeves, side seams, and put the darts in the skirt and sew it on to the top. Mark your 3/4 inch overlap so you can pin the dress on the doll with your seam allowance true.
Now put the dress on the doll, and have a good serious look at things. I make use of notations for this part: –><–, tighten it up, <– —> spread it out, and by how much. If it’s too big, just use tape. You’ll be using your paper towel to trace around for the new version of the pattern when you are done. Tape on more paper towel strips to close up gaps or lengthen things.
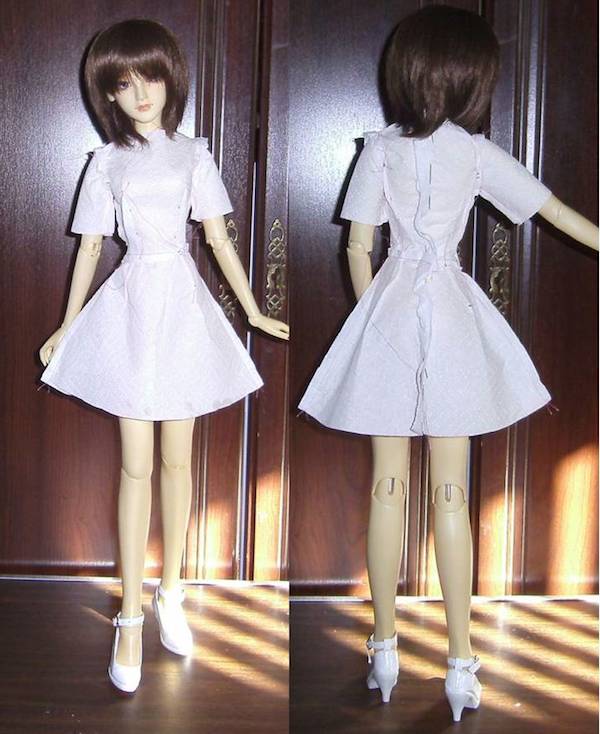
So, the paper dress fits the Dragon Doll SD Girl accurately. However, on the Soom SD Girl, we run into the fitting issues.
While at first the front looks okay, the bust darts are too high. The neck line is too high and the paper tore. The side seams don’t quite line up with the side of the doll, everything is pulled toward the front. Now the back doesn’t close up at the waist. But–the back neck, sleeves and shoulders fit fine. Make sure you really look over the dress and what it needs changing to make it fit. Carefully mark the paper and make notes of the measurement differences. Remember to distribute the difference in measures evenly to the four quarters of the body. If the back needs 2cm more to close it, so you want to add 1 cm to each side of the pattern.
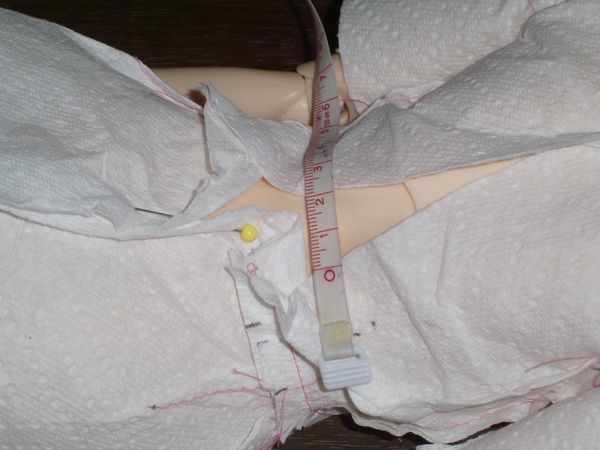
Redraw the neckline in front and mark the darts to just below the nipple line or bust point of the doll. You can tape any tears to maintain the integrity of your test pattern.
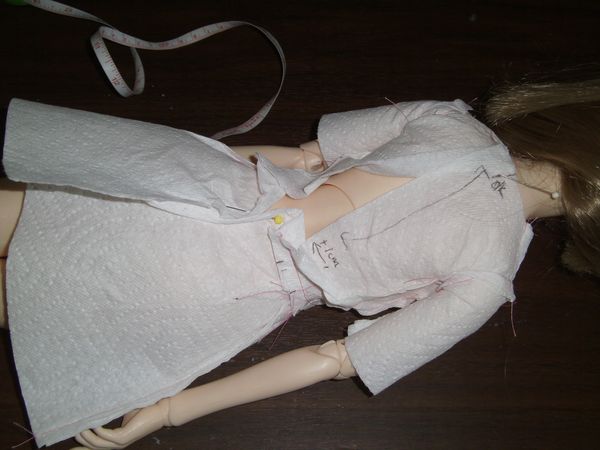
Now take the dress apart and correct the pattern. Refitting the pattern for a larger doll, you can release darts and make them narrower, add to the side seams, and lengthen or shorten the waist. Start from the easy, obvious stuff to the tricky bits in your adjustments and you’ll do just fine.
In this case, I’m redistributing the missing 1 cm on each side to the dart and the side seam to being the side seam back in line with the center side of the doll. I’m also adding just a tiny bit to the back armpit for that bust correction. It’s better to have more than less, and you can always sew the dress tighter and correct it afterward if you have a pattern that’s a little loose.
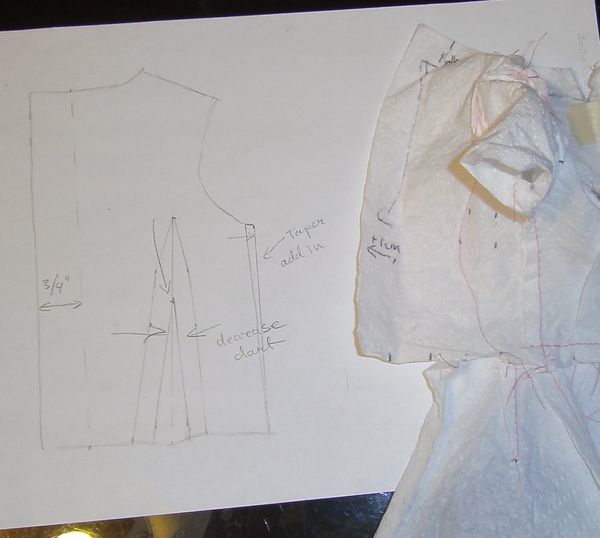
For the front, I’ve redrawn the neck line and lowering the darts to a more complimentary bust. Because I added a little to the back, I’m adding a little to the front as well. As stated, this can be fitted out if it is too lose.
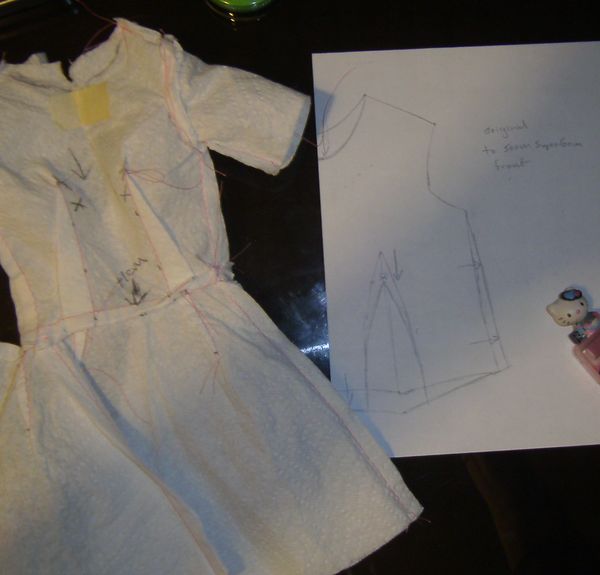
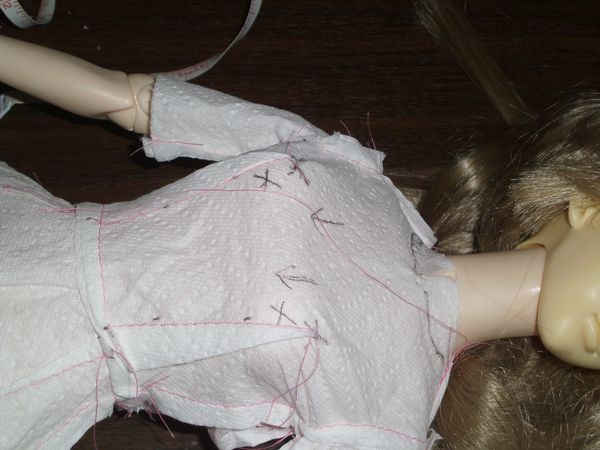
Because the waist line has been let out, the skirt darts are no longer needed quite so much. I found that a slight gathering corrected any excess. Since this is a basic pattern, and can be used to draw other patterns later, you can add darts wherever you like later. Re-cut your test paper towel pieces and assemble again.
Test fit again. (My girl’s wig was in the way ,so now you can see my failed attempt at dying her to fit a caramel color body. Yep, proof positive heat turns some resins green.) Check to make sure the quarters of the pattern line up with the quarters of the doll’s body; front left and right, back left and right, all divided as if by a line down the center of the doll’s body. You’ll see some dress making mannequins marked into sections, remember them and use them as your guide.
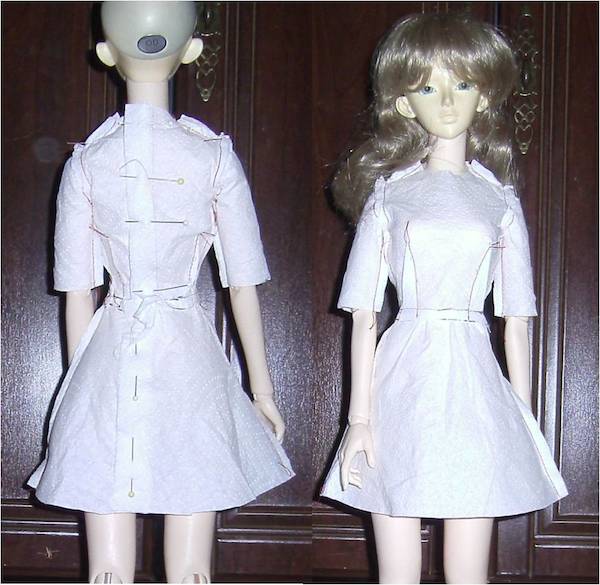
Mark any more small changes you notice and correct them once more.
Take the second sample pattern dress apart, and draw your basic pattern out and make an archive copy of it.Scan it into PDF form, that way you’ll have it safe somewhere. A basic pattern can be called a fitting shell or a ‘sloper’, but it’s a paper 2 dimensional representation of your doll that can be used to compare bought patterns to or make more patterns of your own.
Next I’ll be showing you how to use this very basic pattern to make design changes and expand your pattern collection! It’s like math, the formulas look scary, but once you have the basics remembered, it’s very simple. You can also use these methods to alter any pattern to dolls or to people, the formulas are the same, except unfortunately they don’t make paper towels people size. You’ll have to use inexpensive muslin.
I just found this excellent reference for fitting patterns!
http://www.clothingpatterns101.com
The site also shows how to do some of the things I’ll be discussing in the next tutorial, so read up! (and have your design ideas ready!)
1 thought on “Basic 1/3 Dress: Part 1”