By Rajendora @ Sewing Box Designs
This is the final portion of the multi-part project on Victorian underpinnings by Sewing Box Designs. The other parts include the chemise, the petticoat, the bloomers, and the corset.
Last in the Victorian underpinnings series is the cage crinoline. The basic construction can be adapted in shape for anything from an Elizabethan ‘cartwheel’ to an Edwardian bustle (basically half a crinoline) once you get the idea of it. Because of plans I have, this is a late Victorian, pre-Edwardian, rather steam-punk shape, but you can make yours any shape you want.
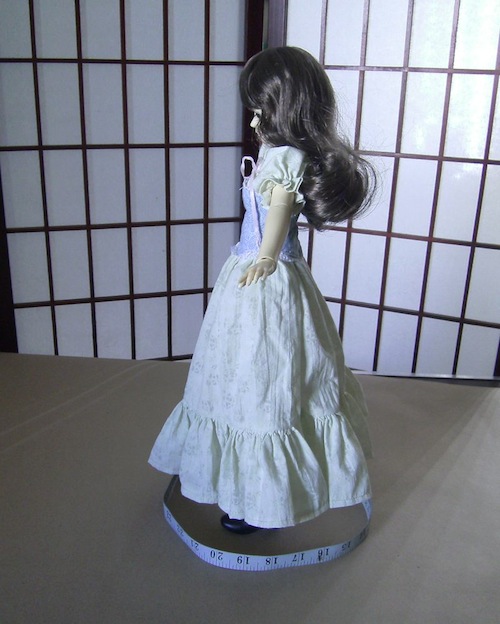
For the initial patterning, mark an X and stand your doll in the middle of a piece of paper big enough to draw the bottom circle of what you want the skirt hem to be. Using a tape measure, carefully measure around this circle. Now measure your doll from her waist to the outer line of your circle. If she’s going to be wearing the crinoline over clothing, make sure you have her measure her dressed. Next measure your doll’s widest hip area.
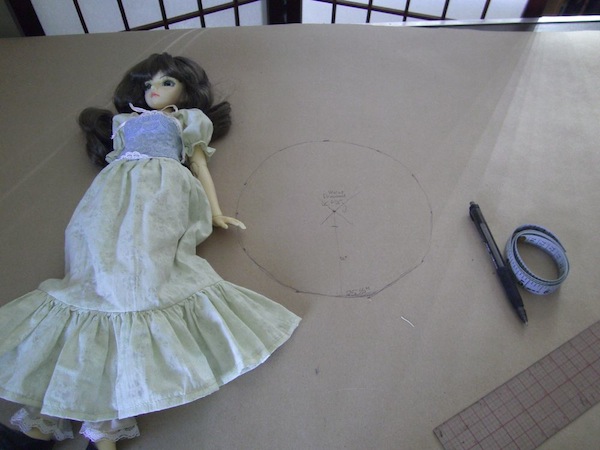
Don’t do anything with that circle on paper just yet. You’ll need it again.
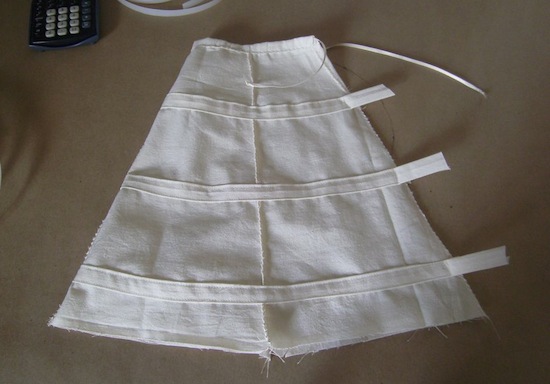
Taking 1/4 of the hip and 1/4 of the hem circumference, and the length from waist to floor, draw your pattern piece. Add a 1/2 inch seam allowance to the sides, and 1/2 inch to the top for the waist elastic or ribbon tie strings casing. Cut four pattern pieces at the least. If you have a big girl you might want to break it up into 6 or 8 pieces with smaller pattern pieces. The skirt panels shape the hoops, which shape the crinoline, so you can make changes in the basic pattern piece to change the shape of the final crinoline. (Check out the crinolines in a bridal store and see how they are shaped.)

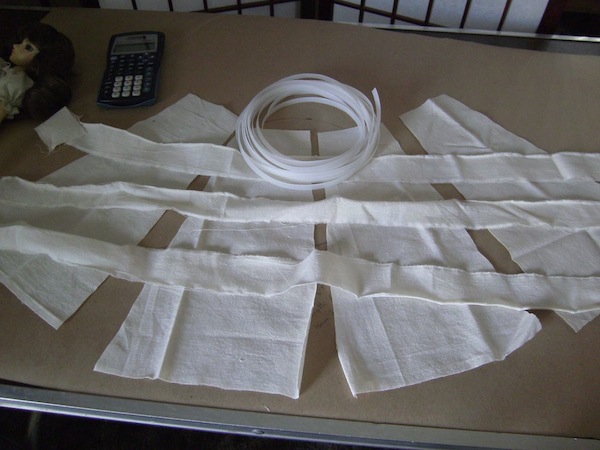
Now take your circle and draw at least 3 concentric circles for an MSD (or 4 for an SD girl) that will make the hoop parts. Remember for a Victorian era crinoline, the bottom hoop goes only to the ankle at the lowest, and the top hoop starts just at the crotch line. Once you have your circles drawn, measure around them and you will know how much feather boning to cut (or make) and the total added with the extra for overlapping (about an inch each) will be the tape casing for the boning. I make my own boning, because it’s inexpensive for so very little in a package now, and I can control the width to scale. 2 liter soda bottles are too thin now, so use something like an opaque juice or milk jug. Cut the strips in a continuous circle around the jug and then cut your width and length as needed. If it’s a bit square still after cutting, just lightly steam it flat with an iron between some toweling after you cut the strips. Be careful not to steam your fingers.

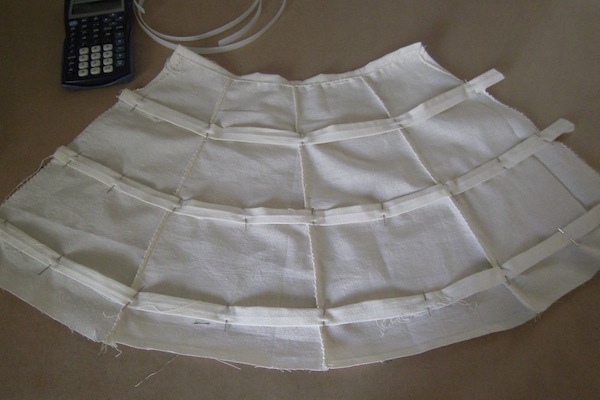
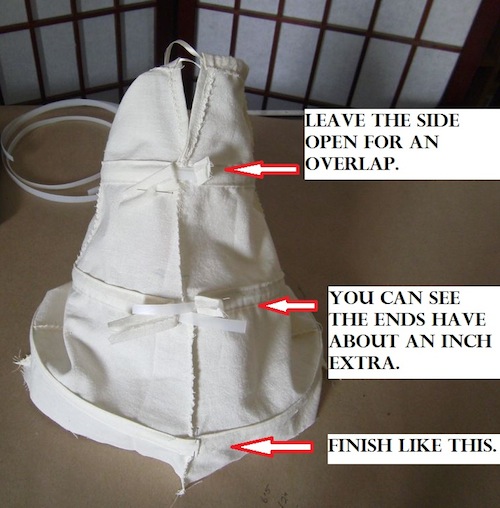
Sew your ‘skirt’ pieces together with a very tight stitch, leaving one seam open. Press the seams in the direction you’ll be inserting the boning, so you don’t snag up on them. Finish the casing for an elastic or leave an opening for tie strings, but the crinoline should easily go up over her hips and gather at her waist. Now mark your circles on the ‘skirt’ part, so you can pin on and sew your hoops in with the tape you make or the store bought tape that comes on it, stopping a half inch or so from that last seam. Slide the boning ends in to the casing sides after threading them through. Remember to use at least a 1 inch overlap on the boning so that the hoop is strong and doesn’t fold there.
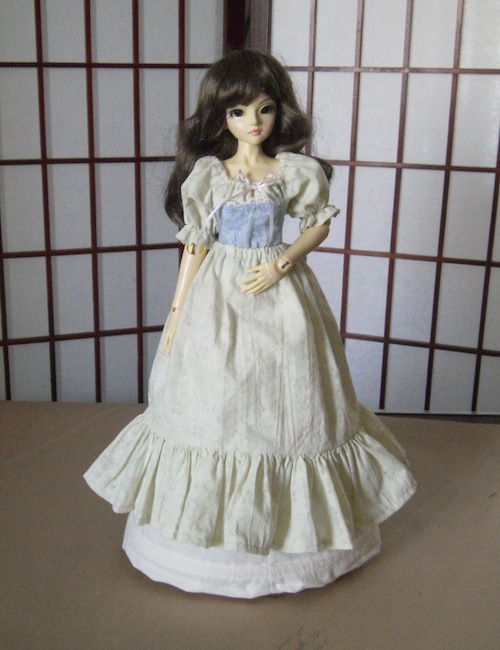
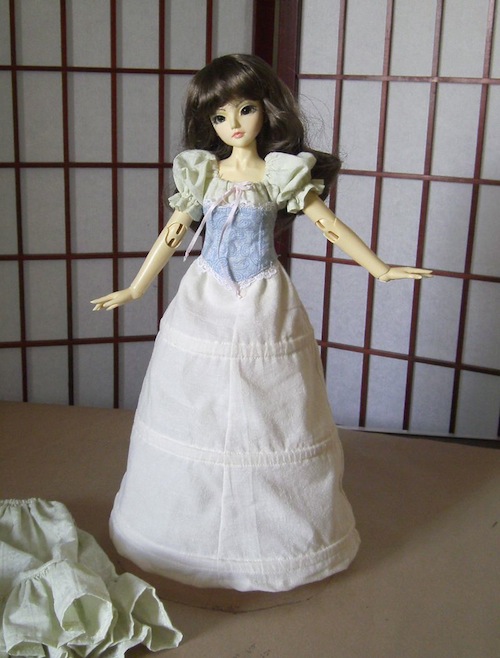
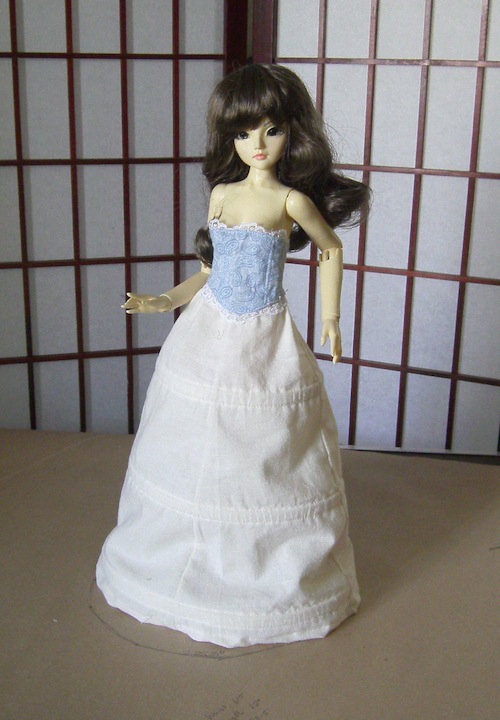
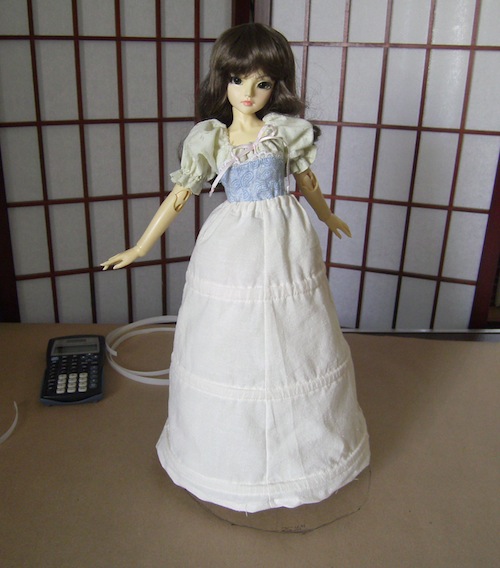
As you can see the seams and shaping can be quite supportive. If your dress is made of heavy fabric, or trimmed in a lot of ruffles, you can add more circles of boning, but the extra seams work nicely. One thing to keep in mind is that you make your crinoline before you make your measure and make your final dress or skirt pattern. I’m using the petticoat from a previous lesson to show that length disappears over a crinoline. Also, her under clothing adds a LOT of bulk so a dress patterned to the doll’s size would be too tight over all this.
Try the crinoline on the doll and make sure that the hoops all line up for a smooth transition. You can push them together and ruffled the slip part a little more to get rid of any weirdness in the crinoline’s final silhouette. Once you have your hoops in the right place, you can use a tapestry needle and a pair of pliers (it’s hard!) to sew right trough both ends of each hoop to secure it.
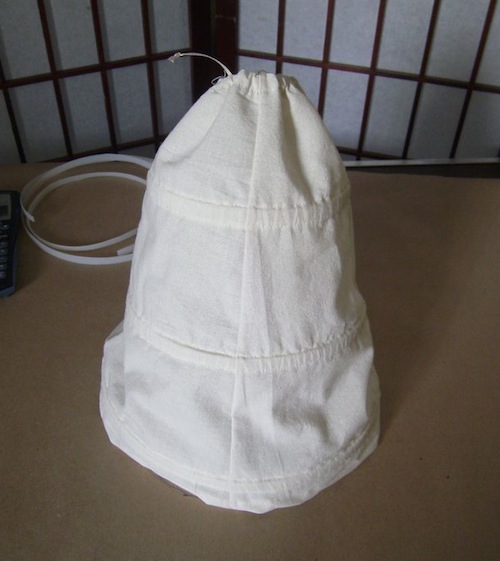
Now you can check the hem and hem your crinoline. You can finish it off with lace trim or how every you would like.
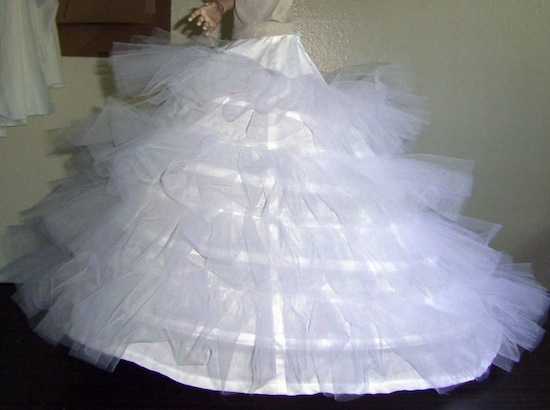
Here is an example of a larger doll’s crinoline I’ve made using this technique. The final shape is a bell with more in the back than the front.
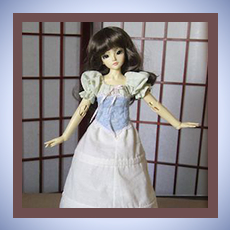
Finished crinoline: