By Rajendora @ Sewing Box Designs
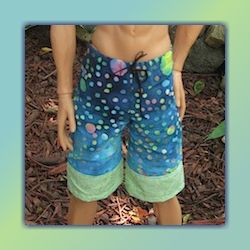
Rajendora designed these shorts to pair with her Beach Shirt.
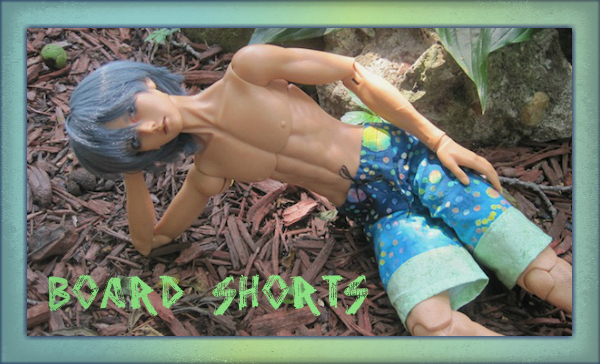
In California, and I’m sure everywhere there are waves, surfers wear everything from cut-off jeans to wet suits, but the iconic ‘surfer baggies’ are always somewhere on the beach. This is a good pattern for beginners because it can be the stepping stone for other pants, and it’s very simple. If you know what a fat quarter is (18 by 22 piece for quilters), it takes less than one for these shorts for the 1/3 and 70 cm doll sizes. I used cotton batik and pieced the bottom contrasting color. You can add in contrast with side stripes, diagonals or anywhere, then cut out your pattern for a quick cheat.
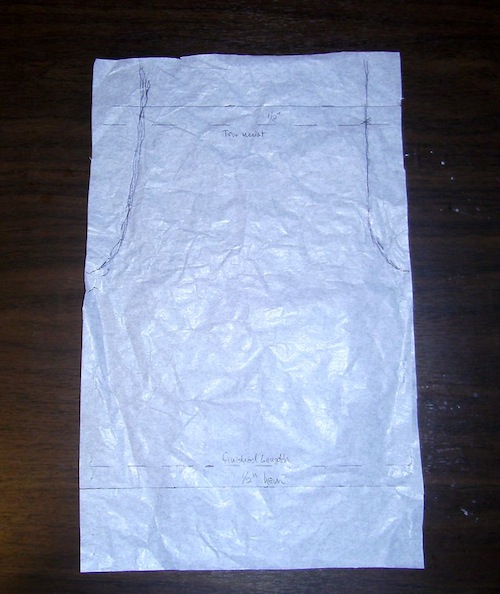
To make the pattern, first you measure around your doll’s hips at the widest part and add at least 2 inches to that measure. Then measure from waist to knee and add two more inches. Cut out a rectangle with those measurements, and fold it in half length wise. Pin it together half way down the side with a 1/4 inch ‘seam’ to make a fabric tube. Don’t tape, you’ll be flattening the paper after.
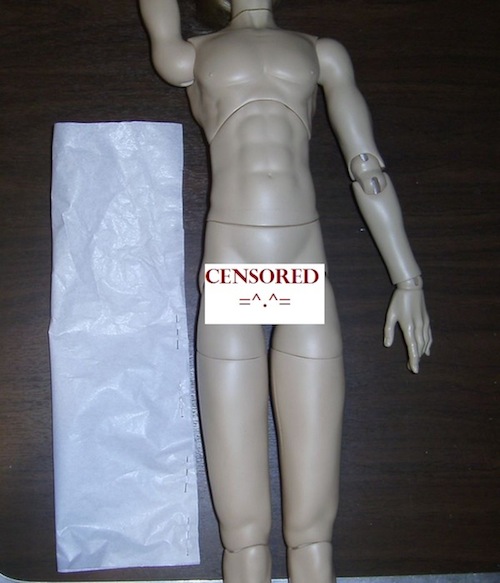
Then slide the pattern tube onto your doll as snugly up his legs as you can. (Some of these guys can be rather a much in the junk, so just remember, surfer baggies don’t fit tight.) Pinch a half inch on the side at the widest part of his hips, and leave room at the waist. Remember these are pull-ons, you don’t want them skin tight for this part.
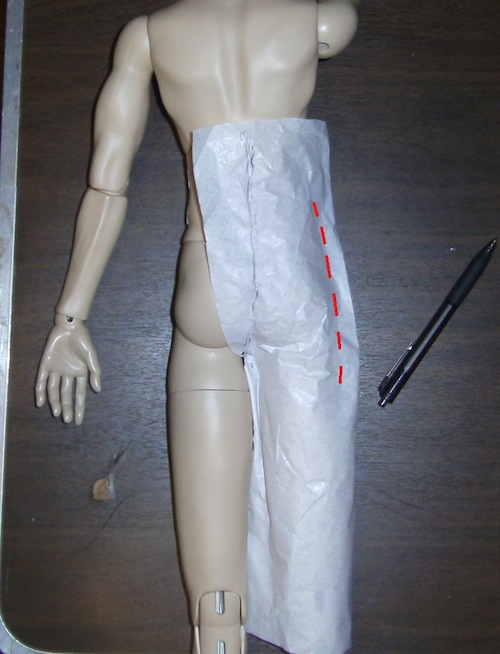
Draw a line up the front and back of the pattern piece as shown. You can see it’s a bit longer than the finished pattern needs to be, but that’s because you lose a bit over the curves of the bottom and front, and you want to be prepared with that extra. (Especially for EID and Soom, they have a lot in the booty.) Then slide the pattern paper down off your doll’s leg and flatten it out. Add a half inch seam allowance top and bottom, and 1/4 for the front and back of the crotch seam. Now trim off the excess paper and your pattern is ready to use.
Cut out your two leg pieces pieces, and pin and sew the front and back crotch seams. I used my zig-zag stitch to over lock the raw edges. (And you can see the edges of the add-on contrast have been done the same way.)
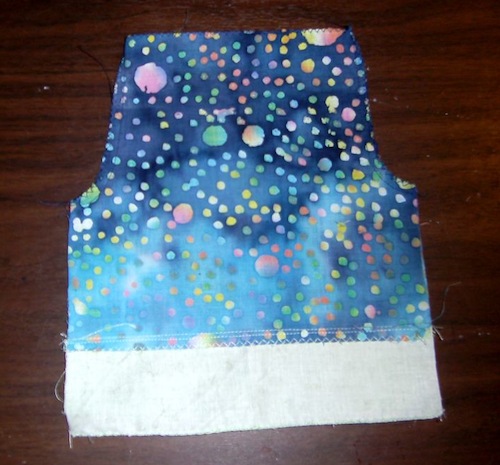
Spread, match up the crotch seam, and pin and sew your inseam. If this is for a smaller doll, hem the shorts 1/2 inch first, then sew the inseams. The sample was for a big doll, so I hemmed them after sewing the inseam.
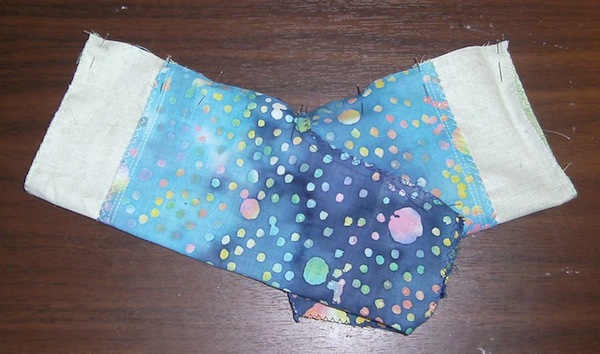
You’ll want at least a 1/2 inch top seams for the tie string casing. At this point if you want to use elastic, leave an opening, but I was going for authentic board shorts with a tie string so I sewed it close.
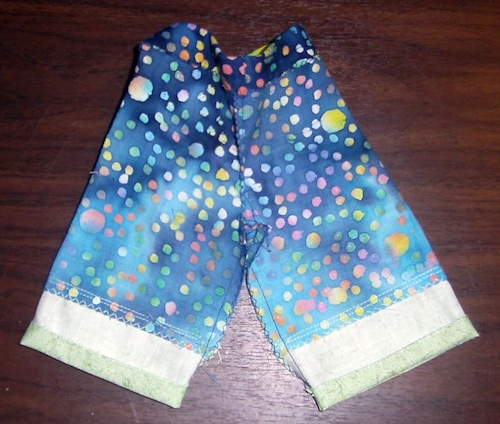
I use a tapestry needle and some cord to make the tie string. I doubled it because it’s a bit thin. You can also use 1/8 ribbon.
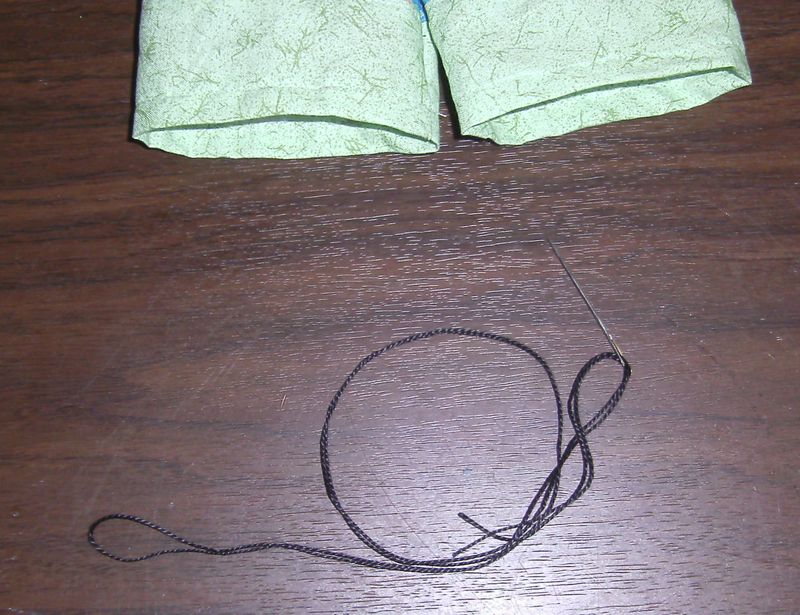
Tie a knot on one end of the string and carefully work your needle into the fabric casing about 1/8 of an inch from the front seam. Tapestry needles have a sort of dull point, so you can us it like a bodkin to work the string around, but it will poke through a few times until you get the hang of it.
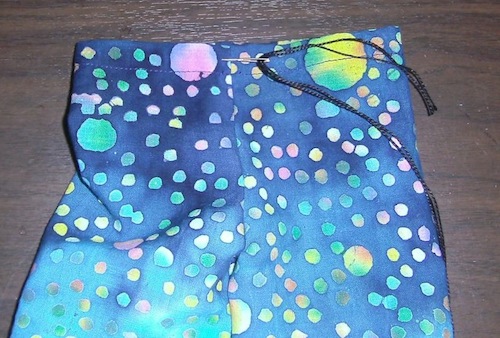
When you’ve got your string all the way around, poke it through and pull your string out 1/8 from the seam on the other side of the front. Put the shorts on your doll and tie a bow, and see how much string you need. Cut and tie another knot. Usually two knots on top of each other is enough to secure the string.
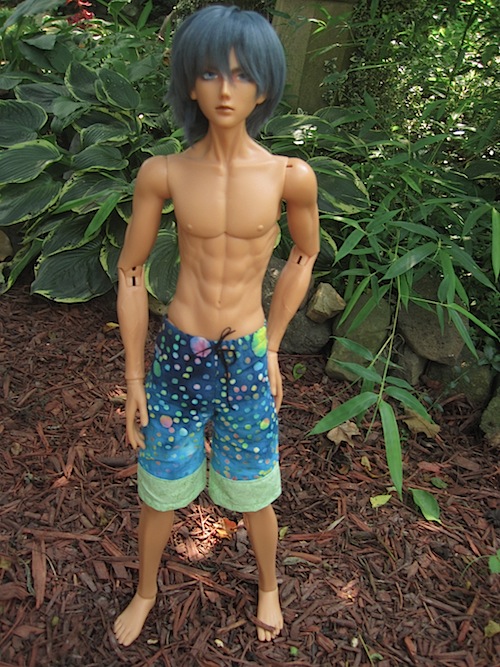
And you’re done! ^_^ Later on, you can split the pattern down the side for side seams and put a waist band on and so forth. You can make simple pants, cargo shorts, or tighten the pattern and use knit fabric, experiment with what you know and have fun!
3 thoughts on “Surfer Shorts Tutorial”