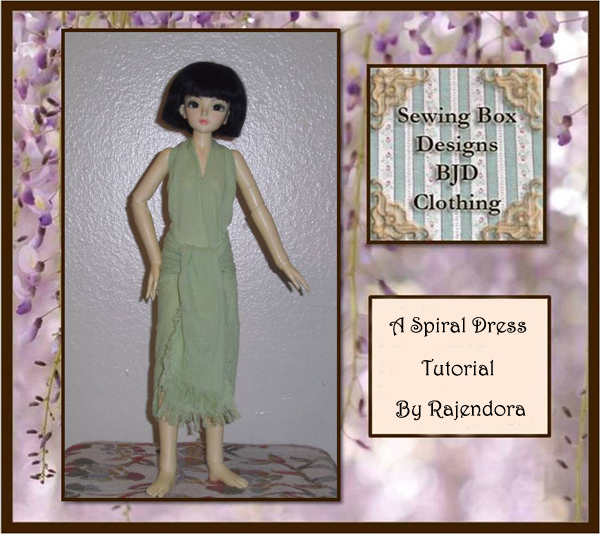
The Spiral Dress Tutorial
By Rajendora of Sewing Box Designs
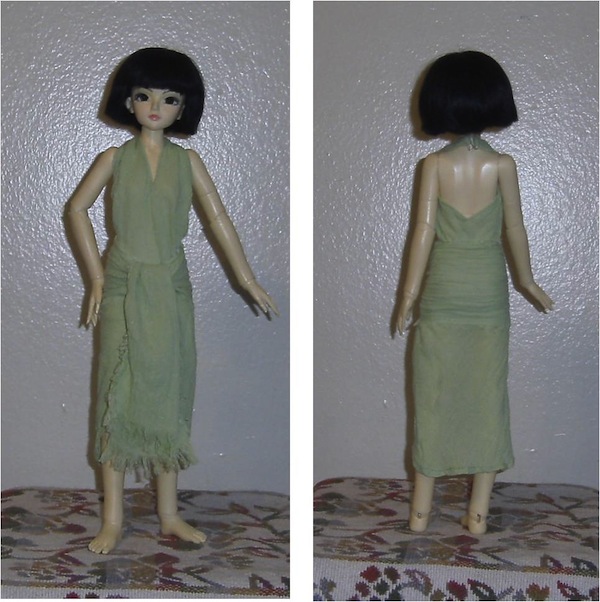
This is a basic little dress that just about anyone can sew in about an hour. It’s a good learning-to-sew project, because it only uses straight cutting, and the straight and zig-zag stitch on a machine, or it can be sewn by hand. It fits almost any doll (not sure about the very wide hipped art bodies–or unicorns O_o ), and it comes out super cute. This is a photo-heavy tutorial because there is no pattern. It’s best tested in paper first. I used two paper towels not broken apart for the length to test it.
This is one of those dress designs that sort of pop up now and then with a bit of history behind them, like the 1920’s bias scarf or the handkerchief dress that Madame Vionnet whipped up to go to a party. This dress pattern is also rumored to have been made up on the run in Hollywood in the 1980s, from a sari bought in a used clothing store or boutique somewhere. Because it’s made from a strip of fabric with the left-over becoming a sash for the hips, that could well be true. It’s also popular with belly dancers.
For any size doll, you’ll want at least your doll’s height in length for the fabric. It’s best to make it with a crinkle cotton gauze the first time, then you can experiment with other fabrics that drape well on the bias and adjust the pattern to them.
For closures, you might use a loop and jewelry hook, rather than tying the back of the neck, and a broach or pin for securing the waist sash. Also, by now anyone who’s used to my work knows I have a fiendish passion for green. >.<;; sorry about that.
~~~~~
Step 1:
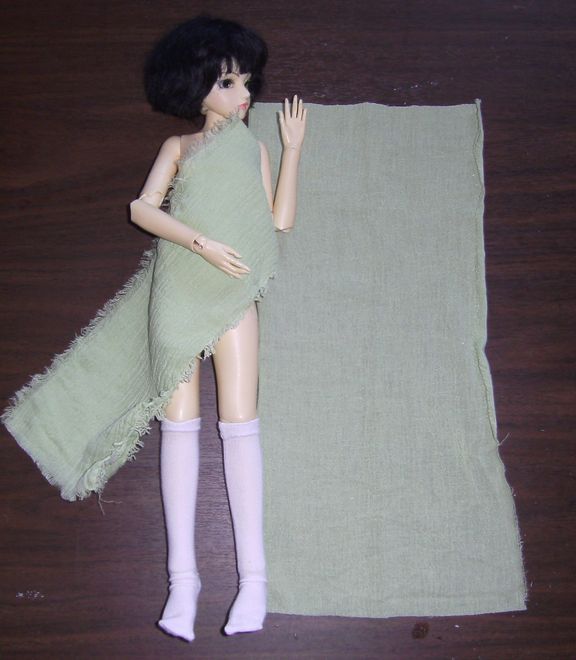
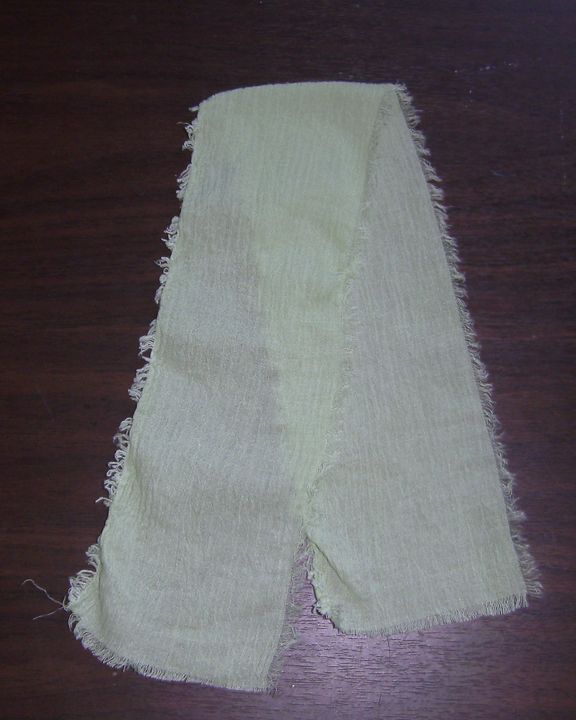
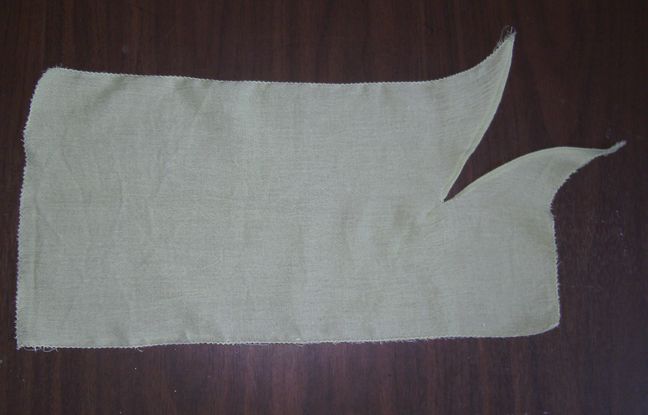
After you’ve washed and lightly pressed your fabric cut out a rectangle in this manner.
You’ll want the measurement around your doll’s hips for the width, and the length is from the tip of her nose to her toes.
Step 2:
Out of the left over fabric, cut a long piece to make a sash at least the length plus one half of your doll’s height. If you have to, sew two strips together, and zig-zag over the raw seam. It will be behind her butt so don’t worry. ^_^ I used the fringed edge of the crinkle gauze fabric, and then frazzled the other three sides to match. At this point you’re not sure how long you’ll need the sash to be so don’t worry too much about the fringe.
You can also use a contrasting fabric for the sash.
Step 3:
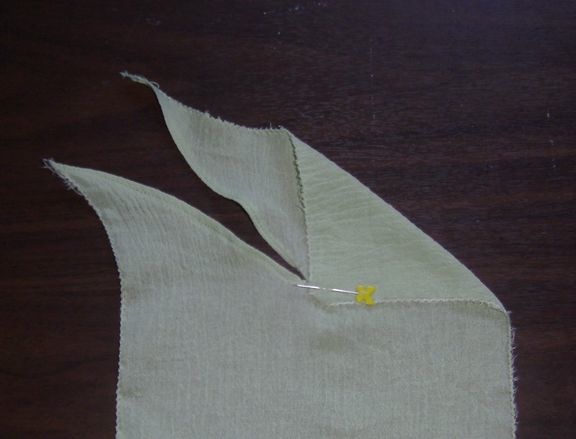
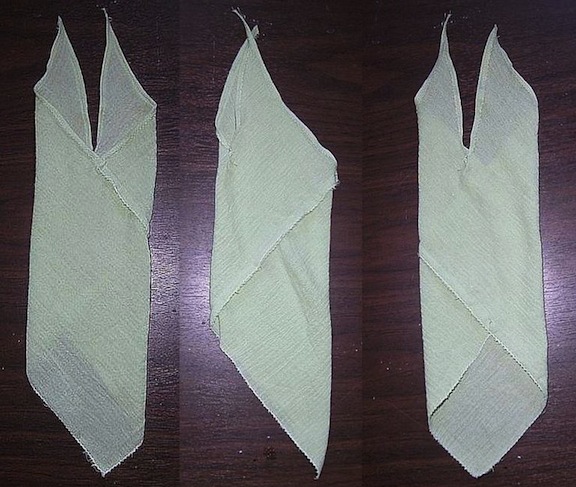
Lay your right side up, and fold the right top corner down to the other side.
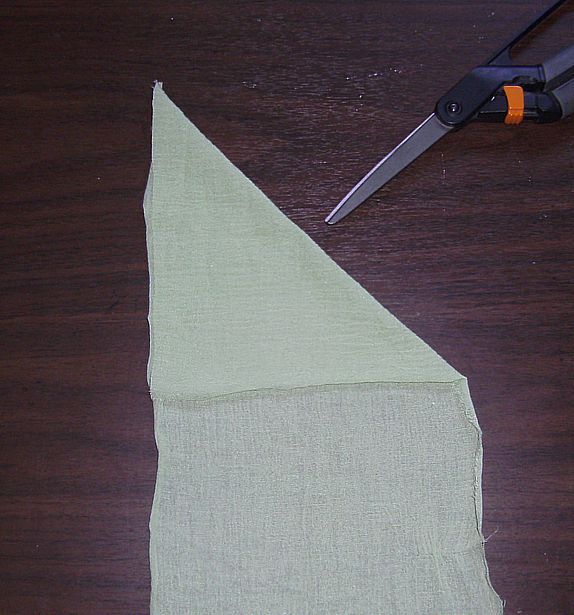
Now fold the other corner, or point, down to the other side.

Cut a diagonal opening, as shown.
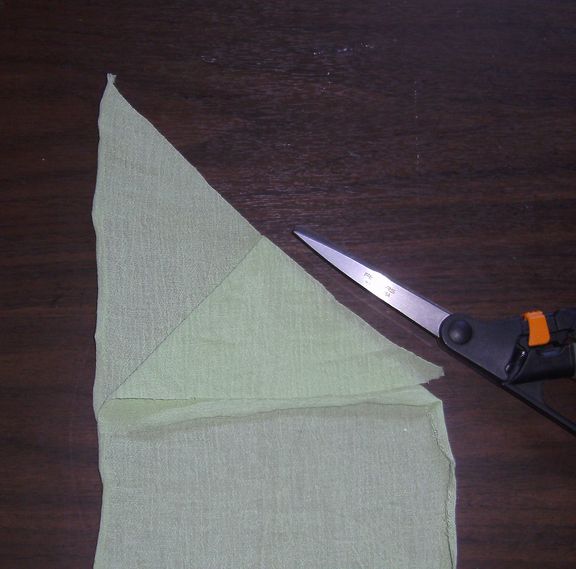
Now you have your neck ties.
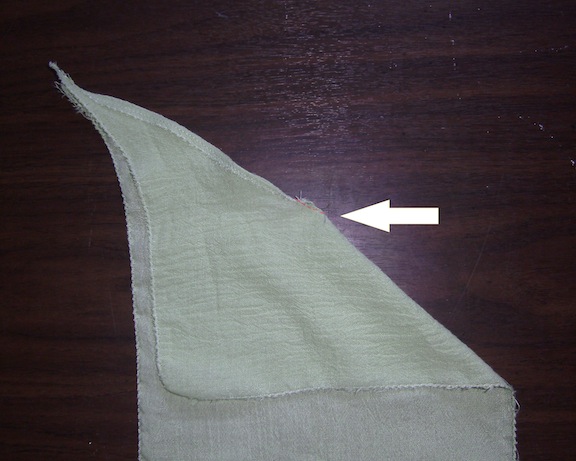
Finish the edge on your neck opening and then zig-zag all round the piece so it doesn’t fray. Once the rest of the dress is finished, you can decide how low you want the v-neck to go and mark the extra to put in a little bathing suit or a jewelry hook.
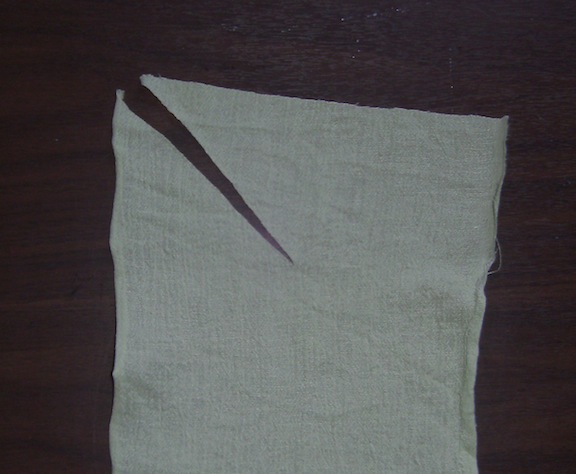
I like to sew the bottom of the opening to make sure it doesn’t rip when I tie the neck strings, as shown in the ridiculously tiny red dashed line I made in MS Paint. O_o
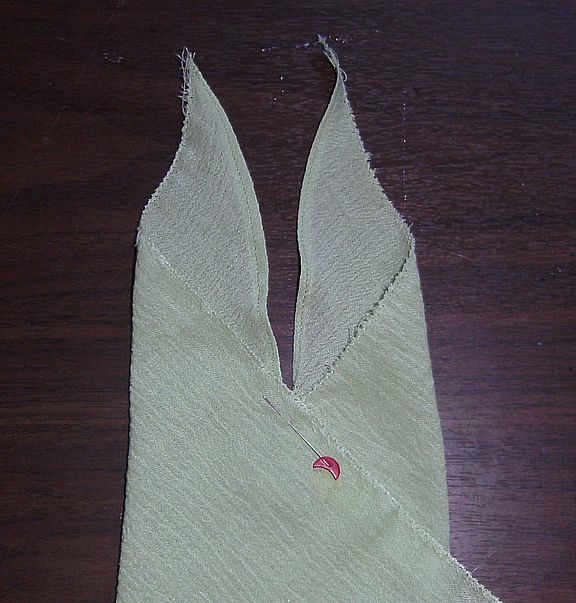
Now, this is the tricky part. With your right side up, fold the top right corner down as shown. Use a pin to mark a 1/4 seam allowance.
Now, fold the other side over to mark the bottom of the neck opening on that side with a pin.
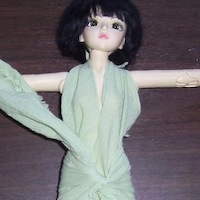
Now, just breath deep, and start pinning the seam from there, turning around the dress until you reach the end of the longer side. It’s one straight seam, but it twists around the dress. It will look like this when it’s pinned.
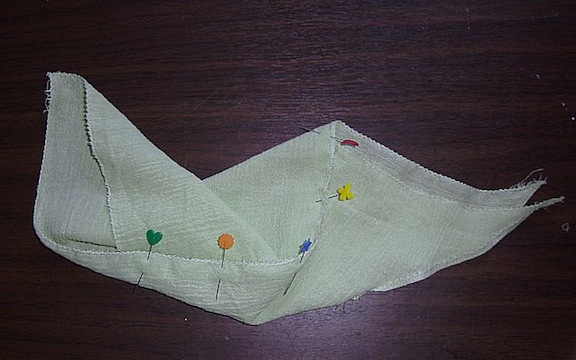
Sew that seam, making sure you catch the beginning and end securely. This image shows the spiral seam as you turn the dress around, but you are only sewing a straight seam.
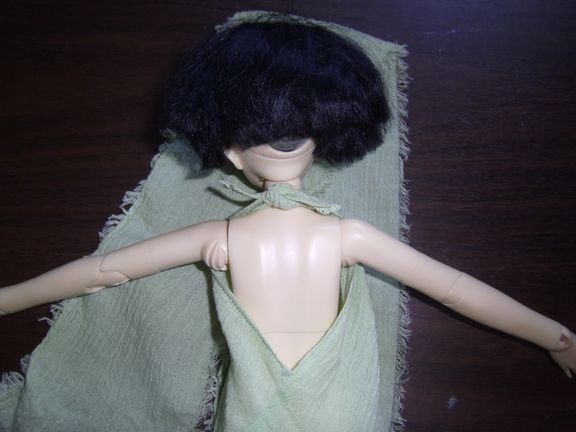
Now for the test fit. Slip your doll into the tube you’ve made and tie the ends on the back of her neck. Decide how low you want the dress to go in front and adjust the knot loosely so you can untie it later, after you’ve marked them to put your choice of closure on them.
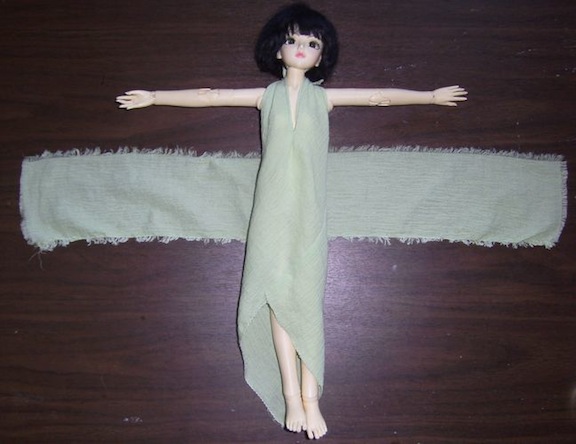
Turn your doll over and lay her on the sash with the wrong side of the sash up if you’ve had to make a seam down the middle back. You want the top just above her waist. As you can see, there is a point in the back. If you want to keep the point that’s fine, and you can also use a slightly shorter length of fabric. It’s something to play around with after you’ve got the pattern sorted.
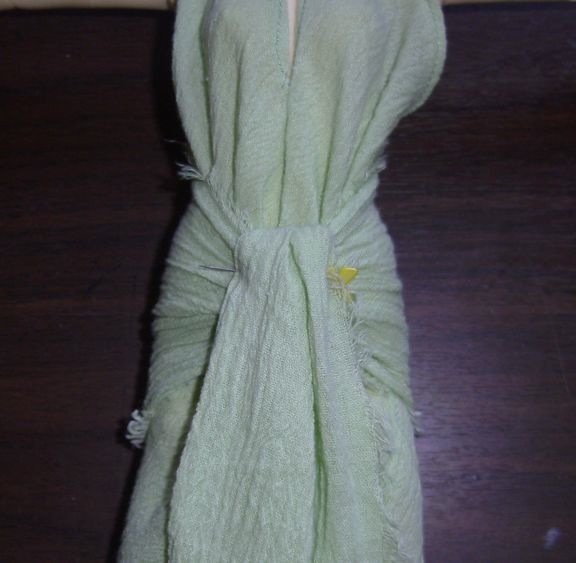
Tie the sash like this. The knot should be right about where a pair of low rider’s button, the bias snugging makes it fit her like a glove.
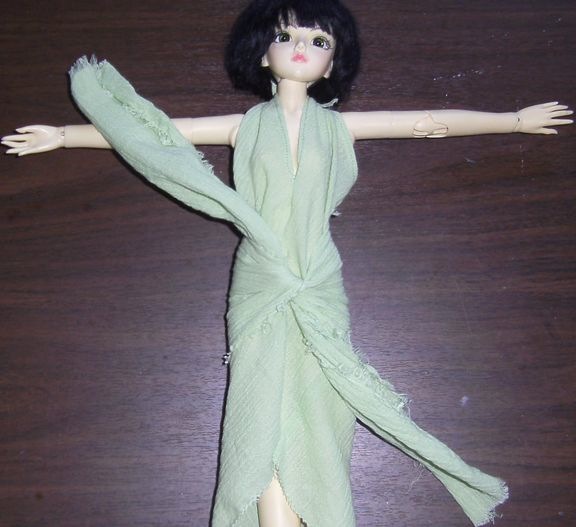
Adjust the sash into a nice fold over and secure it with a safety pin or something less lethal than a sewing pin. O_o
Now you can check the hem and decide what to do about it. I decided to mark and trim the point off the back of mine and keep the diagonals in front.

A quick hem job and it’s ready to play around with for trim and beads or fringe or whatever you would like to do to fix the basic dress up. ^_^ Fabrics that would work well beside Cotton Crinkle would be sheer cotton or silk voile, very thin rayon, stuff like that that has a nice drape on the bias. You can also use pretty vintage handkerchiefs and so forth. Just make them into the long rectangle to start with and watch your raw seam so it doesn’t end up on the wrong side of the fabric.
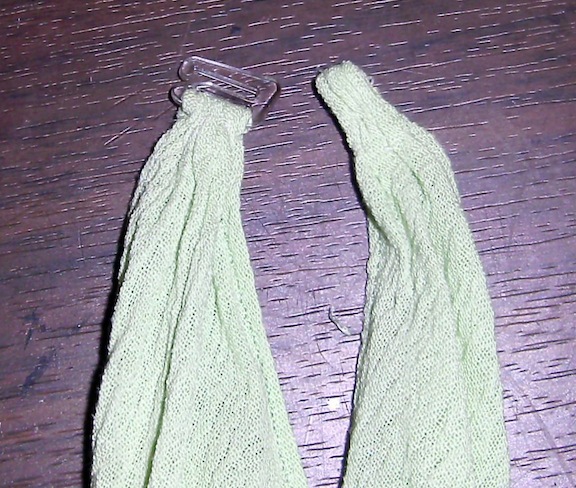
I’ve added a clear hook to the back of the neck, and sewn the fabric into the loop for it.
Now trim the sash to the length you would like it, and fringe the ends.
As I’ve said, this is a very basic dress, and a good jumping off point for beginning stitchers. It works up very fast and can then be trimmed up and played with for a pretty result. With a hook and eye, a narrow belt and an even hem, it can be a flapper dress. It can be a historical costume. Or it can just be a quick bathing suit cover up. Use your imagination and have fun! ^_^