Designing a custom Pattern:
Espoir Tape Shell Pattern Part 2
By Rajendora @ Sewing Box Designs
Part 1 of this project may be found on BJDcollectasy HERE
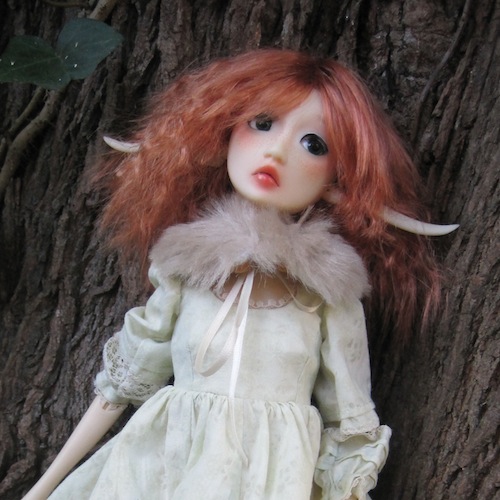
Espoir was created by French artist Ludivine of Woodolls. Her dolls are sold through Jpop Dolls.
References:
I’m including a list of books and links here to patterning information and in the tutorial I’ll be explaining some technical terms so you will know them when you read the patterning information.
~~~~~
Books
Inexpensive (relatively): How to Make Sewing Patterns by Donald H. McCunn and Robin Lew
Make Your Own Patterns: An Easy Step-by-Step Guide to Making Over 60 Dressmaking Patterns by Rene Bergh
Make Your Own Dress Patterns by Adele P. Margolis
And text books for industrial training; if you are a college registered alumni or current student, try one of the text book rental places and rent a copy with your student/alumni discount!
Patternmaking for Fashion Design (5th Edition) by Helen Joseph Armstrong (any edition is good, really!)
Design and Patternmaking for Stretch Fabrics by Keith Richardson
Principles of Flat Pattern Design (4th Edition) by Nora M. MacDonald
Web Sites with tutorials on patterning and sewing;Some people have dolls, some people ARE their own dolls!
Petit Main Sauvage: Patterning tutorials and sewing tips from a professional sample maker for the industry.
http://petitmainsauvage.blogspot.com/
Poppykettle on the sway back issue, links in comments most useful.
http://poppykettle.com/2013/05/16/m5929-swaybacks-and-centreback-seams/
Buzzy Bee’s World, further on the sway back issue a lot of girl dolls have to counter balance their bosoms. Her blog also has tricks and tips and patterning info that’s very clear for the learner.
http://buzzybeesworld.blogspot.com/2010/12/sway-back-alterations-my-analysis.html
American Duchess, links for her tag “patterning” so you can see what the split method and pivot methods look like in action. Scroll down and click older posts until they run out.
http://americanduchess.blogspot.com/search/label/Patterning
~~~~~
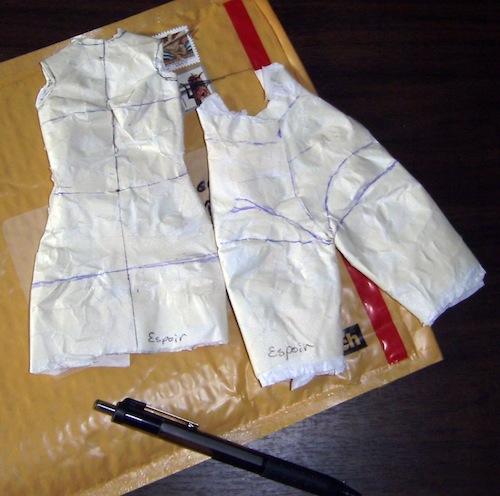
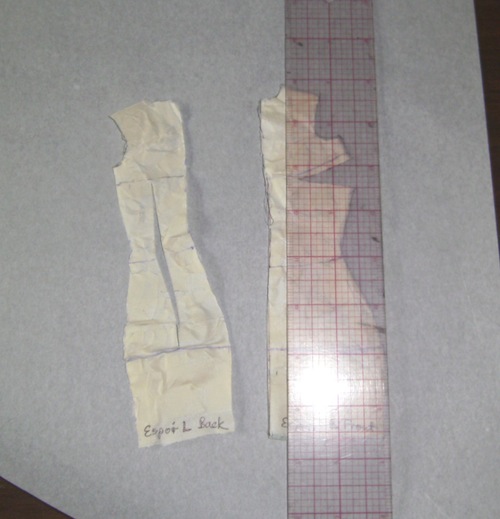
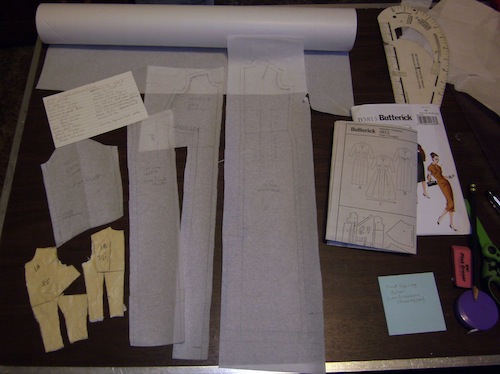
On opening the package, mark the doll’s name on the fitting shell. Check by folding it to see if the lines are as true to the quarters as possible and make notes of the doll’s model specific figure, such as sway back, wider bust or wider hips, etc.
(I now request that the fitting shell for the bodice is done down to the highest mini skirt hem line on the doll. This covers the longer abdominal section rather than longer torso section on some dolls. My Dragon Doll girl has a long abdominal, where say, a Dollfie Dream Sister has a shorter abdominal section and anything that would fit the DDS would be hella short on a DD girl.)
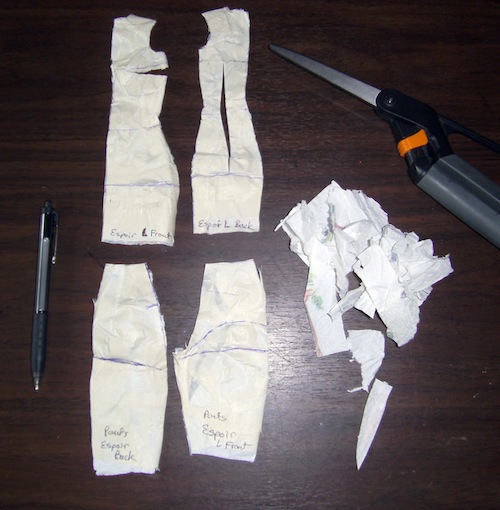
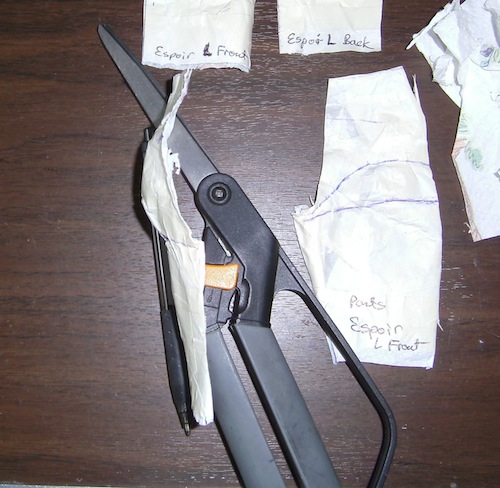
Traumatize the person who put all that work into the shell by cutting it up and gently tearing off any excess paper.
Now, I’ll point out some Espoir specific notes here, to show you what to be looking for at this stage. For instance, her crotch is very lean. Normally there would be a very u-shaped curve there, but only her front is curved. Her back is straight, so mark the piece exactly where the front starts, so that you don’t forget that is where the other side was.
The dart for the bust is cut lower than the bust point (nipple line) because that’s the way it is, has been, always will be. Unless you’re doing a princess seam line. The human equivalent is 1 inch down from the nipple, 2 inches back on the actual pattern, while the sloper goes closer for fitting reasons.
Note that her booty pops, and her waist is tiny. That particular and very normal to humans feature is called Sway Back . Either your hips fit perfect and your waist is too loose and you wear hip huggers and full skirt dresses for the rest of your life; or you find a seamstress who knows how to work around it. It’s the bane of the sewing community/profession. Everyone has a ‘trick’ to fix it. But since the hip to waist ratio is different in every human/doll, it’s a sort of ‘find it out for yourself’ thing that comes with experience. Just try everything until one method works. Then go through it all over again for the next doll/human.
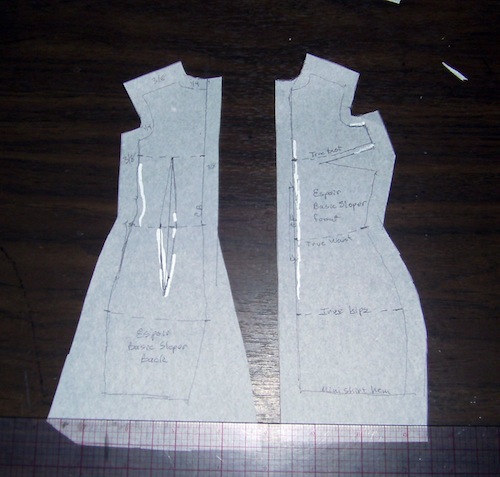
Working with the basic dress or bodice sloper first, take the front quarter and flatten it on your pattern paper. I have a clear (except for all the ink!) ruler I used to flatten it so I could see what I’m doing. Trace off the shell, redoing lines as needed. Don’t fuss to much at this point, you’re working with a flattened 3Dthing,it’s not going to be perfect. Don’t forget to transfer your bust, waist and hip(or widest hip) lines that the owner has drawn.
This is called true-ing up the pattern. Note that the front center is not exactly straight. Take your ruler and draw a straight line. Now use your imagination (or all the geometry and algebra you thought you’d never ever use if you weren’t a scientist) and move the rest of the pattern according to that line. In patterning, it’s called ‘pivoting’. It’s doing CG in the brain and then transferring it to the paper. Mentally picture the pieces moving, then draw them that way. Take the widest part of that gap between the straight line and the ‘real’ line and minus half of that measure and rotate it to horizontal and move down the bottom of the arm hole, (technical term: armscye) and the bust dart, then the waist line if necessary. Once again, it’s a ‘feel thing’, so you can see where I moved it where the white out is in the next photo.
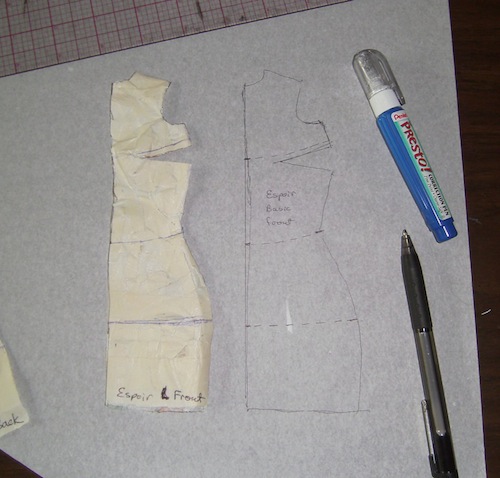
For the basic pattern, I mark the center front, add a 3/8 seam allowance all around, except for the neck and arm hole, which is 1/4 for the shape, and an extra inch on the bottom. In a human, you’d have 1 inch all around for the first fitting and 3 inches hem, etc.
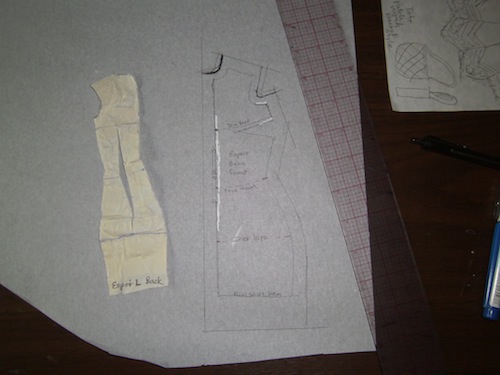
Now for that rather scary back. Fold the back in half, along the waist line. Take a deep breath and open it right from the high hip to the back bust line. Flatten it out as best as you can, and trace it the same as the front, tracing the opening as well. This forms a darted area. You can see where I’ve corrected the dart and side seams there. The center back seam really shows the dynamics of the sway back now. The darts will form the shaping of the back of the garment so you’ll be using them a lot.
Because I’m making an Empire style dress for the Espoir, I’m chickening out and dealing with that sway back latter later. See the list of tutorials up there for the whole sway back angst thing.
Mark everything the same as the front. For the dart area, true it up by splitting it right down the middle, making sure it’s center top and back of that body quarter, and retrace your seam lines evenly. The lower part of the dart below the waist may have to be redone later to ‘fix’ the sway back, but for now, this is the basic sloper pattern. Like a daft fool, I forgot to mark the seam allowances before photographing, so I’ll go back and to do that.
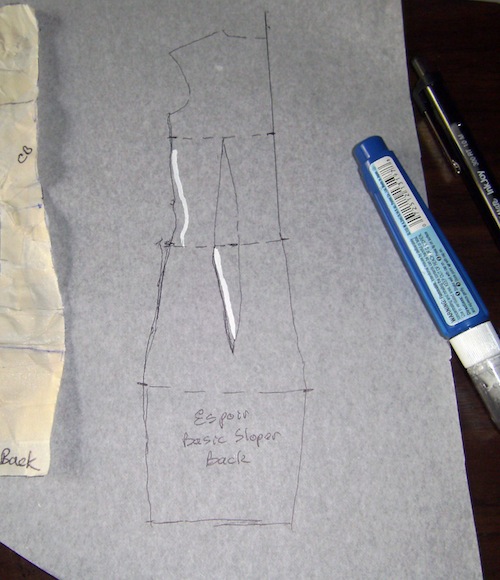
As you can see, I’ve left room on the back pattern paper to deal with the below waist issue later. Do not toss the fitting shell, ever. Paper wears out and at some point, you’ll think, ‘what the heck did I do?’, ‘why didn’t that fit?’ and you’ll want to go back to the shell. Also if you have a regular customer, take the fitting shell and make a mannequin from muslin and stuffing, mount it on a dowel and stick that into one of the little wooden plaques they have at the craft store. It’s the same as making a people mannequin so the tutorials are out there in the sewing blogs. Search under ‘custom dress form’.
The sleeve will be done from geometry and the measurements you have, unless someone really has a strange arm, like centaur legs and so forth, where you would ask for a shell fitting of that body part as well. The rest is actually patterning, which I’m not qualified to teach. If you check out the above links and books, or similar books available either through purchase or your library system, you’ll find out a lot of information that I would just be duplicating here.
What I am going to do is the basic empire bodice pattern. Using the sloper along with what you know a pattern piece should look like, you can pattern anything. A lot of patterning tutorials on sewing blogs will have you vertically split, or use the pivot method on a pattern to resize it, and forget to mention that you really have to combine both techniques. Splitting doesn’t fix the extra length needed for a big bust, and pivoting distorts in strange places. You combine both methods for what you need to do per section.
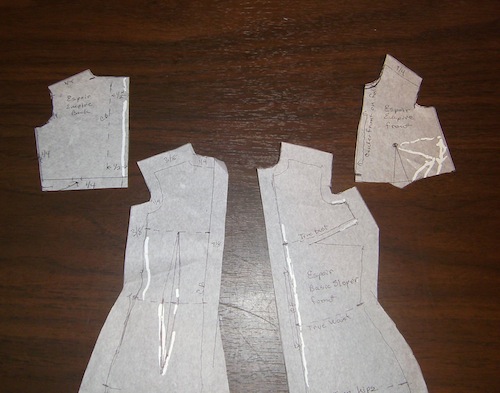
The Empire Bodice
An Empire bodice stops just under the bust line in front and a little lower than the bust circumference in back. Think of a well fitted bra. Now with the fitting shell sloper, think of all the problems you won’t have in fitting a doll’s bust.
For the purposes of the pattern, trace your sloper pattern to half way between the bust line and waist line. Leave some extra paper to play with because you’ll be making changes. My example is cut out for clarity. Because there will be no front seam, mark it as a fold line, as shown. This means the piece will be cut out on the folded edge of the fabric. For the back, you’ll need over lap for the closures and seam allowance. I usually add about 3/4 of an inch and then cut down as needed. It’s always best to have that extra 1/2 inch to work with.
Starting with the back, which in this case is easier, you’ll see a little curved arrow from the bottom corner pointing to where the dart used to be. This means I’ve taken the amount of the dart off the side of the pattern piece. Basically, just close up the dart, by fitting the side tighter. It’s a very short dart on this bodice on a narrow doll and the shaping shouldn’t be missed. However if you are making a Choli top to wear with a Sari, that dart is design integral and should be there for authenticity, even if you have to fake it by making the pattern bigger to have it. Add your 1/4 or more seam allowance.
For the front, it’s a bit more complicated. I left my sloppy white out lines so you can see where I’ve taken the side bust dart and pivoted it on the bust point to an under bust dart. Then make sure that your back side and front side match up. Don’t forget your under bust 1/4 inch seam (which I haven’t marked but I can see is there because it matches the side of the back.)
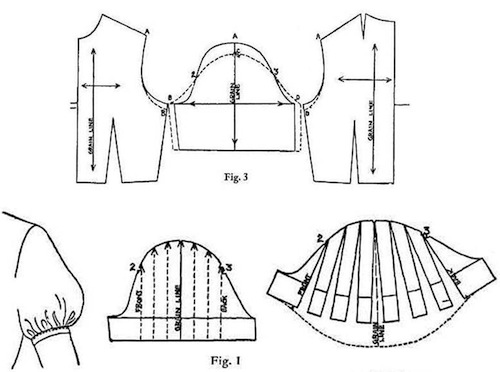
For the sleeve, it gets into geometry. In this diagram I’ve included the basic sleeve pattern and then the various ways you can slash and pivot to get a puffed top or bottom sleeve.
You’ll need these measurements to work with: The armscye measurement. That’s the measurement around the arm hole. The finished length of the sleeve from the top of the arm hole. The width of the upper arm at its widest. The width of the arm where you want the sleeve to end.
If you squint at the picture, you’ll see on the screen left, where I have used these measurements. Make sure you put your seam allowance on, and add a hem allowance.
(Diagrams taken from “Modern Pattern Design” by Harriet Pepin, out of copy write, 1949)
After making a basic sleeve pattern from the doll’s measurements and the measure around the armscye, I ‘walk’ the pattern, meaning roll the sleeve cap along the arm hole and make sure it fits, making any adjustments. ‘Walking the pattern’ is how you make sure your side seams and leg and skirts seems end at the same measurement, that any gathering fits into the other seam, that when darts are sewn, the side seams fit and so on. Once you’ve ‘walked’ your pattern, you can say that it’s ‘trued’. Funny language, no? People still can’t figure out where ‘sloper’ (pronounced slope-er) came from.
Because I’m making a bit of a puff sleeve for this dress, I use the ‘split and spread’ method to re-pattern the sleeve, as shown in the above image. I folded the pattern once, then twice and cut it open along the fold lines. Then I spread it out evenly along the amount I want to add to. Be sure to keep your spread in the middle 1/3 of the sleeve. You don’t want a lot of puffy bulk under your doll’s arm. Put your paper over the spread out break down and trace it nice and even. And there you are. One puffy sleeve pattern.
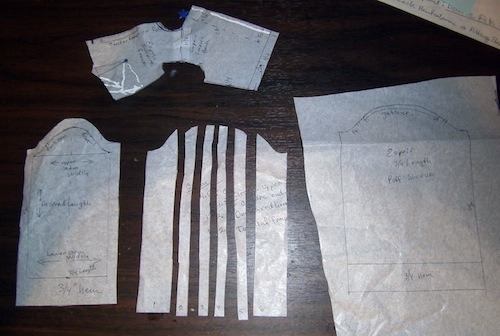
And there it is, the bodice and sleeves. The skirt pattern is pure geometry. Waist plus hips, and cut into pieces to match the design you have in mind. There are dozens of skirt patterning tutorials online which you can find chasing through the links above.
With a basic sloper for your doll, you don’t have to go through ink and paper any more resizing and printing, etc., to make a pattern from scratch from a ‘people pattern’. Just use the people pattern for the basic shapes of the piece, and your doll’s sloper for the actual size. One muslin test and some adjustments and you have a pattern of your own you can use over and over again.
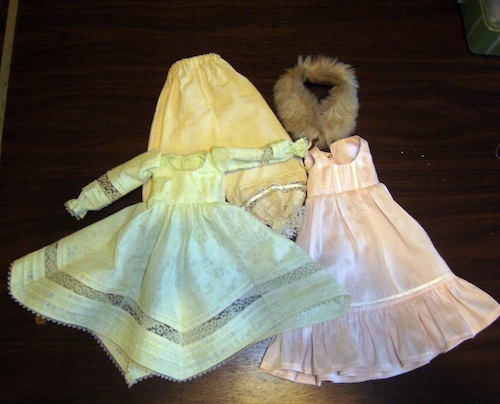
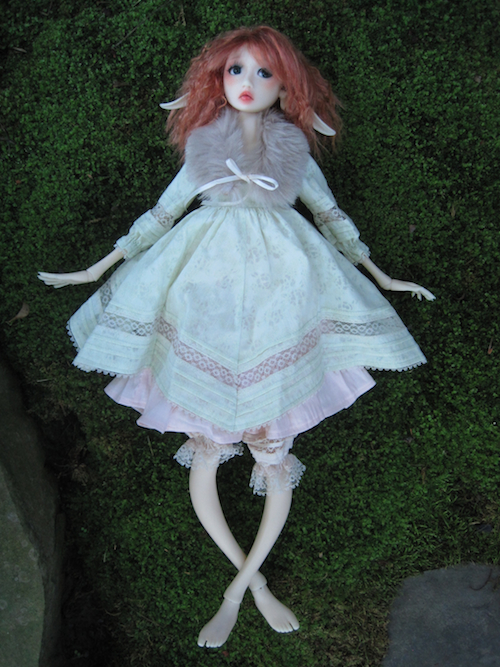
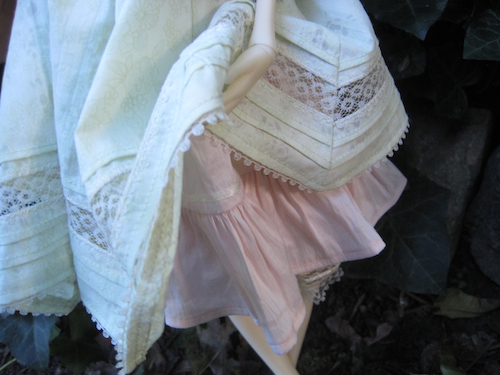
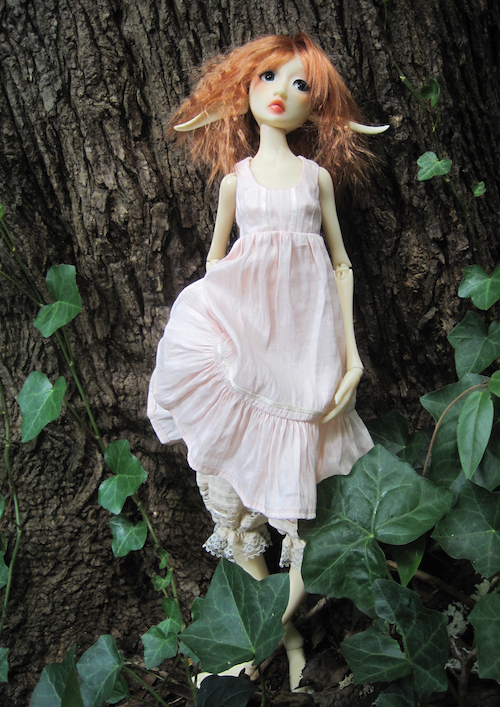
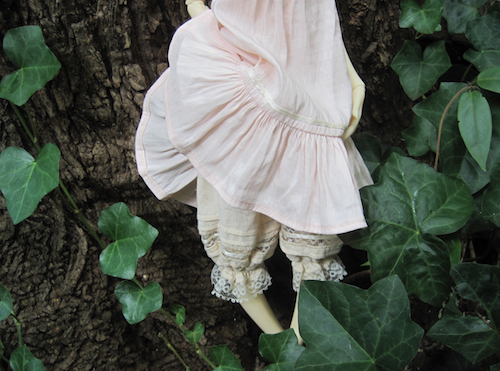
The dress I’m making took some time with all the lace inserts and tucks, but here are the final pieces to her outfit.
~~~~~
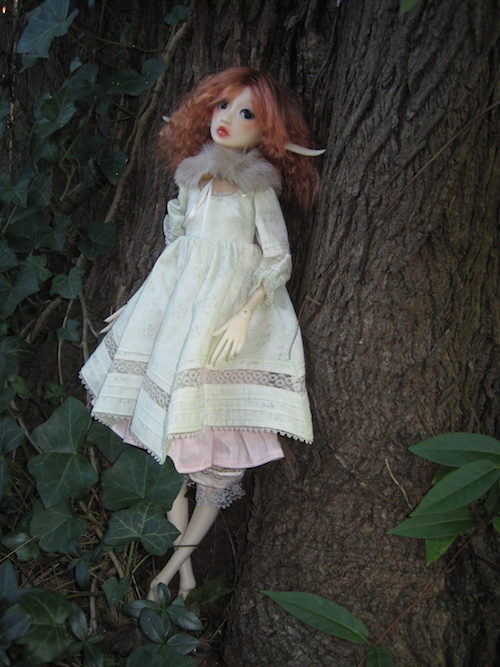
This is beautiful. Just WOW.
my name is sebastian red, chili’m looking for someone to make a custom dolls clothes for men usd. know someone or not ??
If not engaged so please send me some website where you create any of dolls clothes
thank you
Hey that’s a really neat idea! I’m bookmarking this page. Can’t wait to try it!