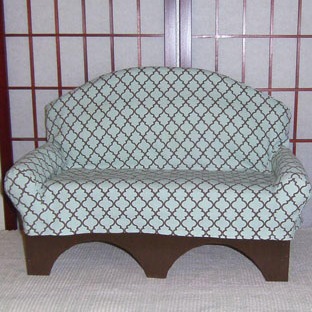
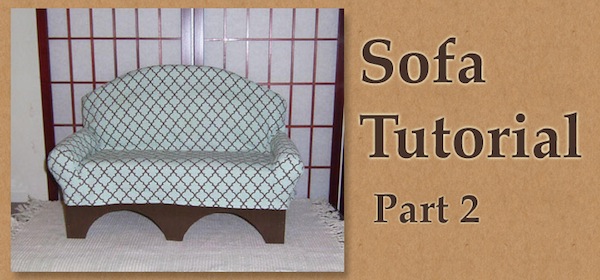
Want a custom designed sofa for your dolls? Why not make it yourself? This tutorial by Rajendora of Sewing Box Designs shows the basic design for a sofa. This is the second part of a 2 part tutorial which will show how to slipcover this or any pre-made sofa.The first part, which was published on Sunday, can be found of HERE.
Tutorial: Large Doll Sofa, Part 2 By Rajendora @ Sewing Box Designs
Slip covers are a neat way of changing your furniture’s clothing with the seasons. If you live in a dusty region they can be whipped off and cleaned rather than having the upholstery cleaned every few months. There are a lot of books and blog tutorials on making slip covers and when I happened on a few, it gave me the idea for a much easier way to make a doll sofa, as well as change a pre-made sofa or armchair’s look.
Skill level: If you can make throw cushions with clipped curve and square seams in them, you can make this. And if you feel you need a test run, use cheap muslin first. Seriously, if you can sew, you can do this, don’t let anyone tell you otherwise. Not even your inner critic.
Materials from the Craft store:
1 yards by 45″ Heavy fabric, a cotton ‘duck’ or printed canvas. If you have an obvious stripe or repeat pattern , this should cover it. Make sure your printed fabric is in scale to look ‘real’.
1/2 yard of muslin, canvas or some fabric that won’t show through your cover fabric. 1/2 yard of 1 inch thick Polyester quilt batting. Matching thread for your cover fabric. A tape measure, ruler, and chalk to mark your fabric
Scissors, Pins, etc. Tissue Paper to make the pattern on. The big sheets of present stuff work just fine. The diagram printed out to help you sort how to cut the pieces.
Note: Once again, read through the tutorial before doing anything else, and picture yourself doing each step, until you are confident you understand everything (or are willing to suspend understanding and just go with cut and sew, LOL!)Cushions
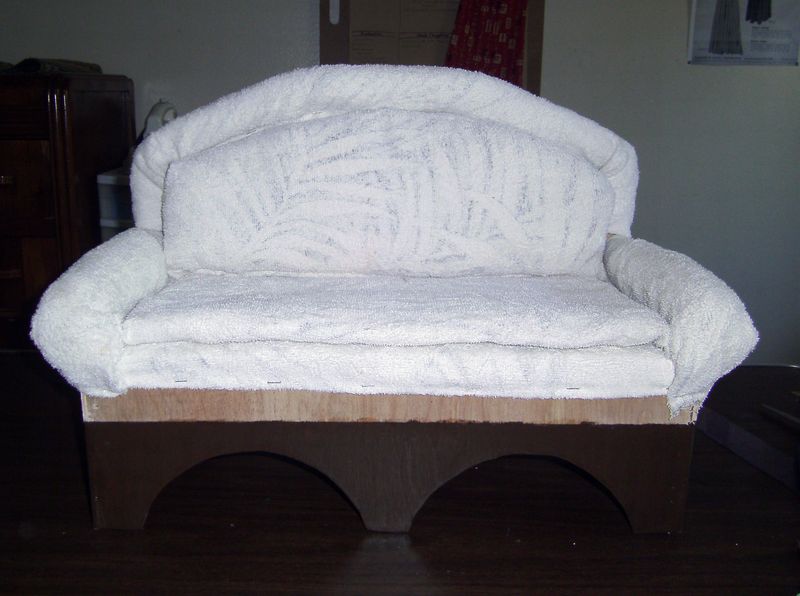
Note: Because later I might make a slip cover that has back and seat cushions on top, I made my back and seat padding removable. You can really play around with this sofa designs, it’s very versatile.
1. Using the muslin or canvas fabric, (I used a rather worn out towel) make a seat cushion, and then the back cushion to fill in the unpadded space. Use flat layers of the poly batting to stuff the pads, not wads of it like stuffing a toy. The quilt batting won’t sag over time like the loose stuff does. If you have to, take some thick thread and make a few tacking stitches to hold the back cushion upright. My choice was safety pins for later removal.
Draping the Pattern
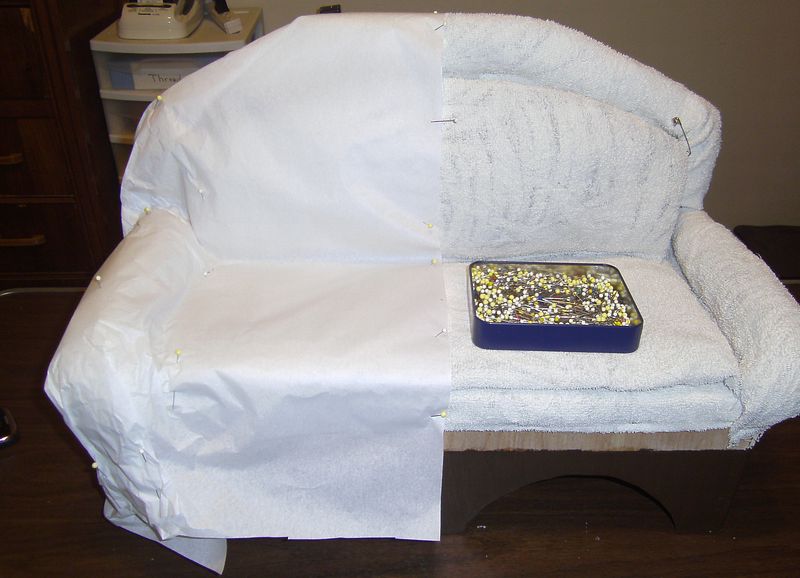
1. Using a ruler to keep things straight, stick pins in your sofa right down the middle. You’ll be working with half your sofa.
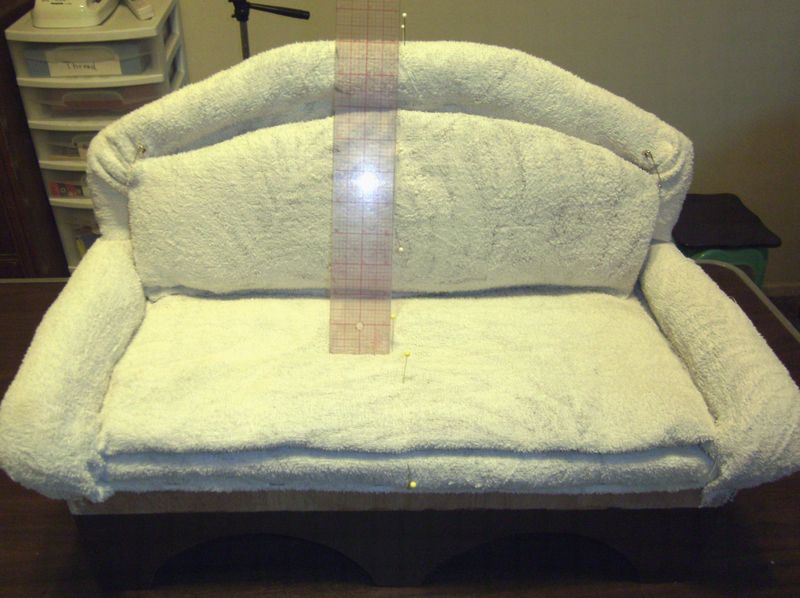
2. Mold your paper over the sofa along that line. For the center back bare wood, you can use a bit of tape to hold it in place. You want exactly half your sofa. Don’t try to tuck the paper into the padding, you want it to be on the surface. Fold, pleat, smooth and pin it until it’s molded lightly over half your sofa. Then draw lines, careful not to poke through the paper into your padding, but if you do, it’s not going to show anyway, so not to worry too much, right? You want every line of the sofa, and where your hem will be. Make sure that part is even all the way around to the back. Think of it as sofa origami, pleat and fold until it looks like a sofa.
3. Once you have your lines drawn, start separating the pattern pieces. You’ll be adding on seam allowances, this is just the basic shapes to start with. I started by trimming off the hem, and snipping out the front of the arms, because that’s a detail I want to work with. As you can see the pins are holding all the excess paper in place.
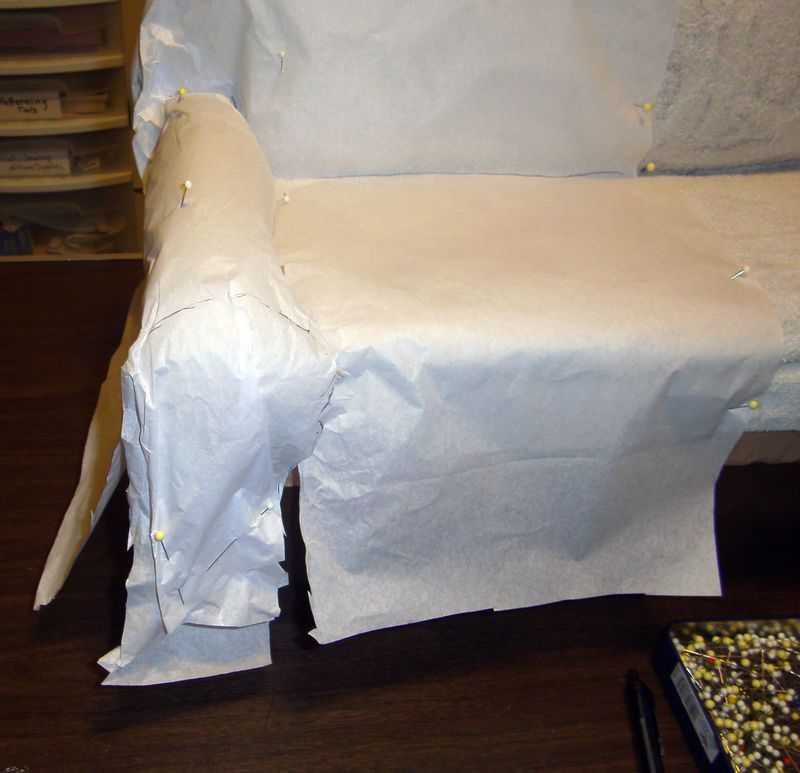
4. Now carefully cut off, while pinning in place, all the ‘shapes’ of your sofa cover. Remember to mark anything you think you might need or possibly forget about when it’s off the sofa and laying flat.
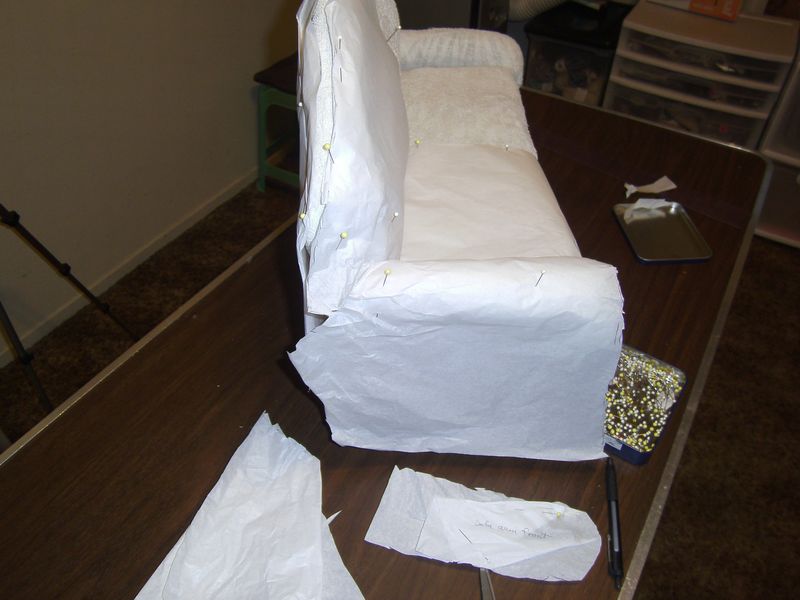
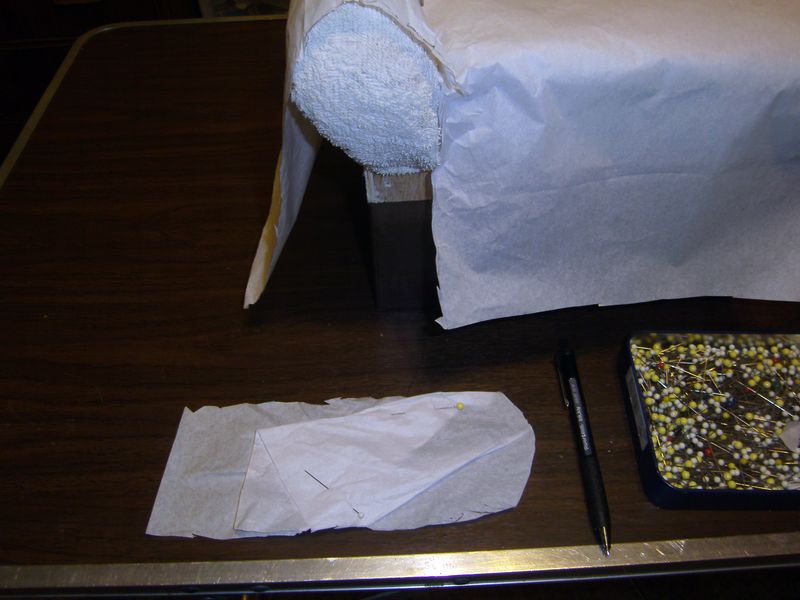
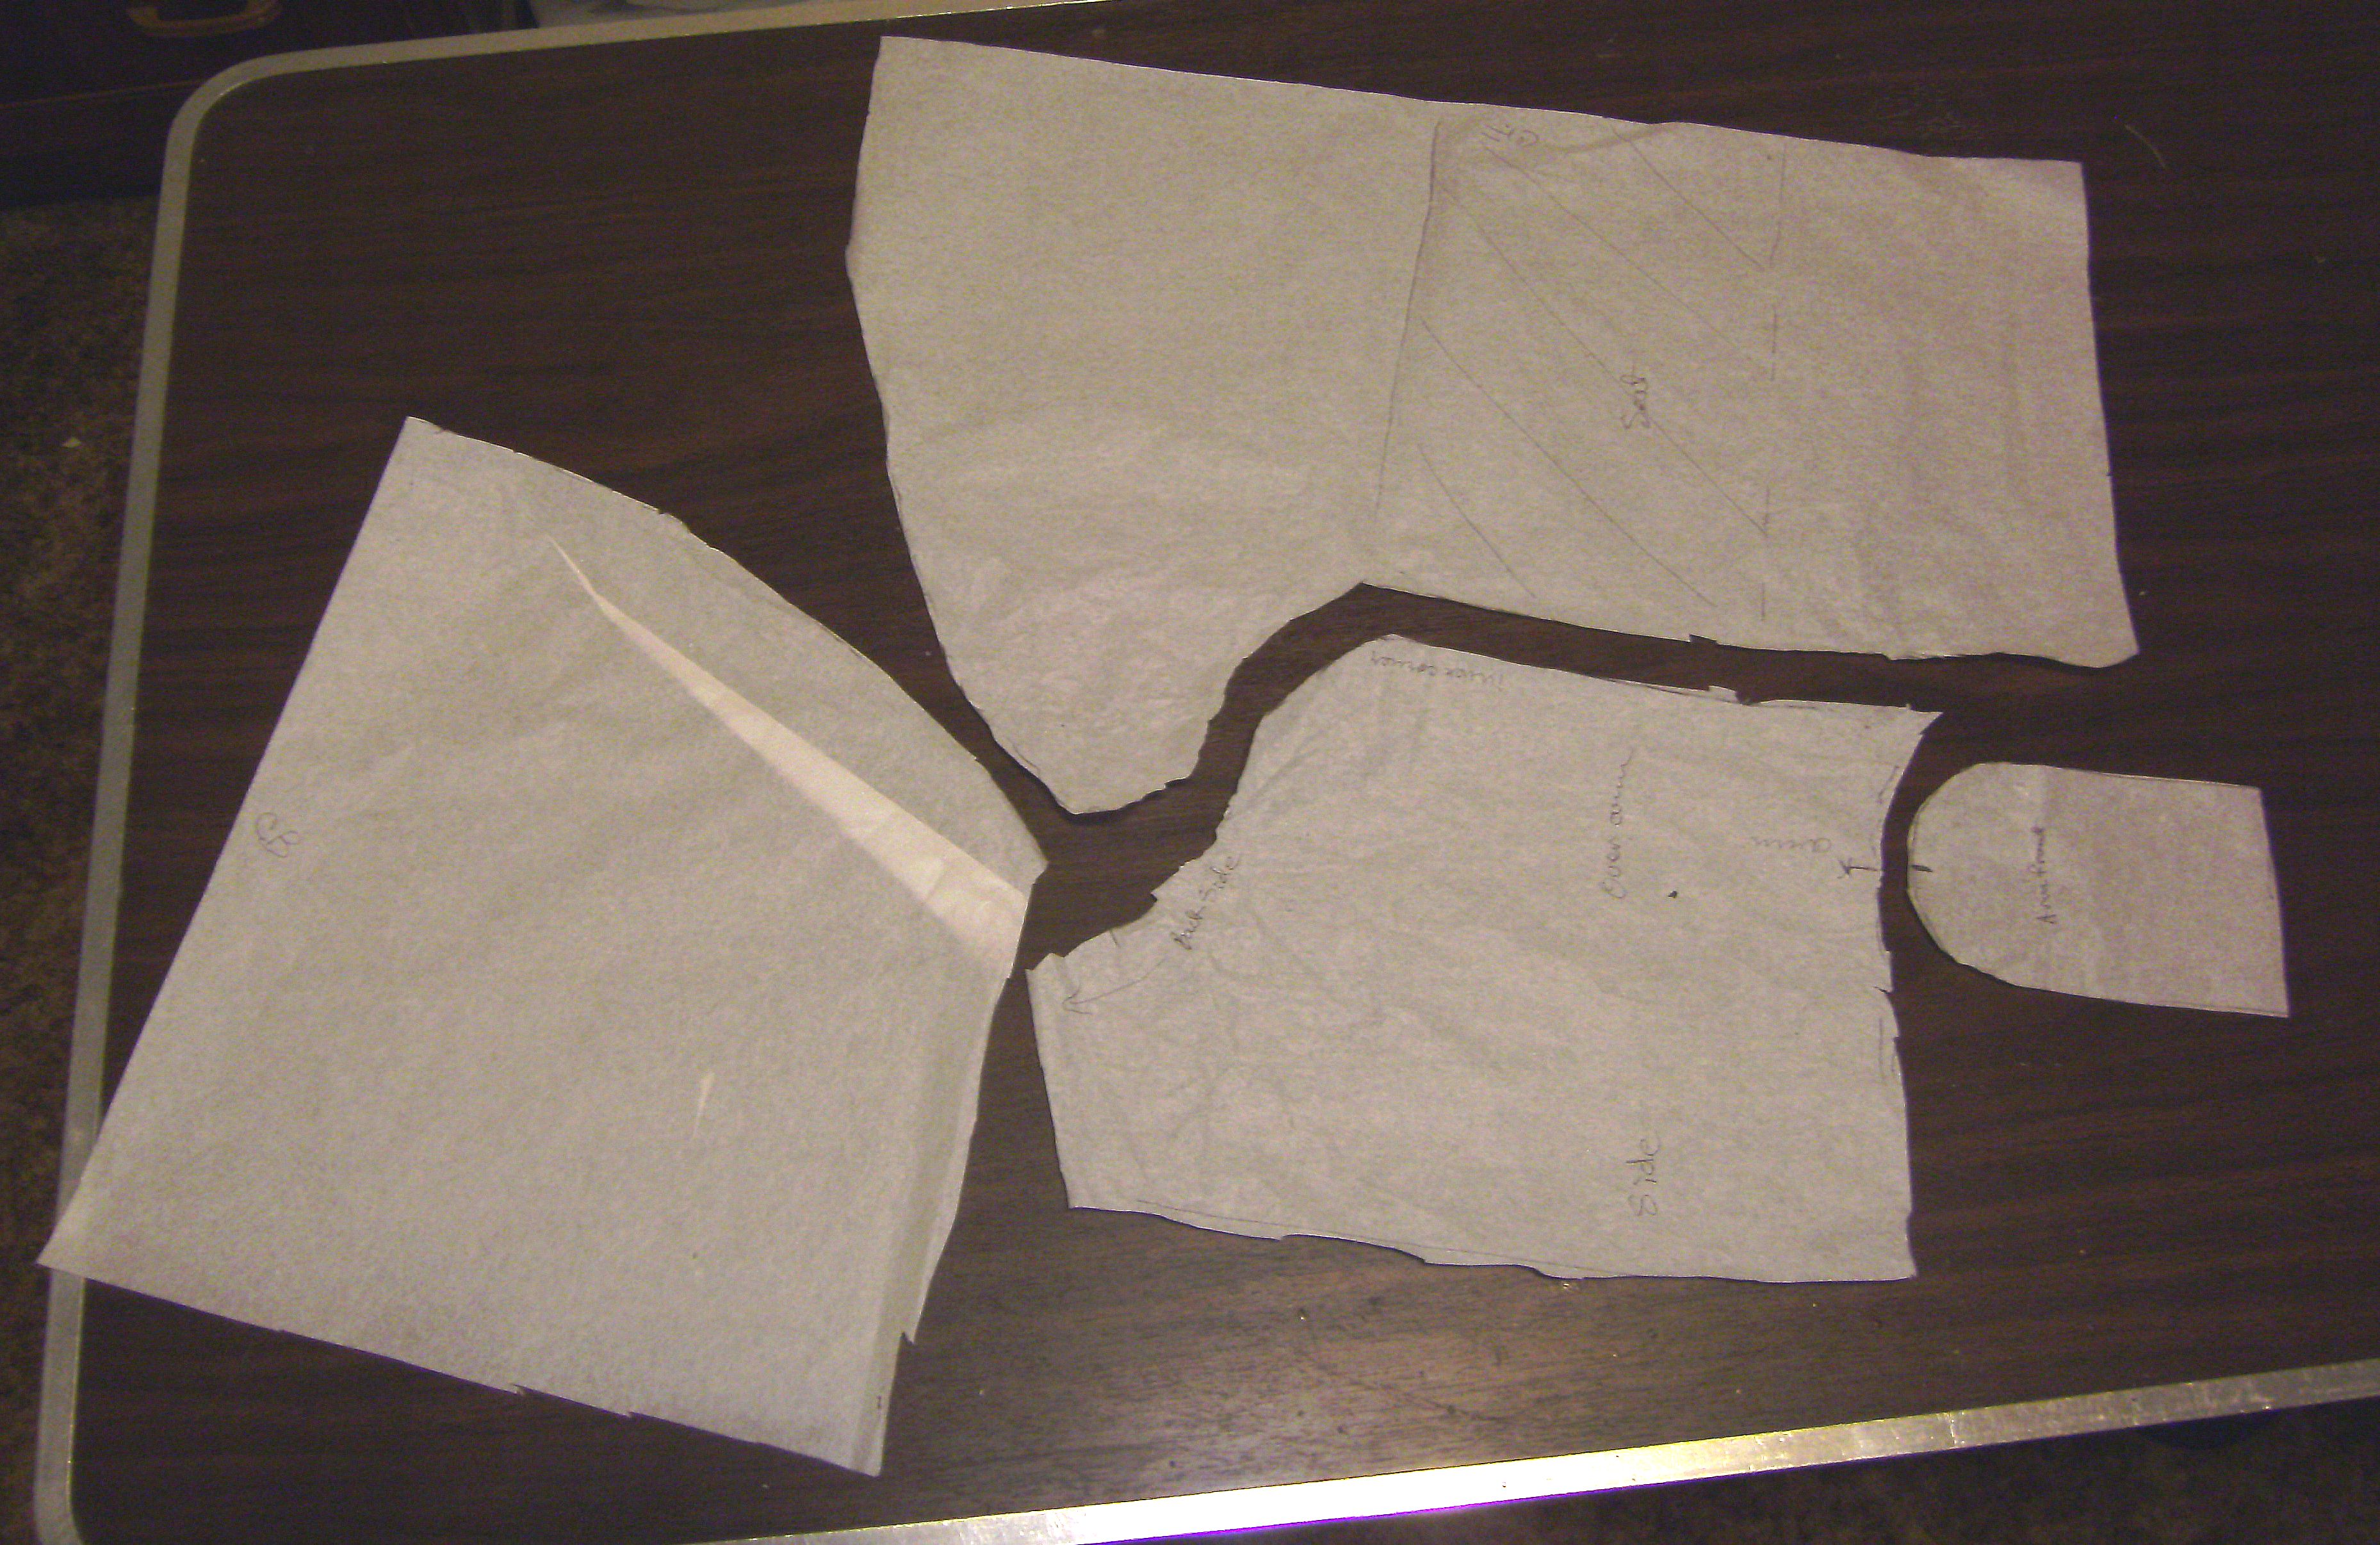
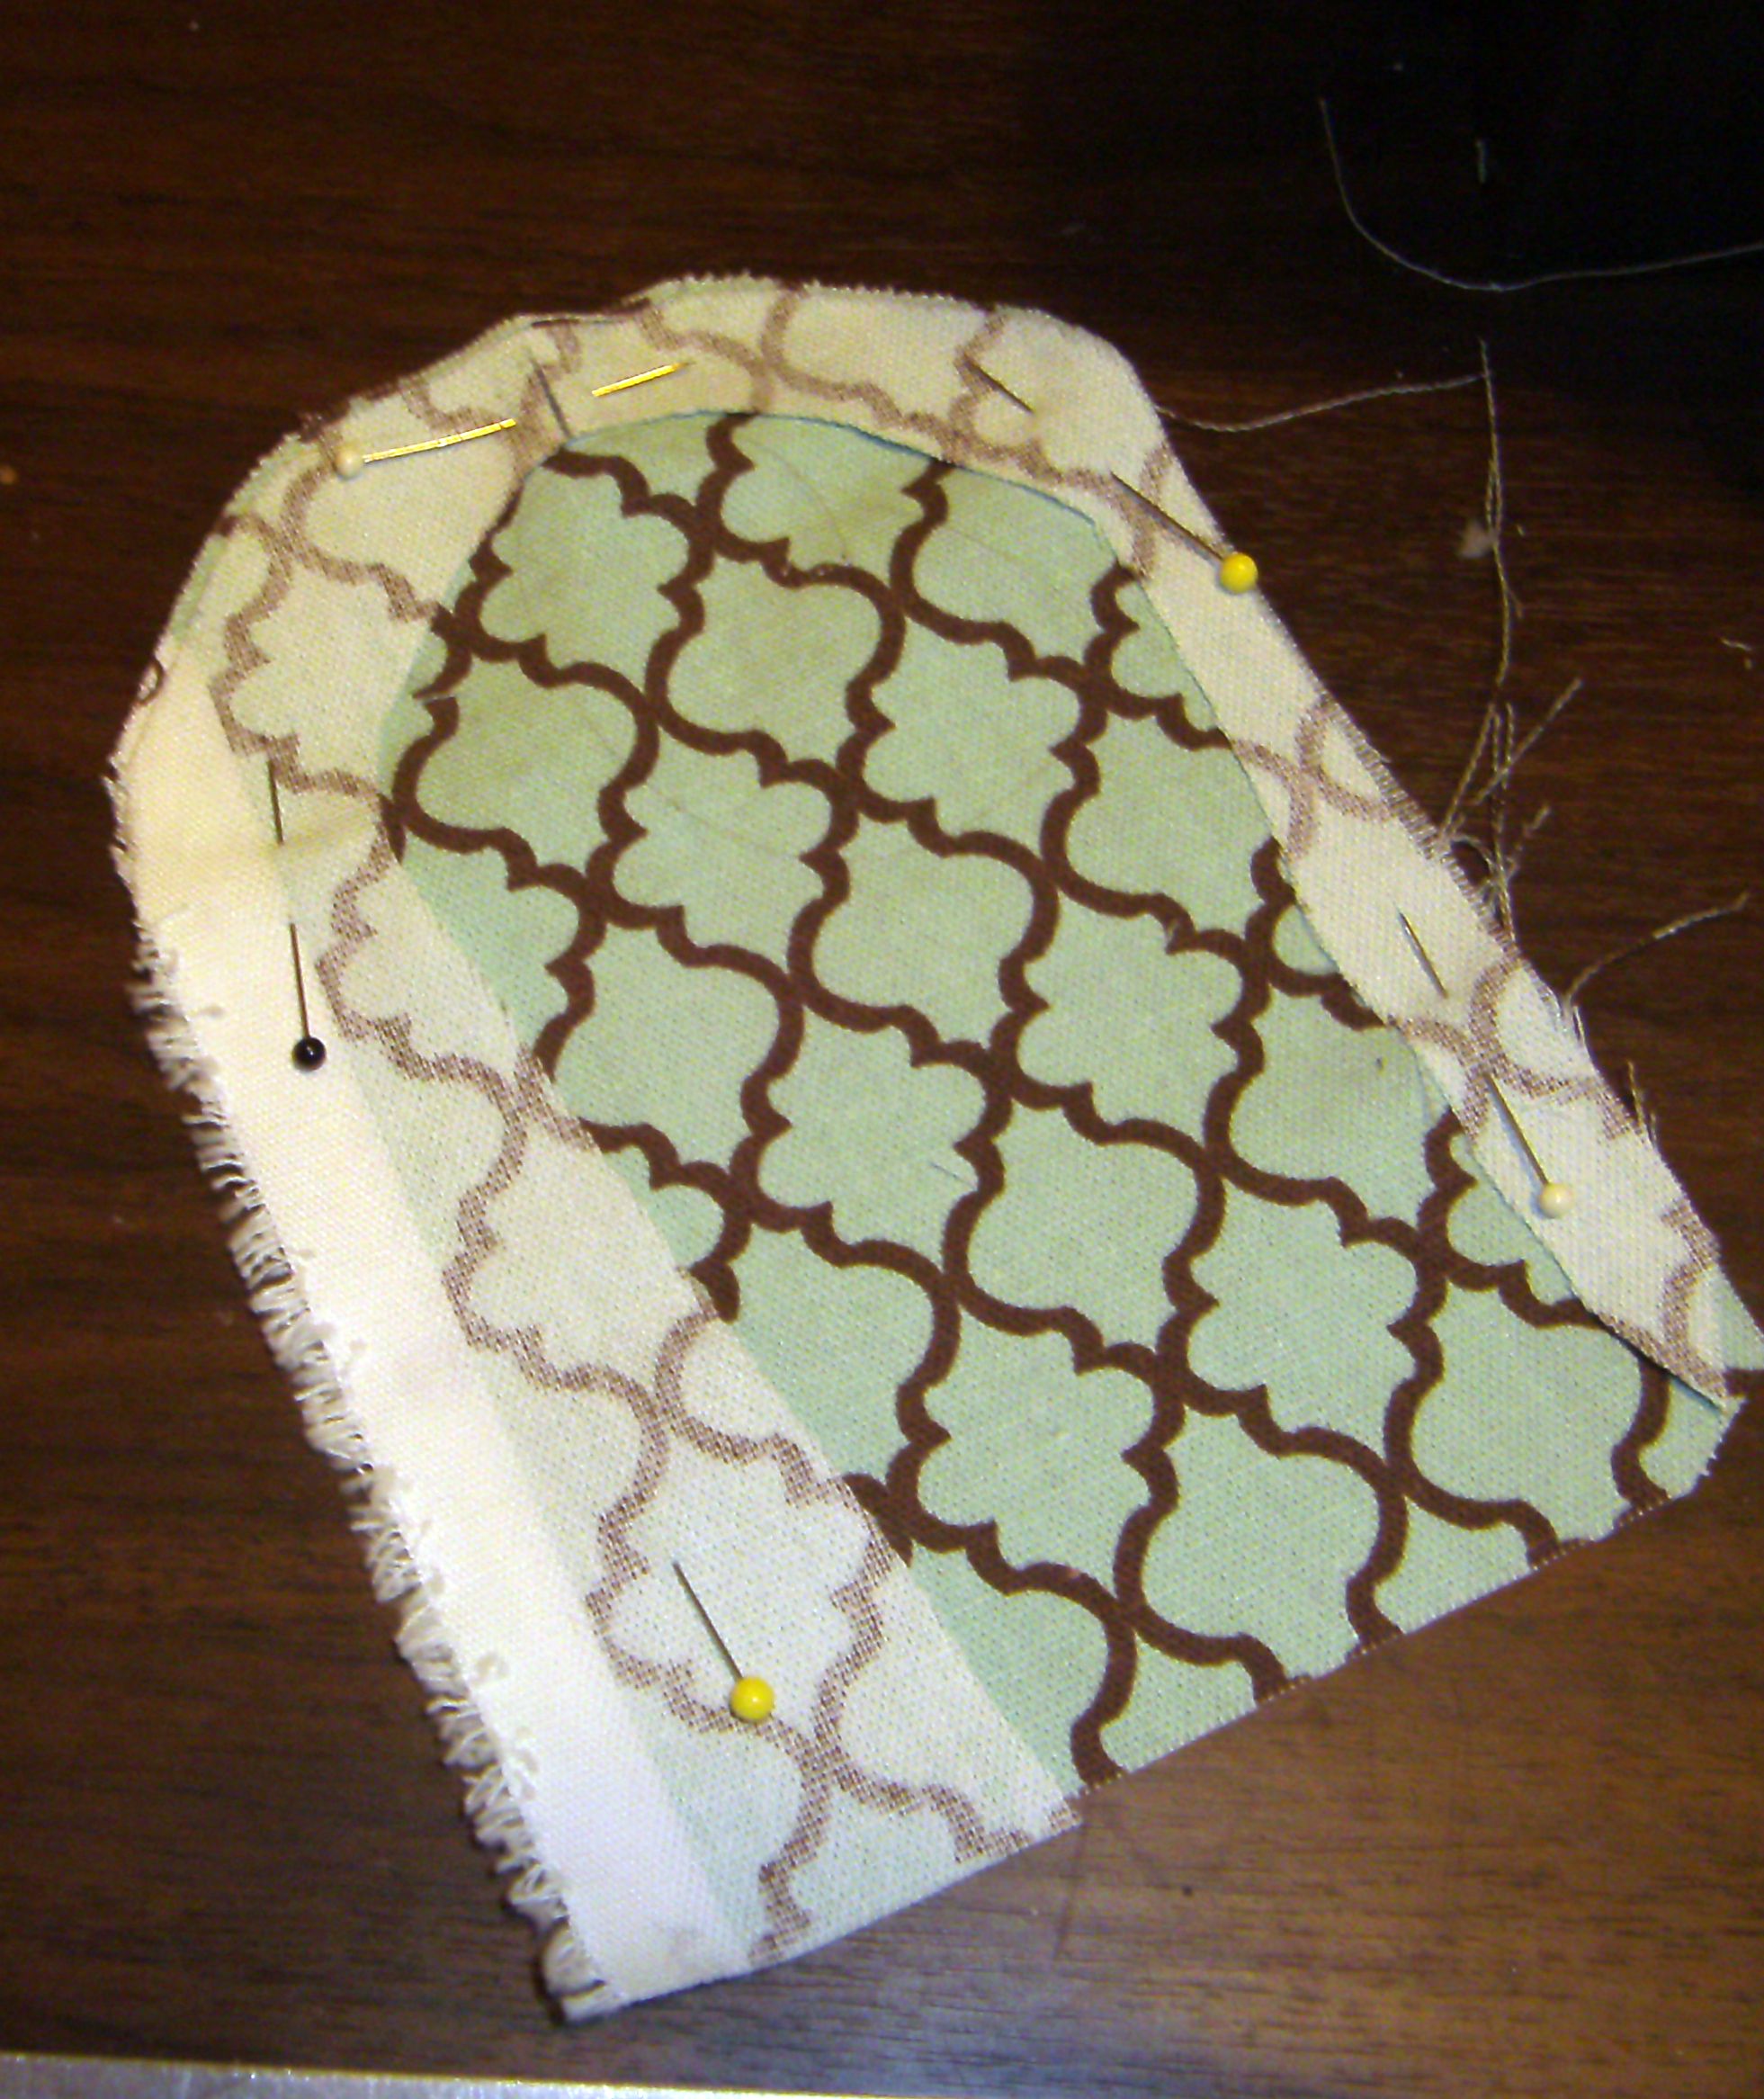
This is what my pattern looks look. The front from top to over the seat and down the front. The back. The arm, and down the side, and the front of the arm. You can see where I pleated the back piece rather than cut the excess off and put some tape on it. I’ve marked the center top of the arm cover and some directional instructions, such as where the arm cover turns into side hem and so forth.
5. Now, if you have a pattern fabric, like mine, fold it carefully down the middle of the print, and lay your front pattern on it and pin. Then using a clear ruler and chalk, give yourself 1 inch seam allowances. This will let you do some adjusting when you pin-fit the cover on the sofa.
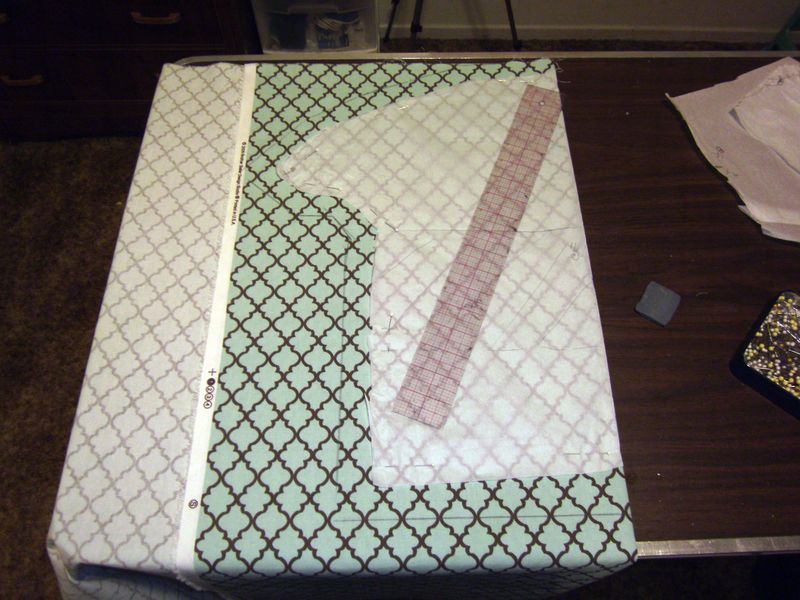
6. Move your fabric and pin the back of the sofa pattern on the same fold. If you have an obvious pattern to match, lay your arm pattern next to your front cover pattern piece fabric, trace mark and match your pieces so that the print can be matched at the hem of the sofa. Play around, take your time, but do what I learned to do: walk away for a while before cutting, then come back and triple check, then cut.
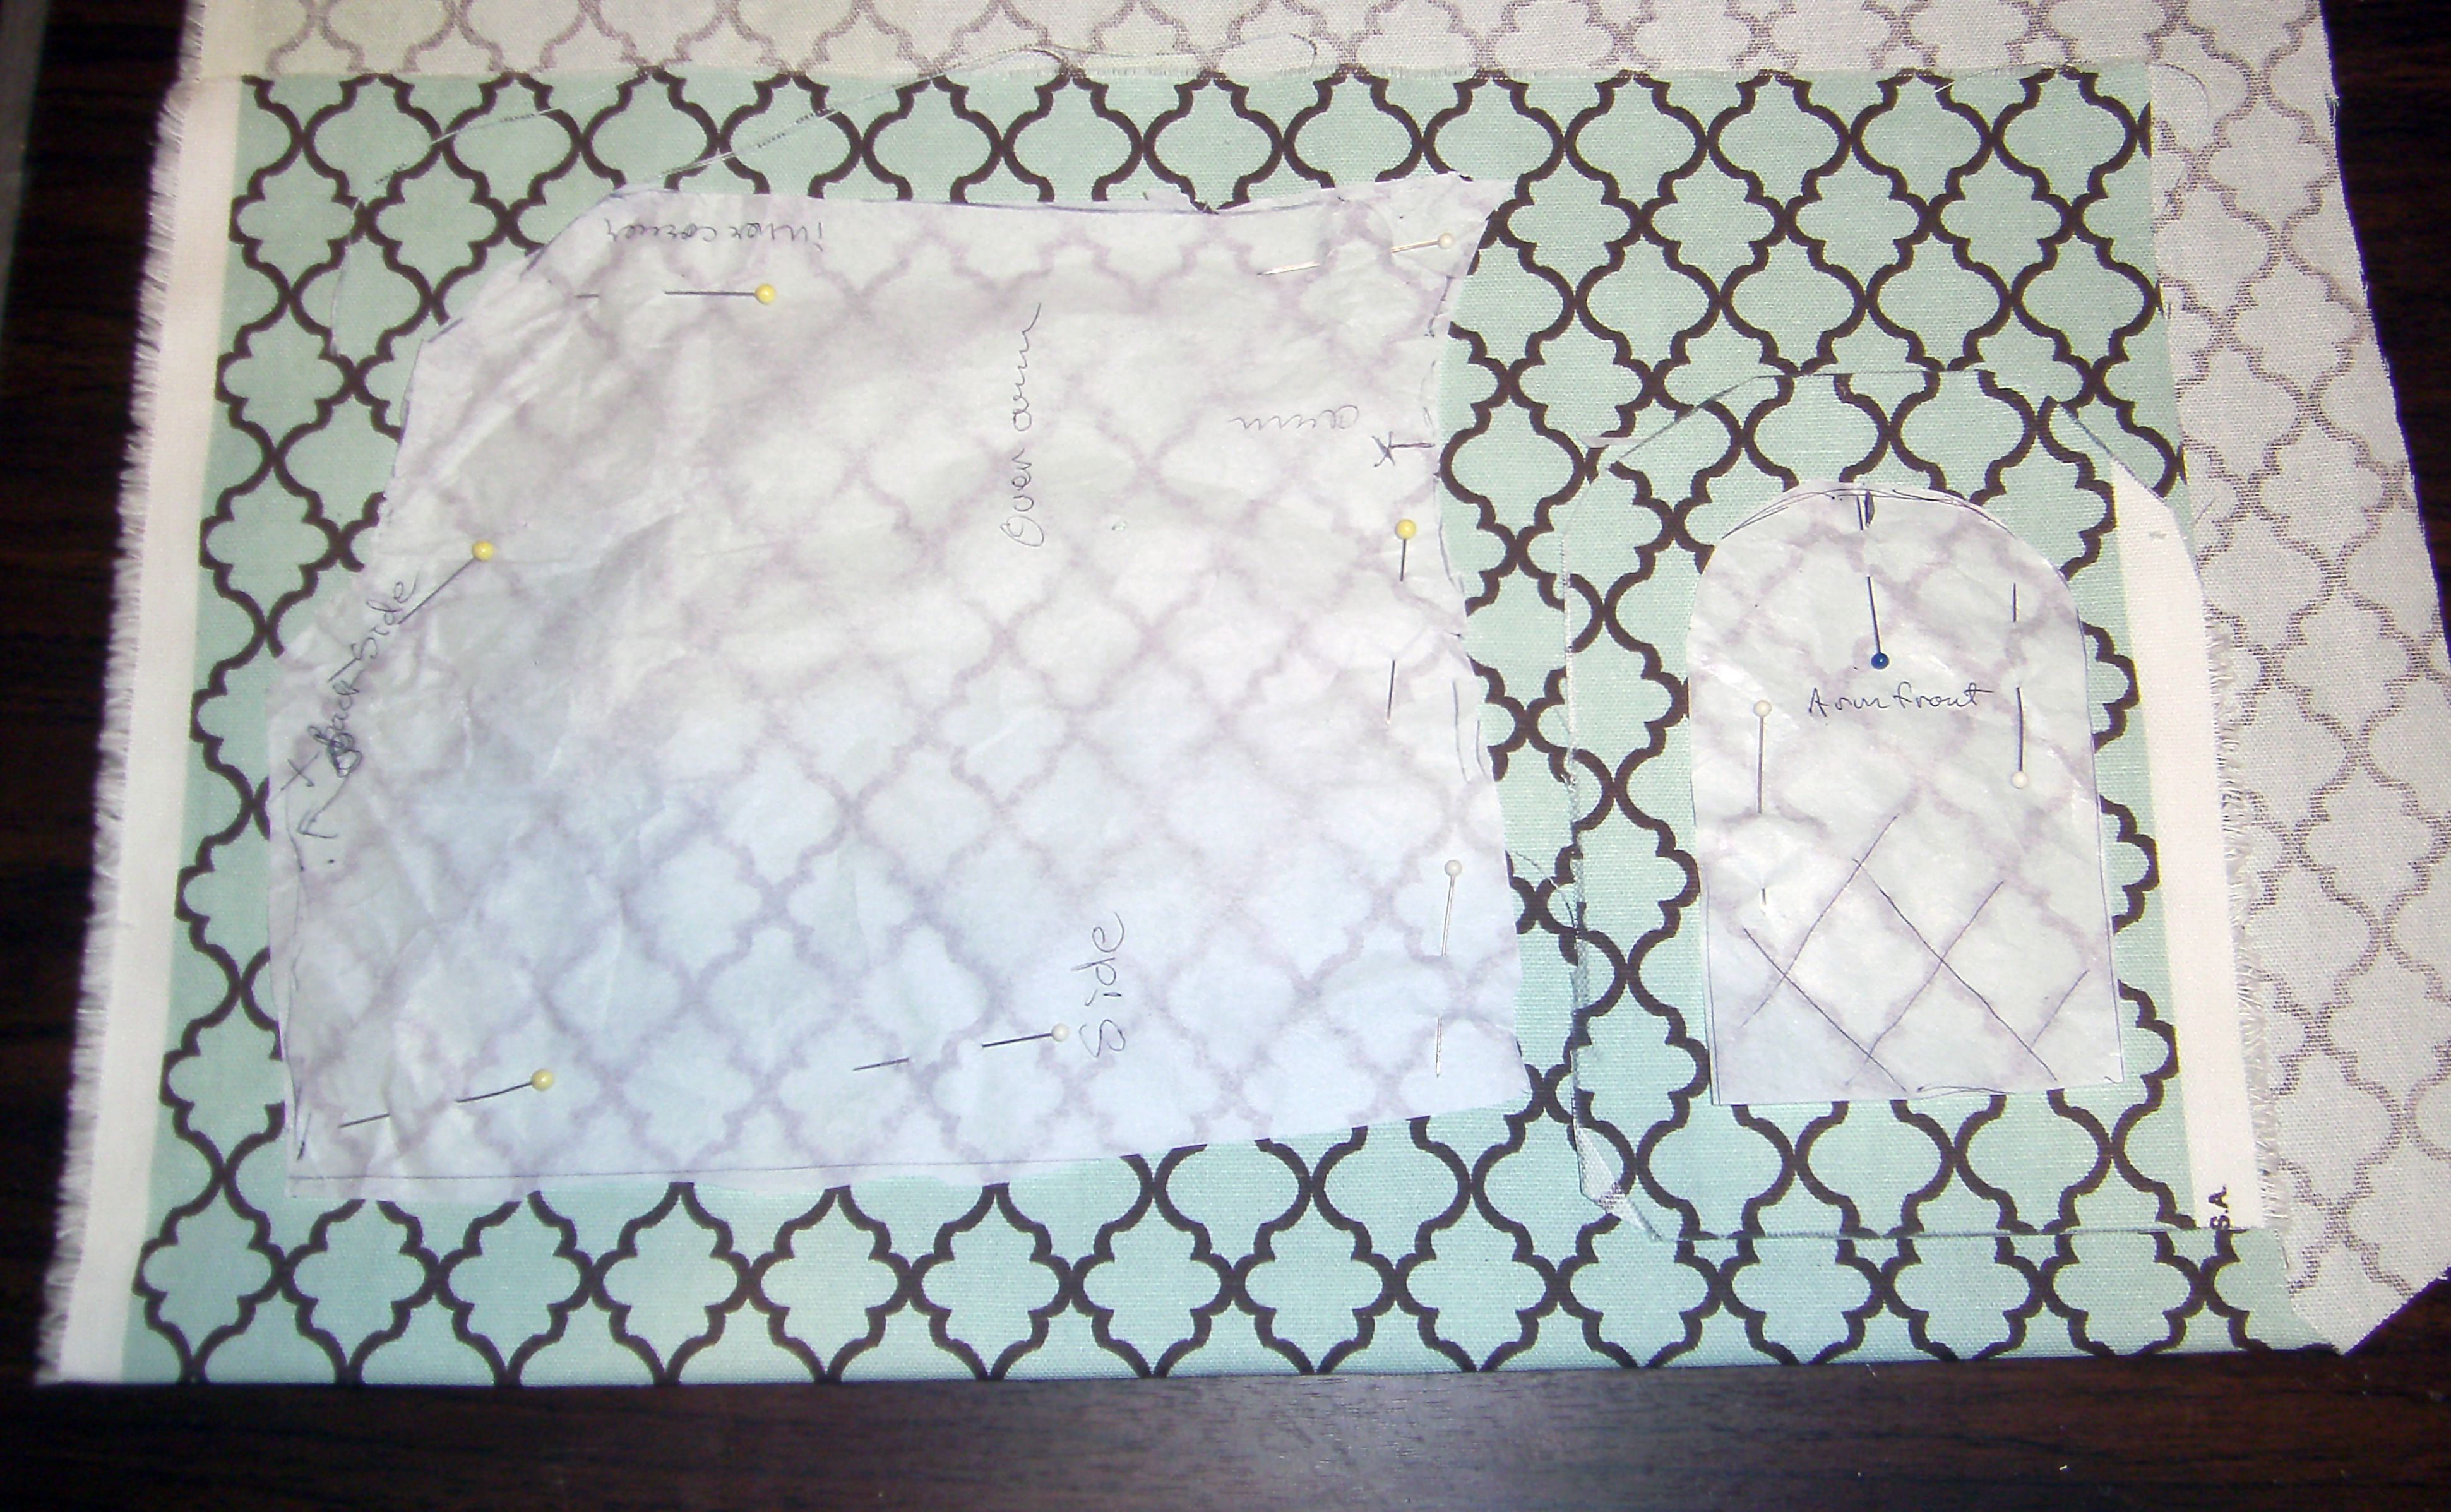
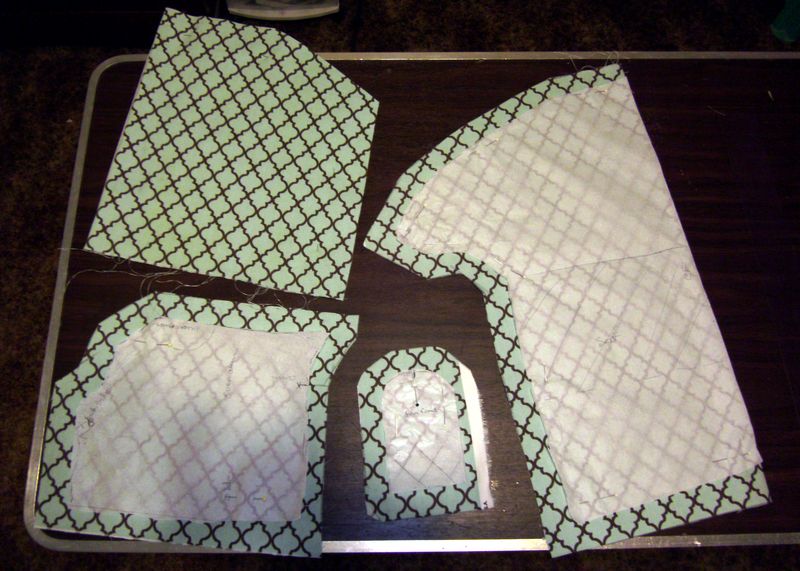
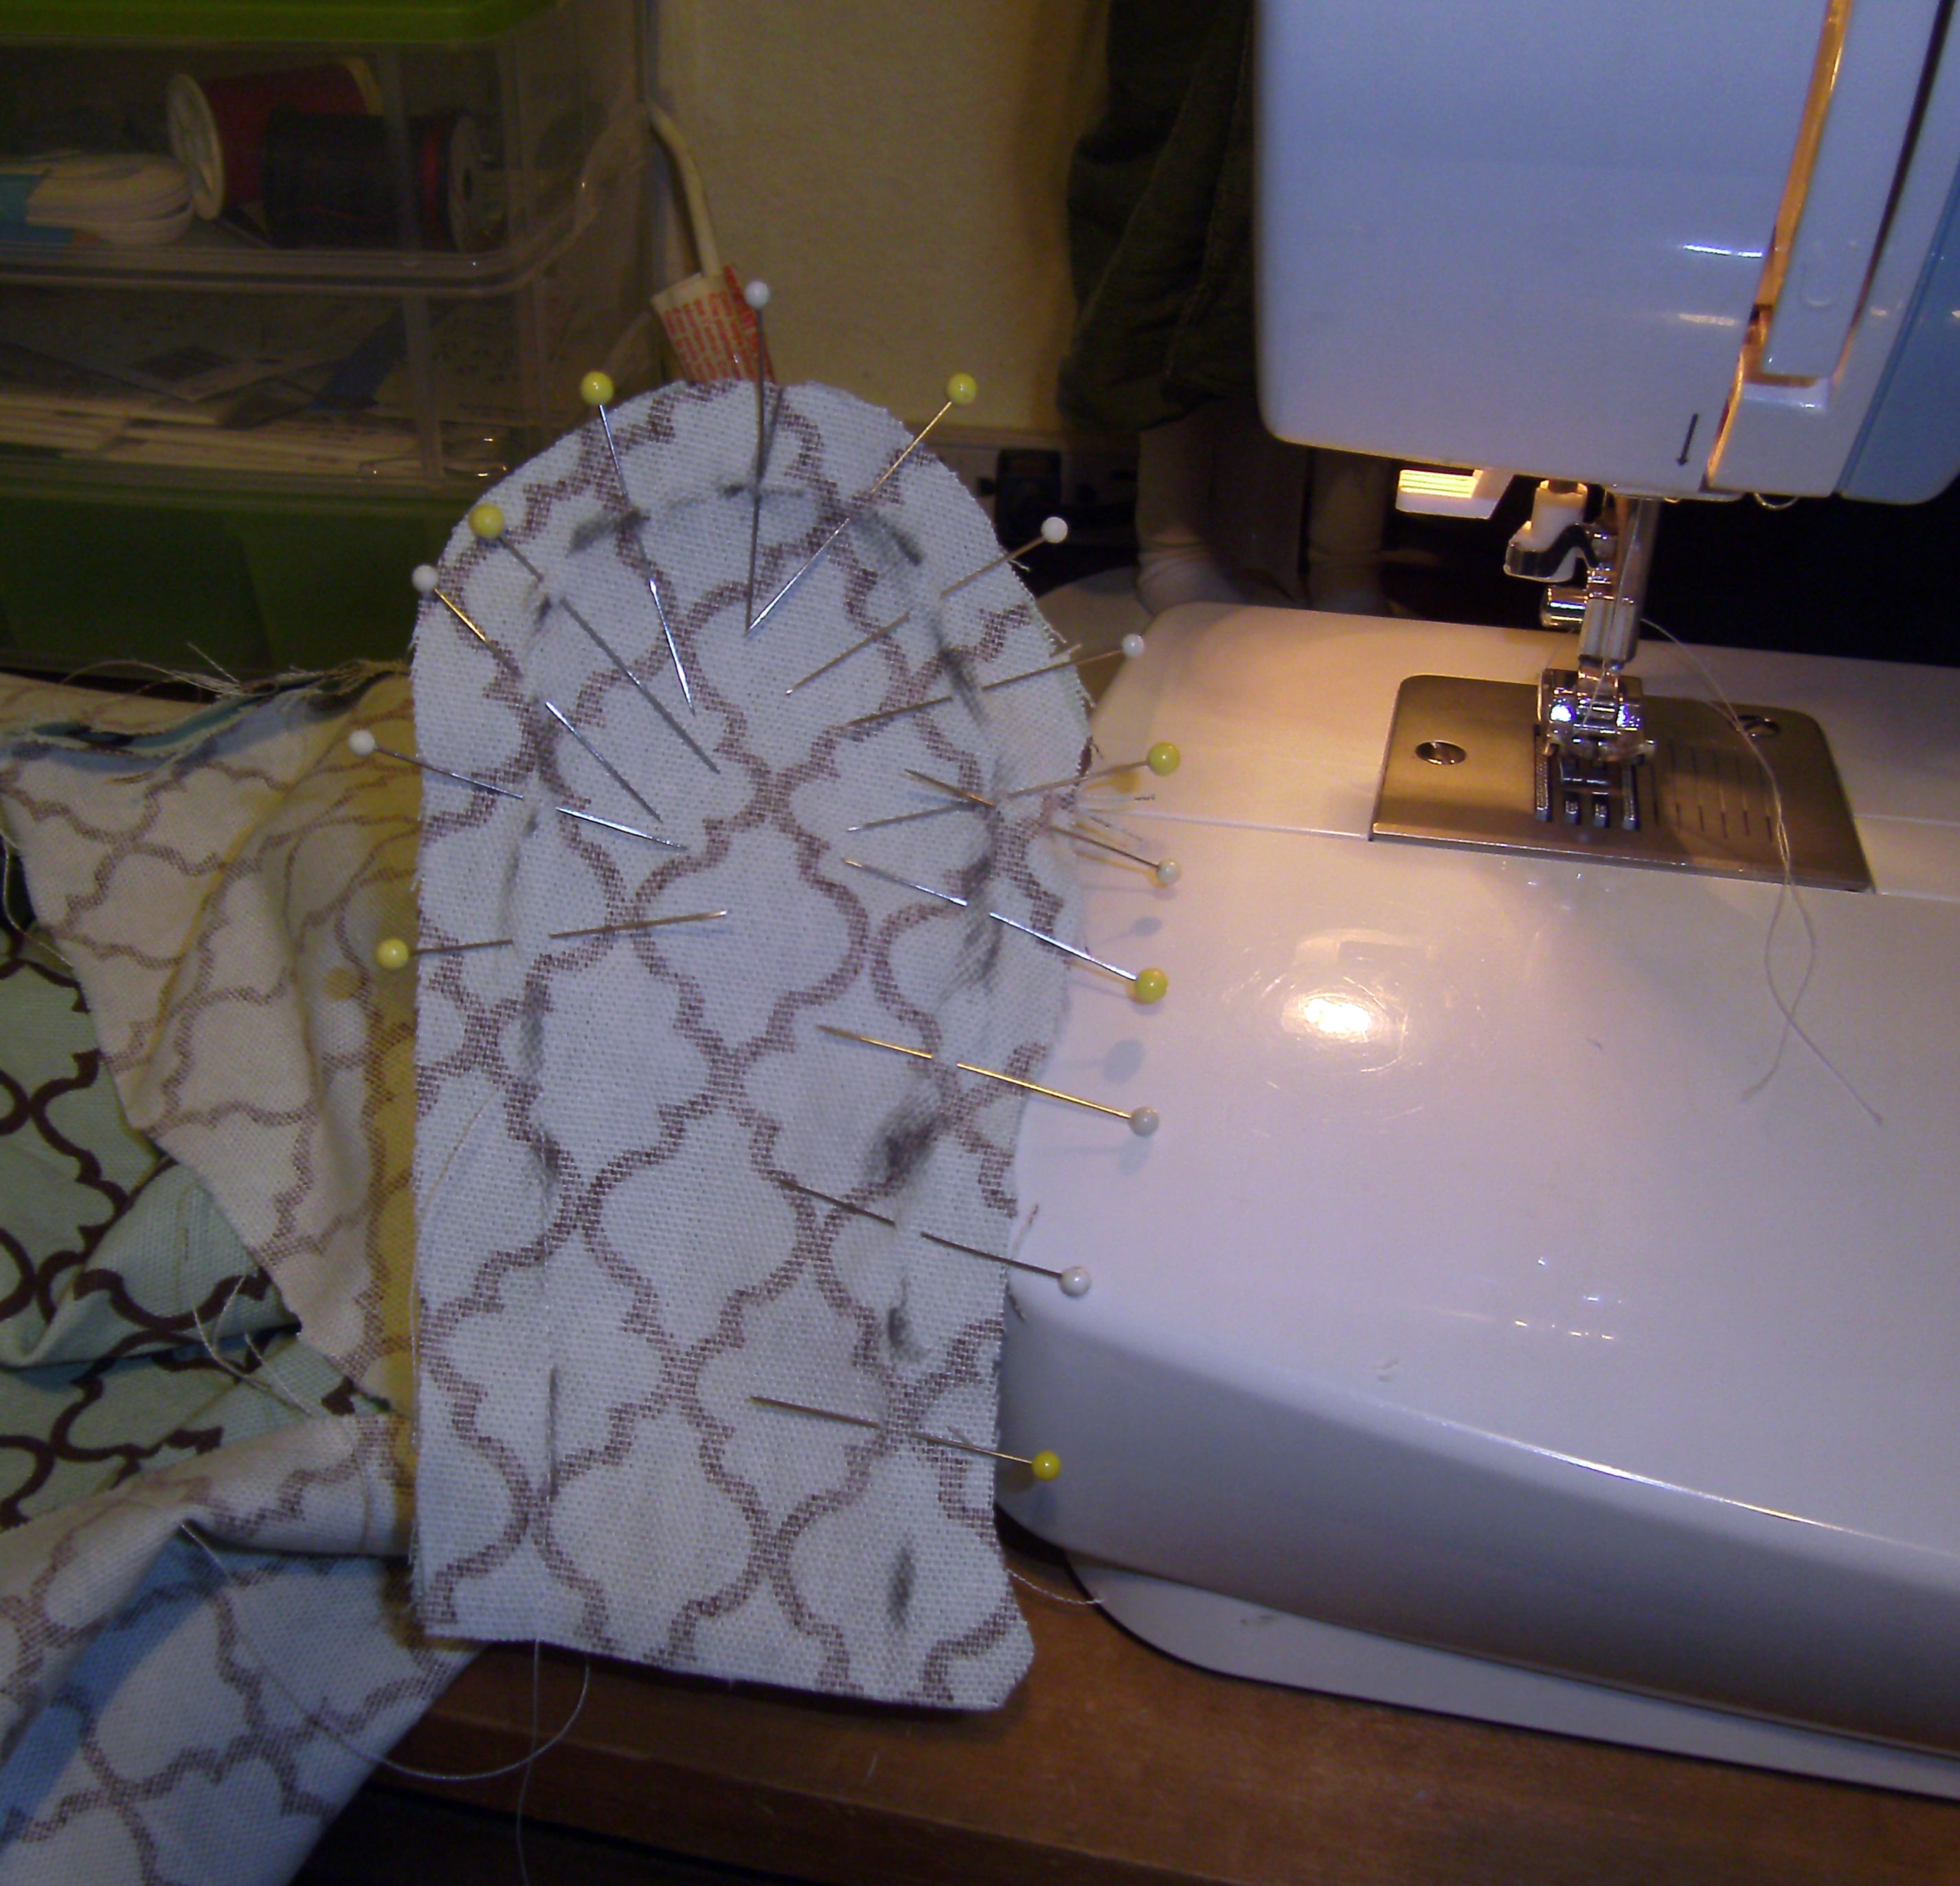
7. Now that you have all your fabric pieces cut out, you’ll see that your arm and side piece is the one you need to keep an eye on. It’s the most 3D of all the pieces. Write notes all over it!
8. Pin your cover pieces right side out on to the sofa and give them a good look over. Is there anything that needs changing, more notes? Is your understanding of the pieces clear? Is this not going to be the most awesome thing your dolls can have? Go for it!
9. Now it’s time to flip your pieces wrong side out and start pinning them loosely. We’re just going for a rough fit to start with, then you can fine tune it. Start with the back and front at the top. Make sure the pieces are centered on your sofa, and chalk mark the seat so you can use that as your line each time you re-fit and pin. Line up your printed pattern from the center back out and the rest will fall into place.
10. You’ll be doing this process over and over a few times. Sew, fit and mark, re-sew. You don’t want your slip cover ‘skin tight’, because you’ll need to be able to slip it over the sofa. You can see here where I flubbed the curve and just redid it.
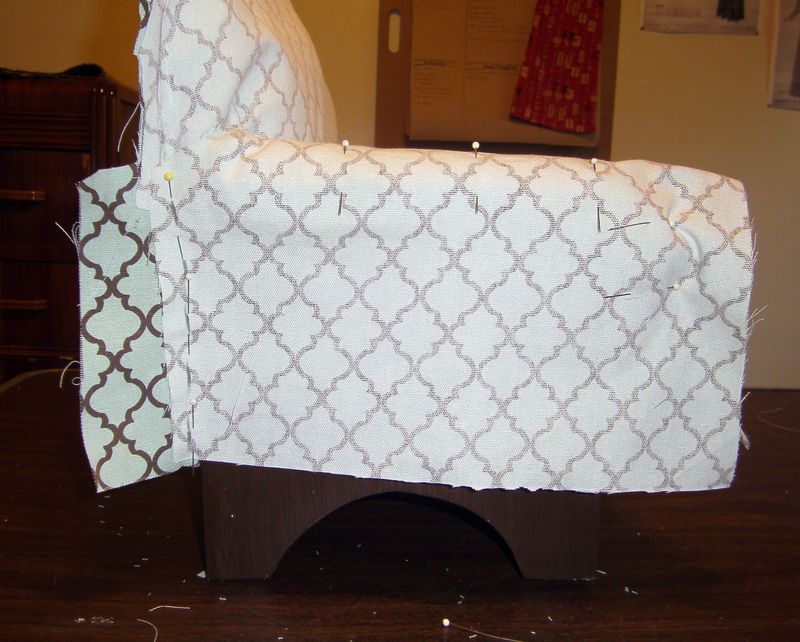
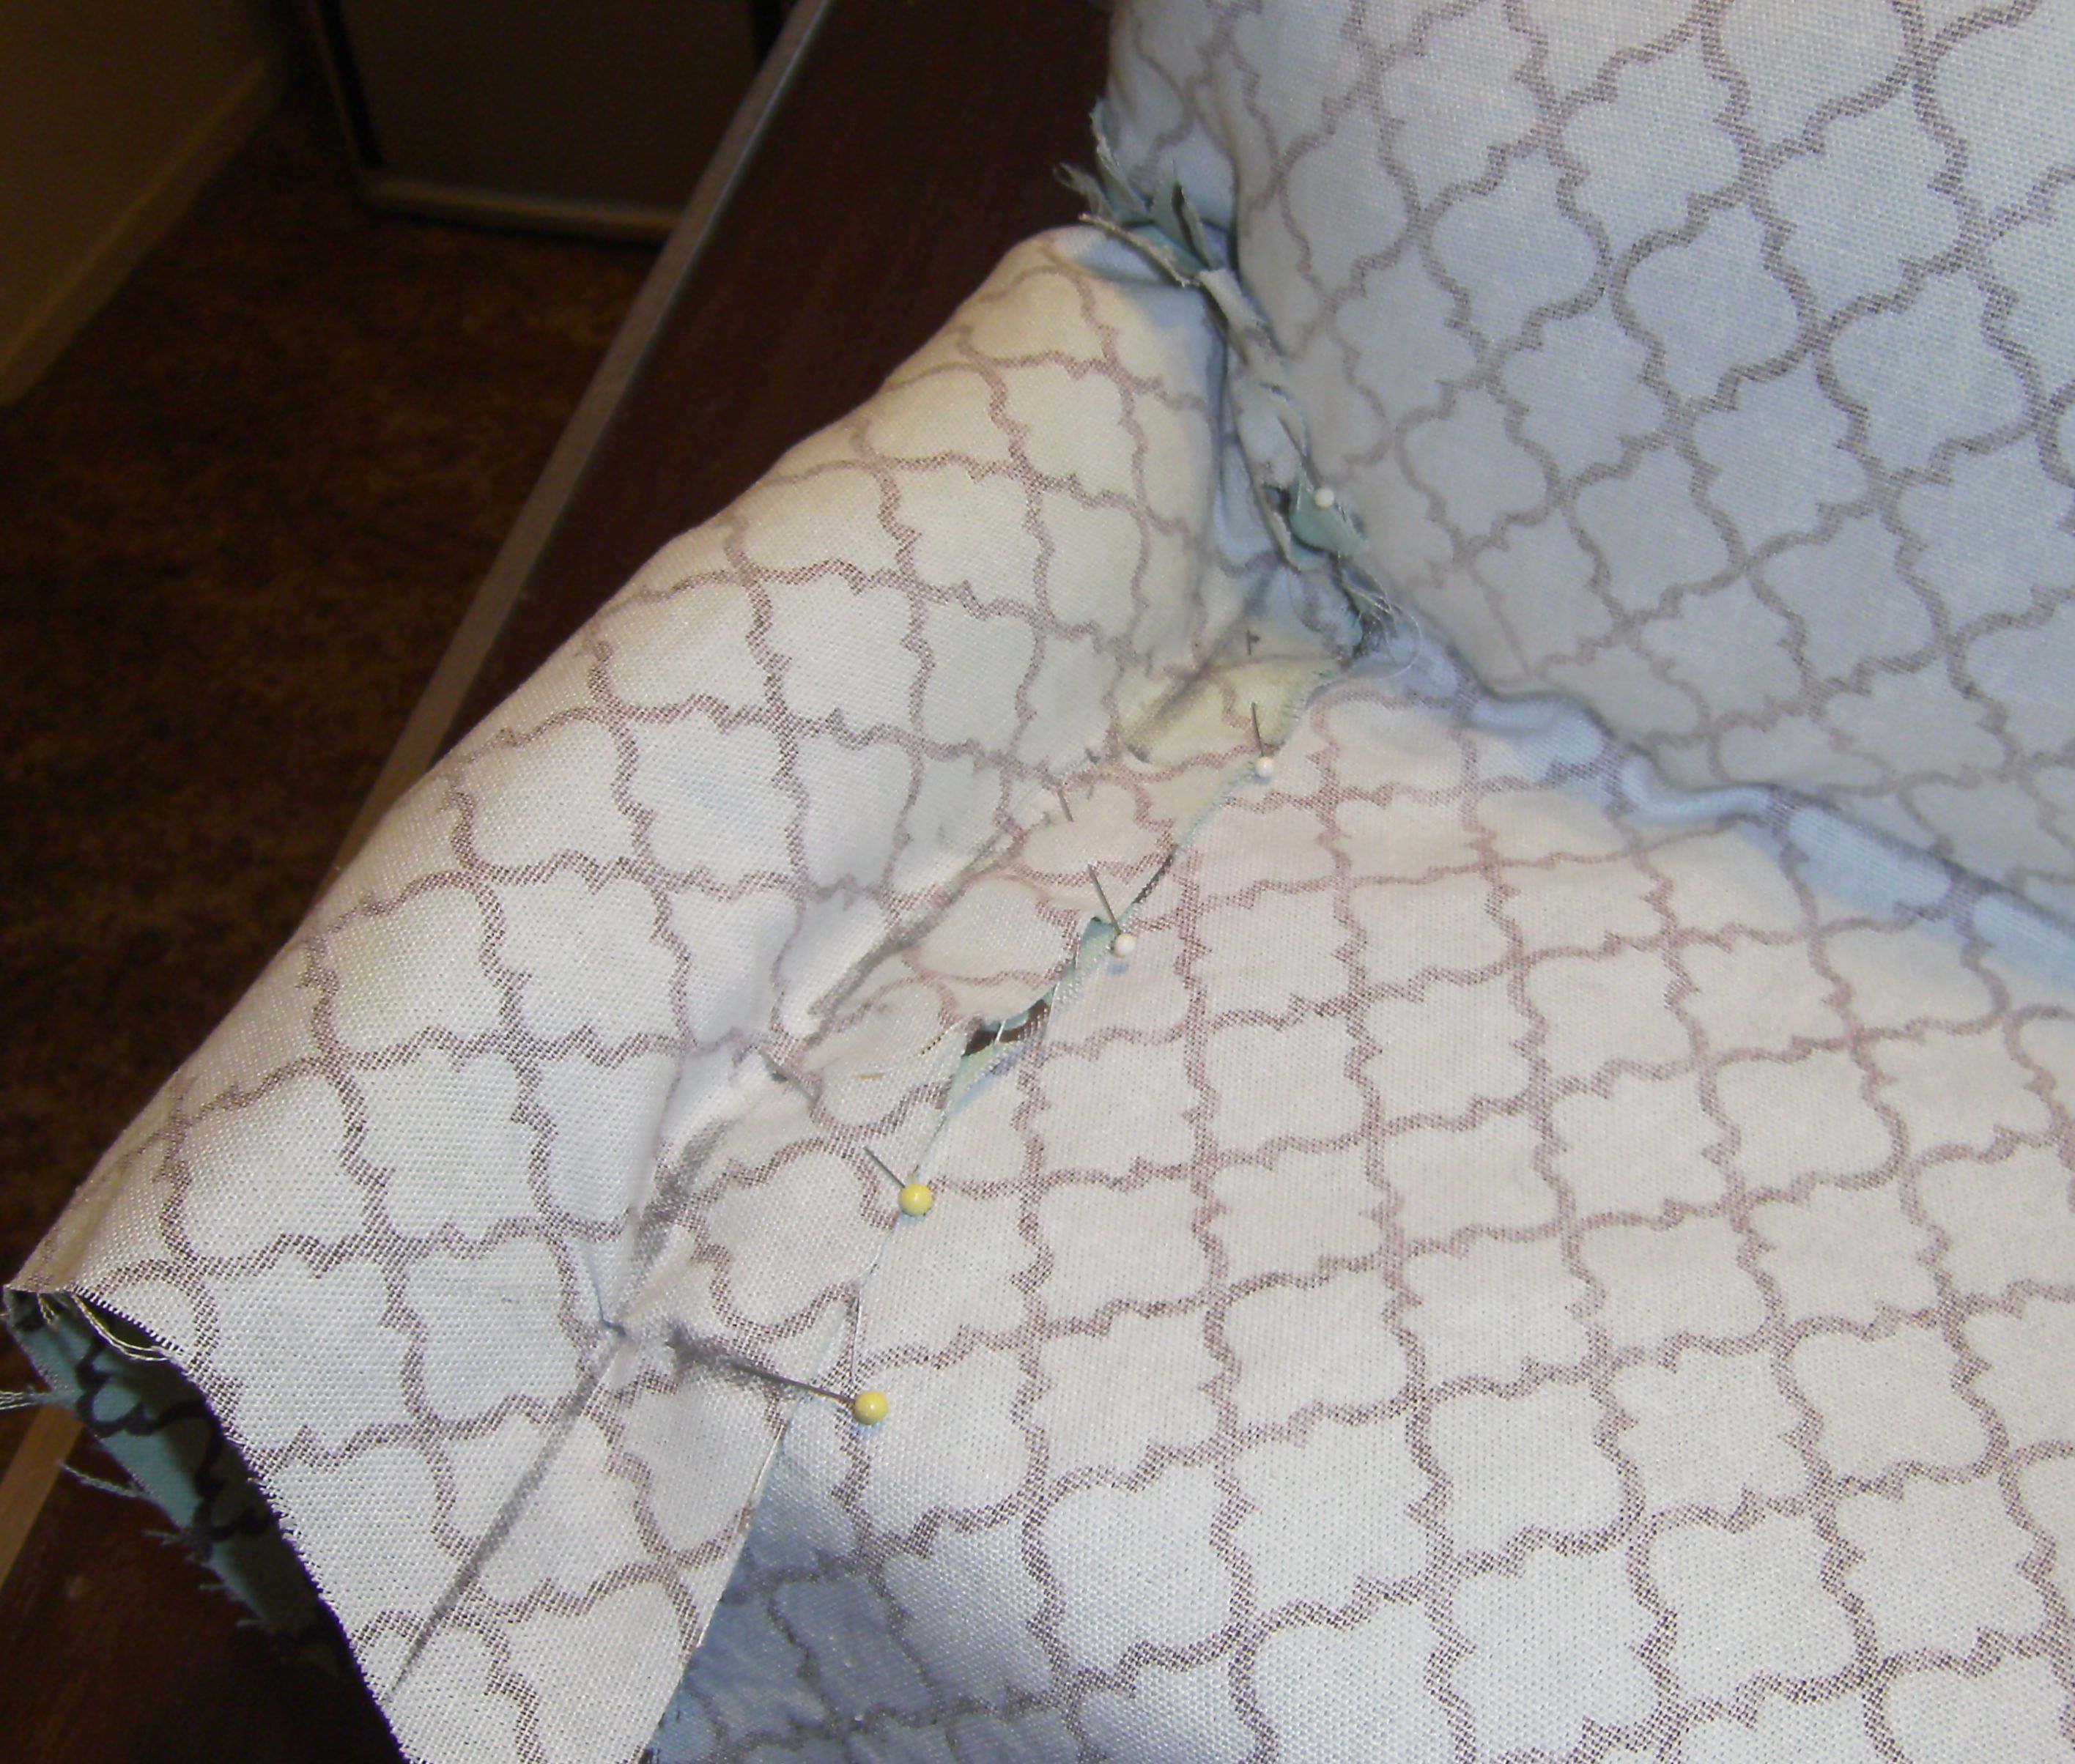
11. Make sure your back hangs straight, and roll the top seam to the very back edge of the top of the sofa. Once your top seam is in place, work with the side seams above the arm of the sofa. Pin and mark your seam line, then sew down to just where the top of the sofa arm begins.
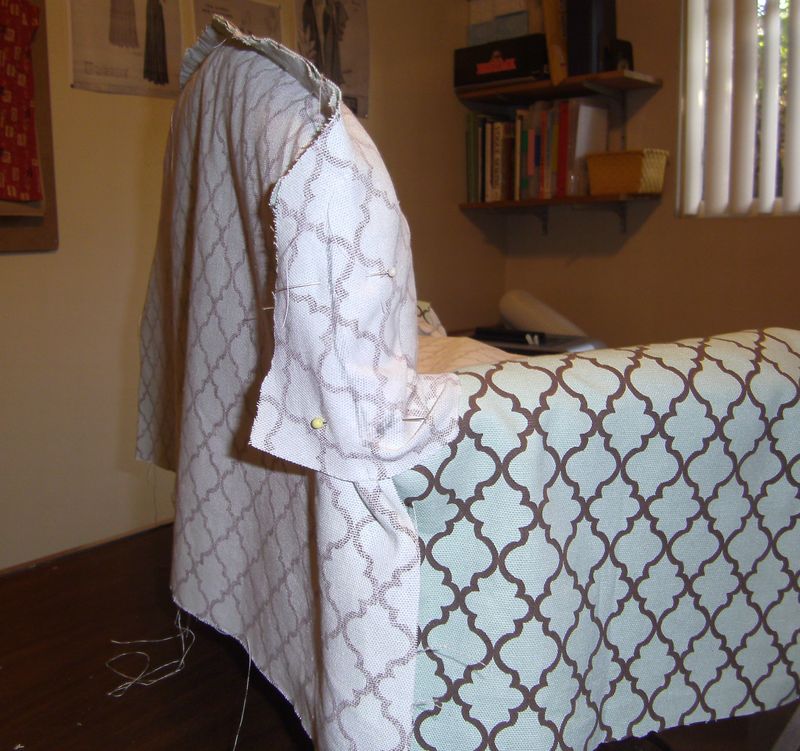
12. With your sofa cover inside out and centered, and your back piece hanging straight, pin your arm cover side piece in place to the padding, so that it hangs correctly and the bottom is even with the back and front of the slip cover, and fit the back to the arm piece side and chalk mark. As you can see I’ve lined up the print as best as possible. Cut off the excess, remove the pieces from the sofa and sew. Do the same for the other side.
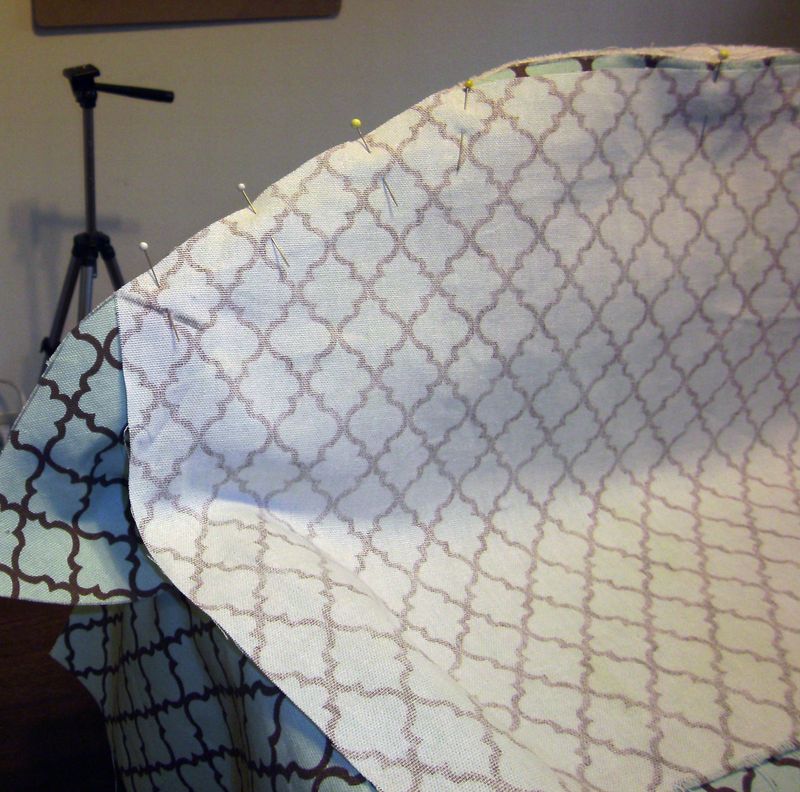
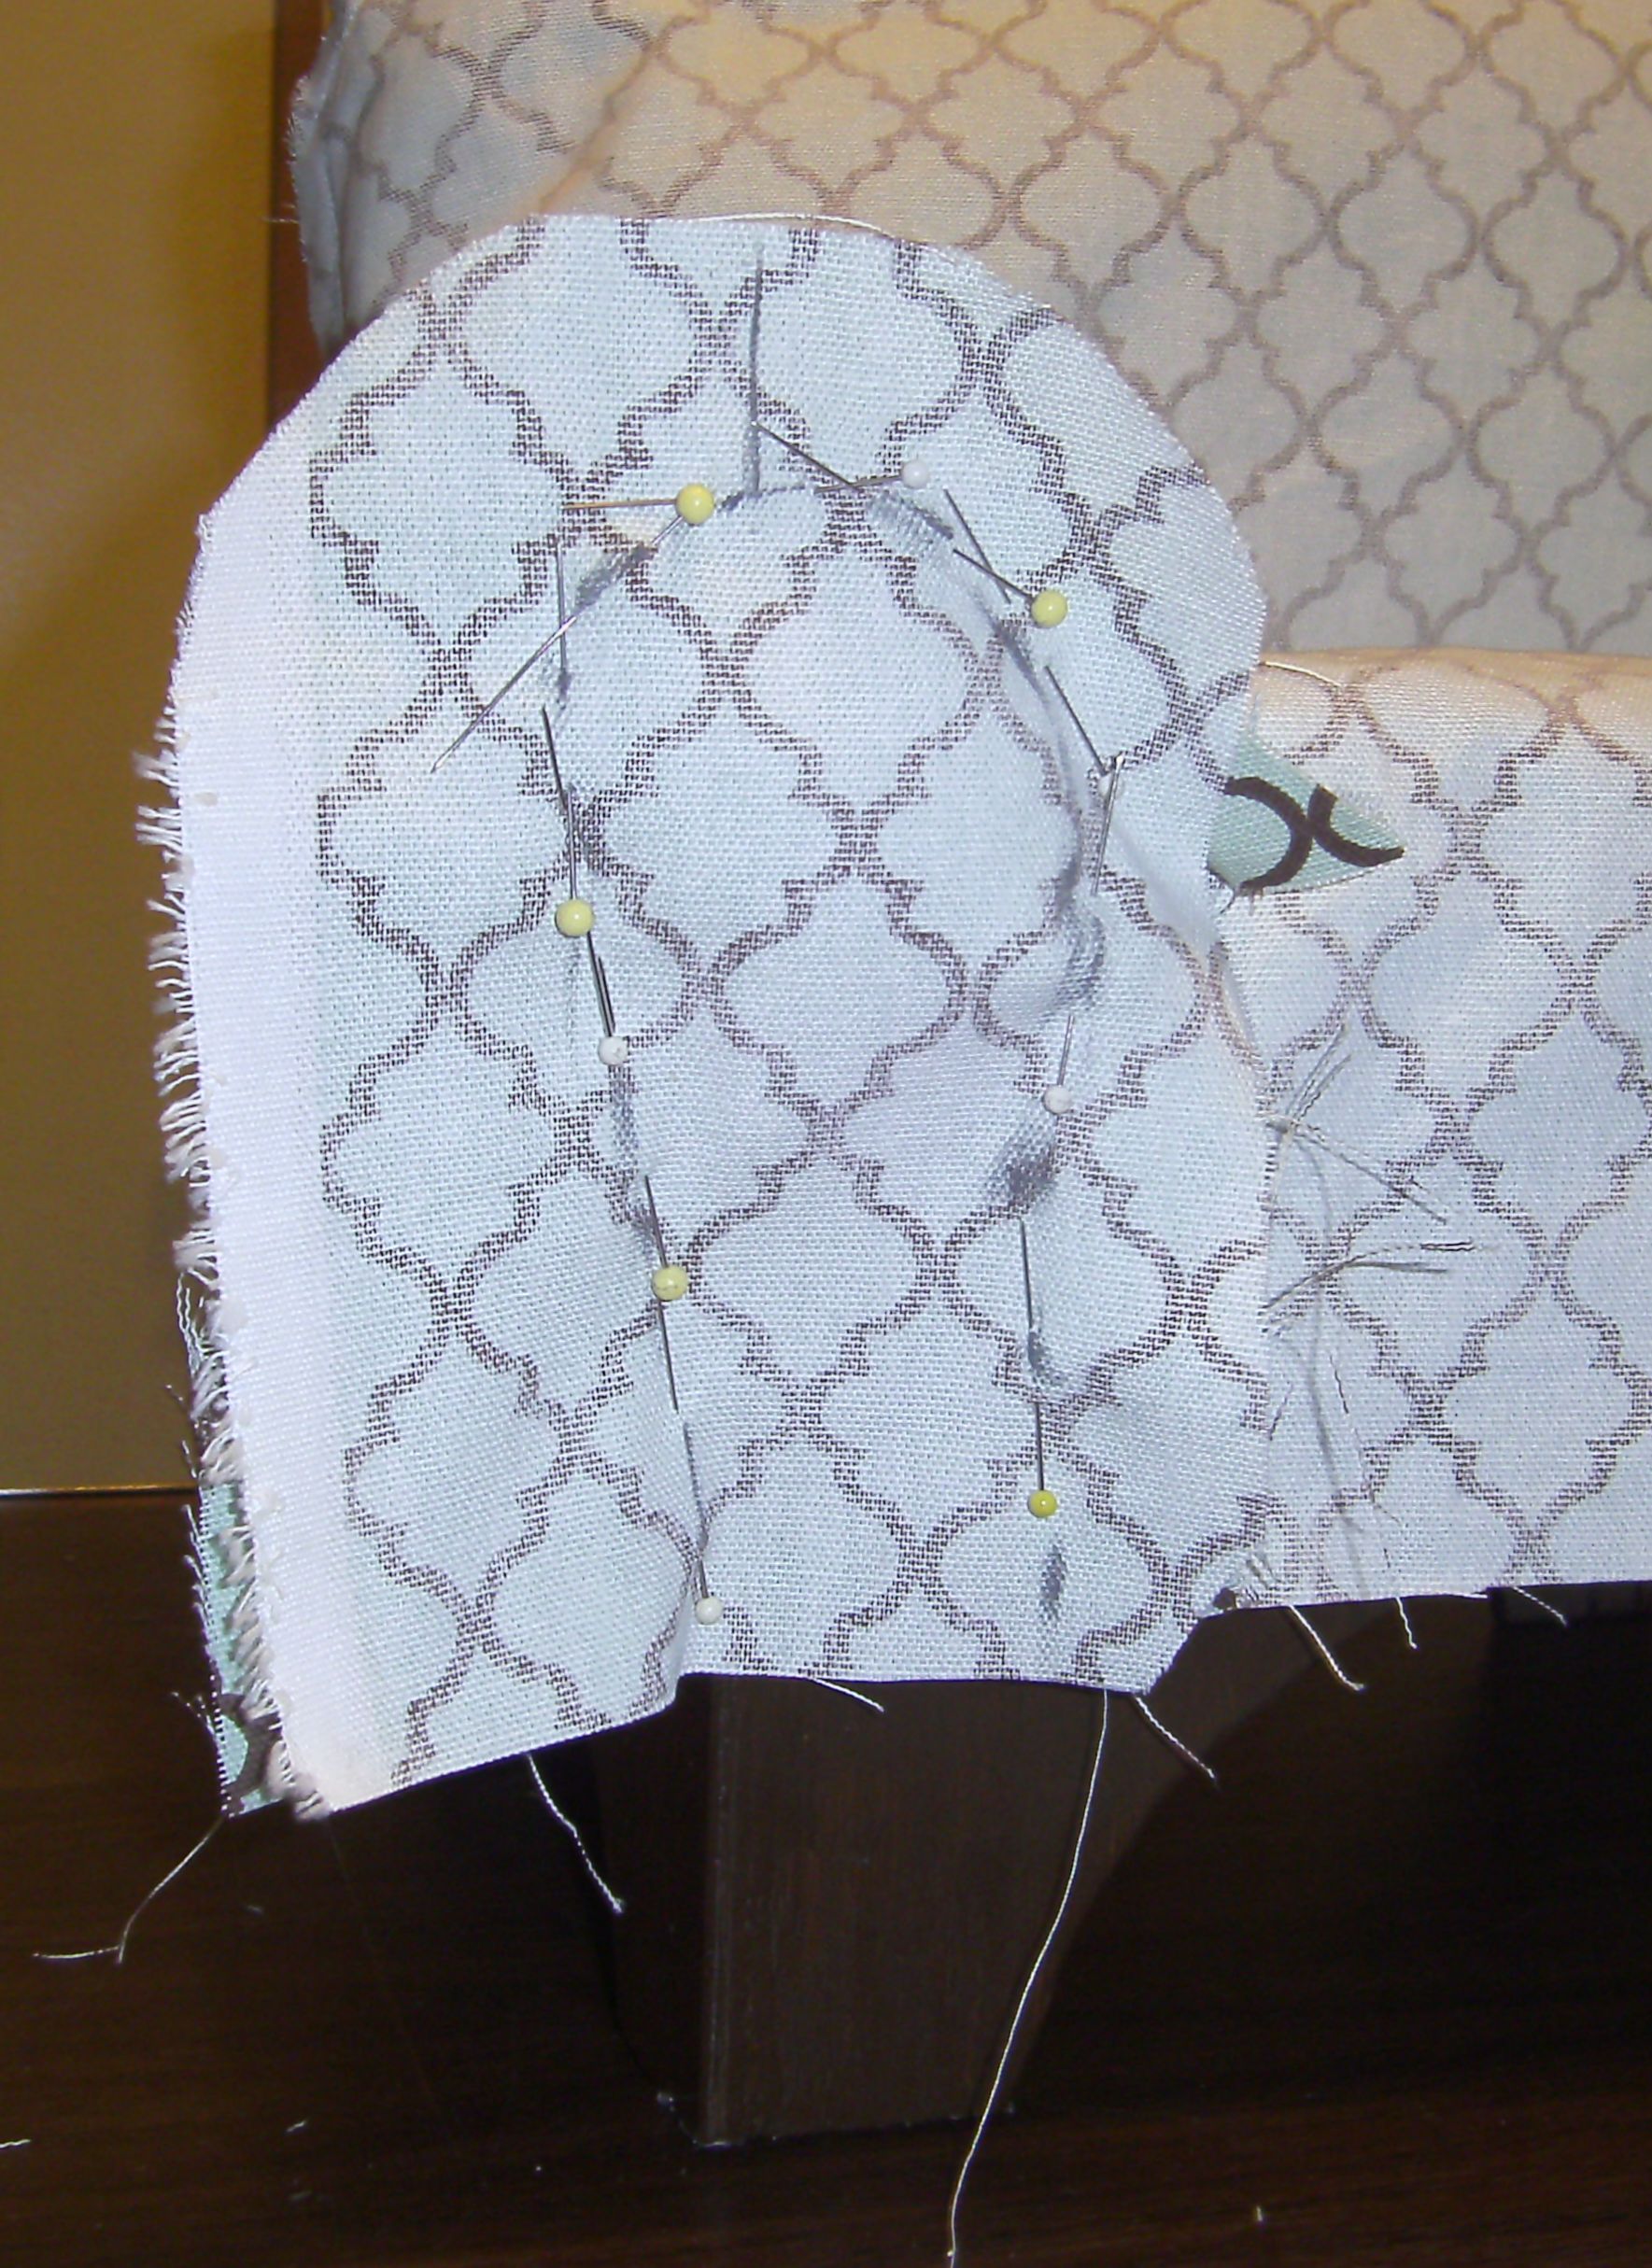
13. Now you’re ready to sew the inner side of the arm cover piece on. Make sure your sofa cover is lined up, and fold the arm piece over and tuck it in so that you can mark it with the chalk. This photo shows what it should look like when you’ve done that.
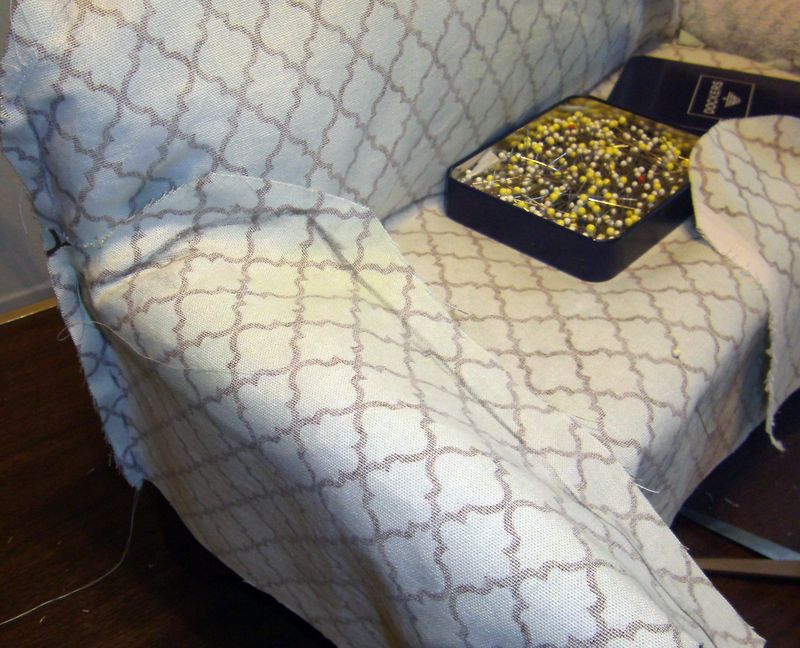
14. Pin the pieces matching them up carefully on both sides (stick the pin straight through and check the other side, line it up, then pinch and pin to sew). Clip the curved and round areas so you can sew them more easily as a straight line. If you get any puckers or pinched fabric, pick out the stitches and resew.
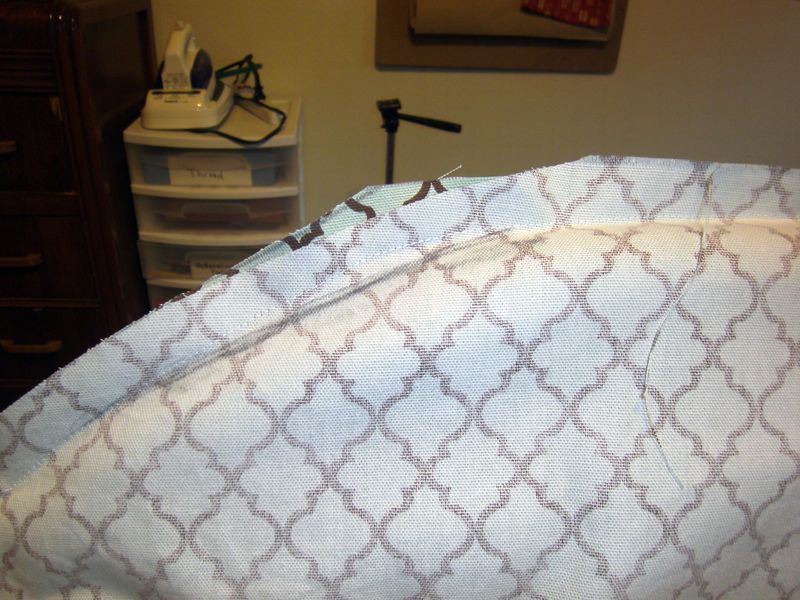
15. Put the cover on the sofa and check your work. Remember this is a slip cover, it’s not going to fit as perfectly as upholstery. But your back side seam should be nice and straight, not to detract from the look of the over all project. Now reverse your slip cover and pin the inner side to the seat fabric, taking care to mark your seam line with the chalk.
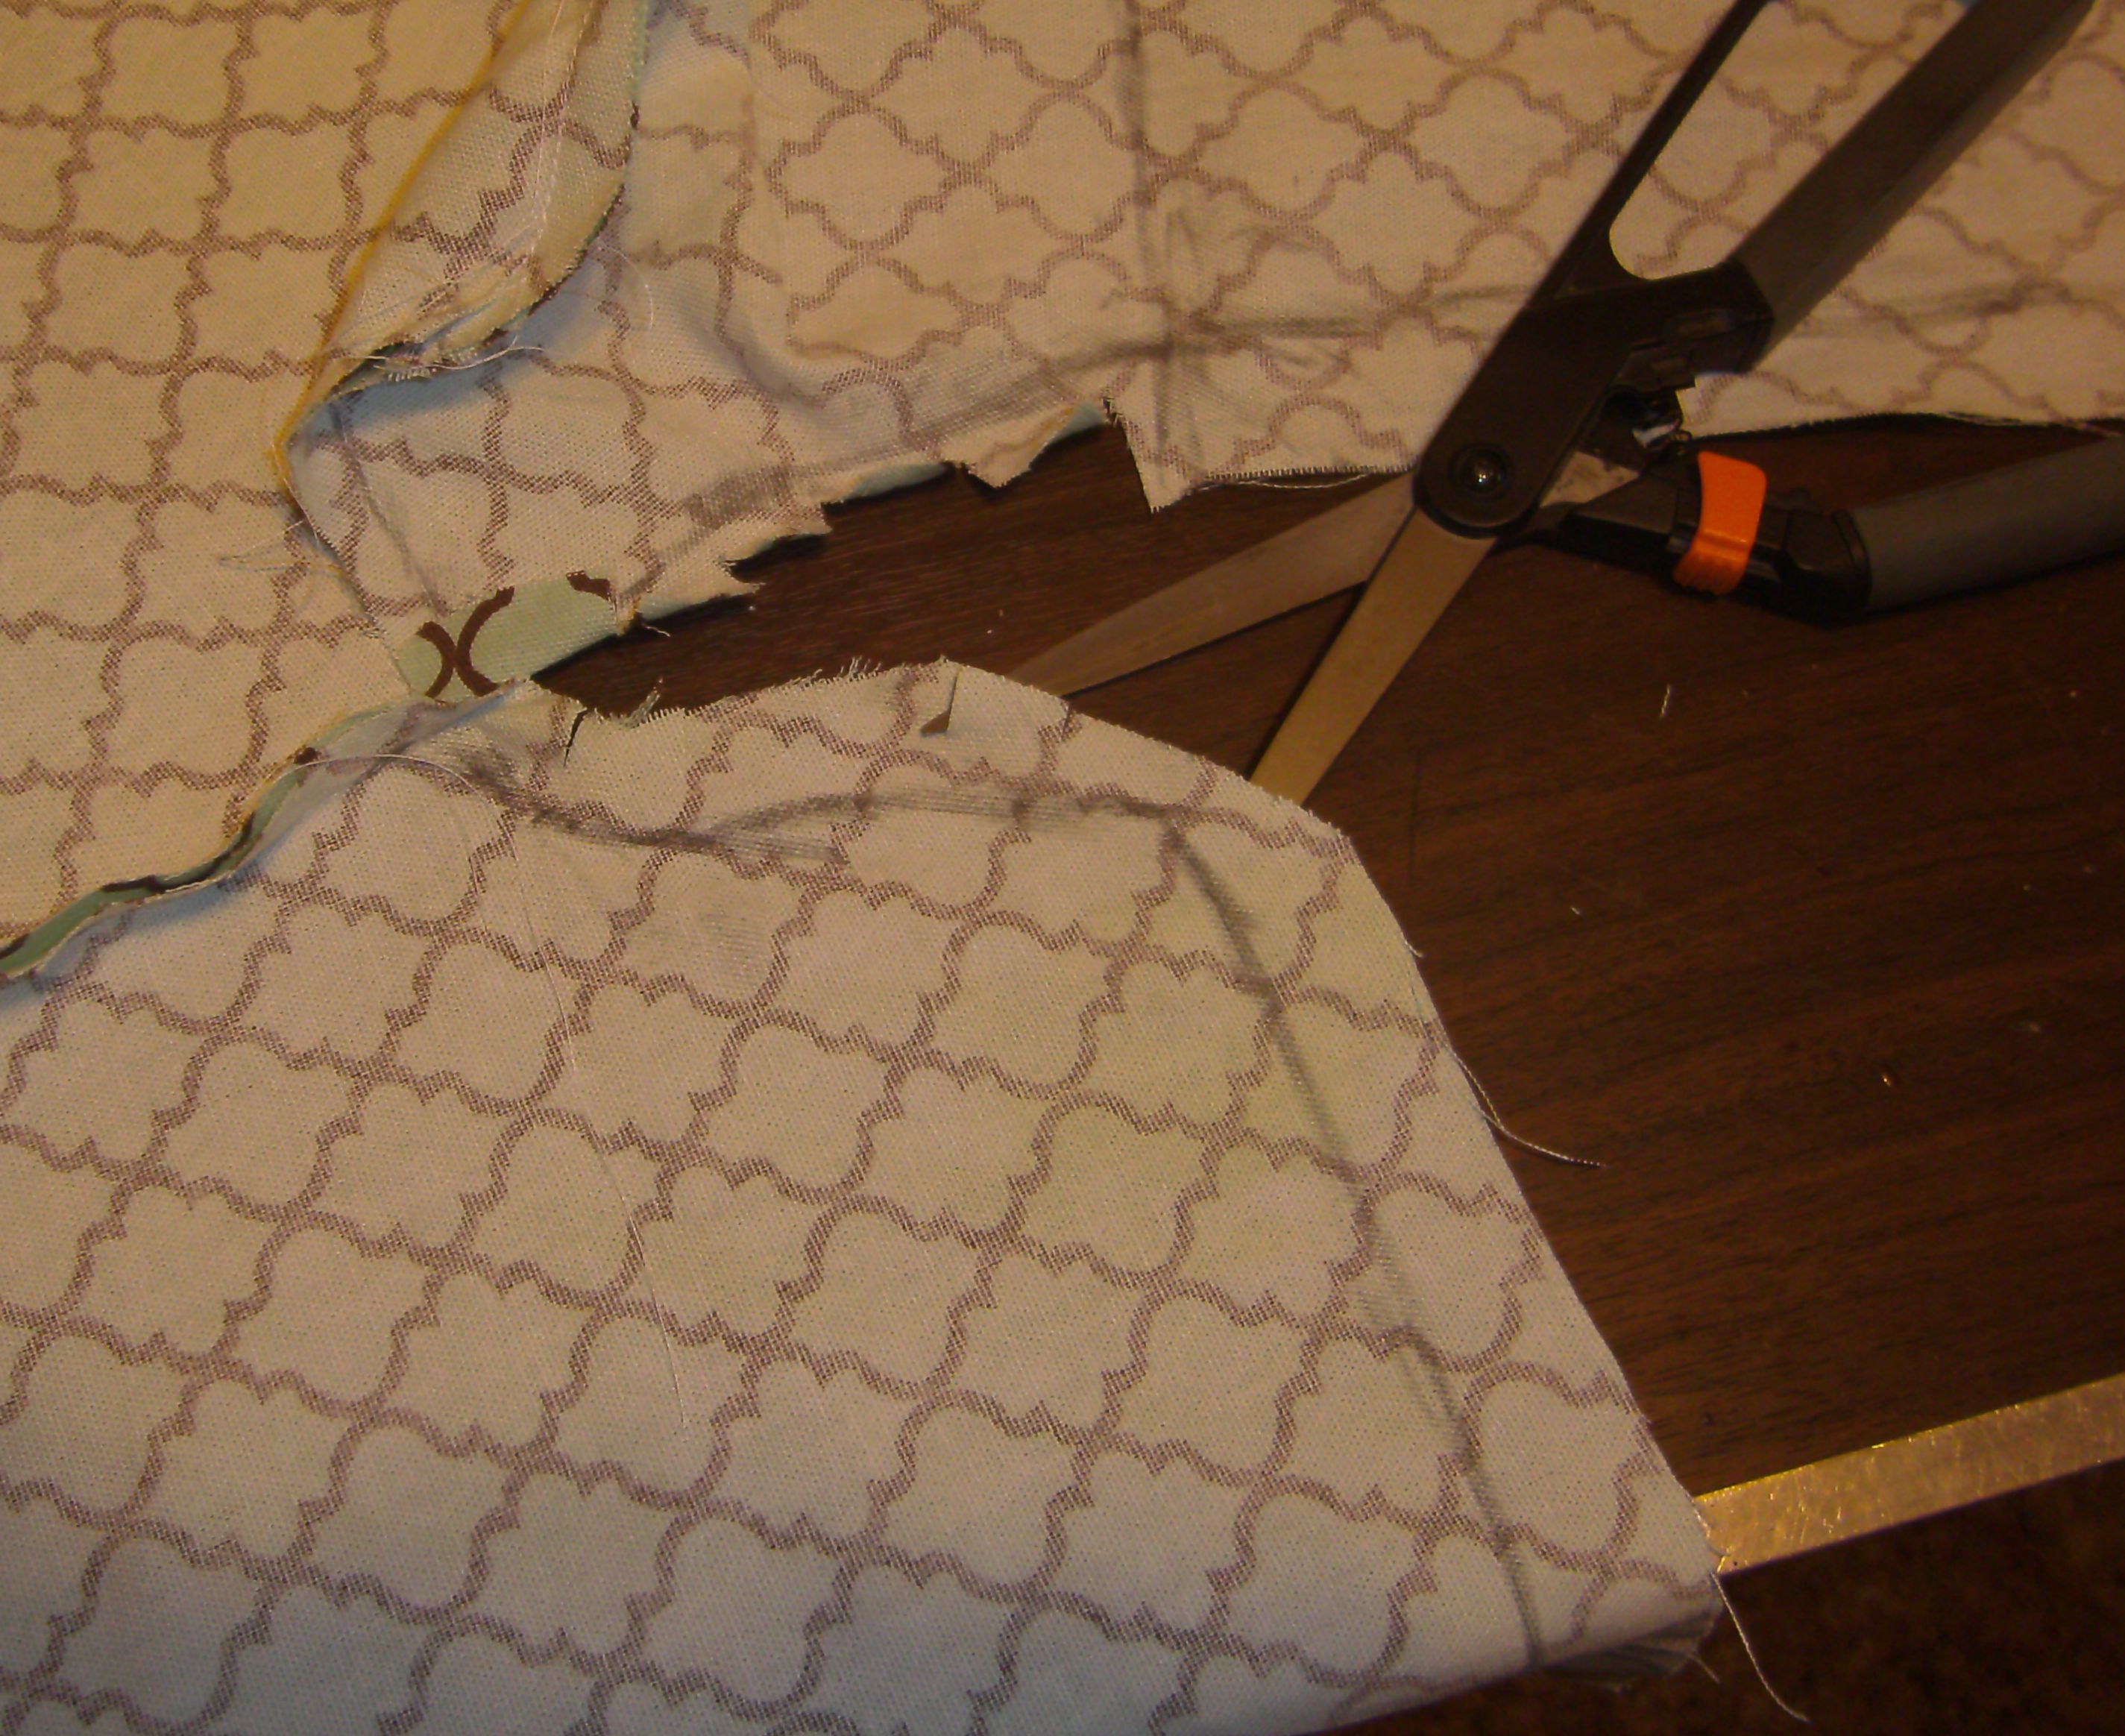
16. Sew that part right to the edge of the sofa seat (you can see I’ve chalk marked that). When you’ve done both sides, put your cover on the sofa right side round. Pin it to the padding all along the tops and front of the seat so that it stays in place while you work. It’s time to mark the pieces for the front of the arms. This is the last of the tricky bits. You want to line up your arm front piece with the top front edge of the arm padding. Then pin around it until it’s snug and has the angles you want. Mark it with the chalk and cut off any excess fabric that’s going to get in the way. Snip the curve along the top.
17. Now trim off the excess fabric and use it to mark the other piece opposite but the same.
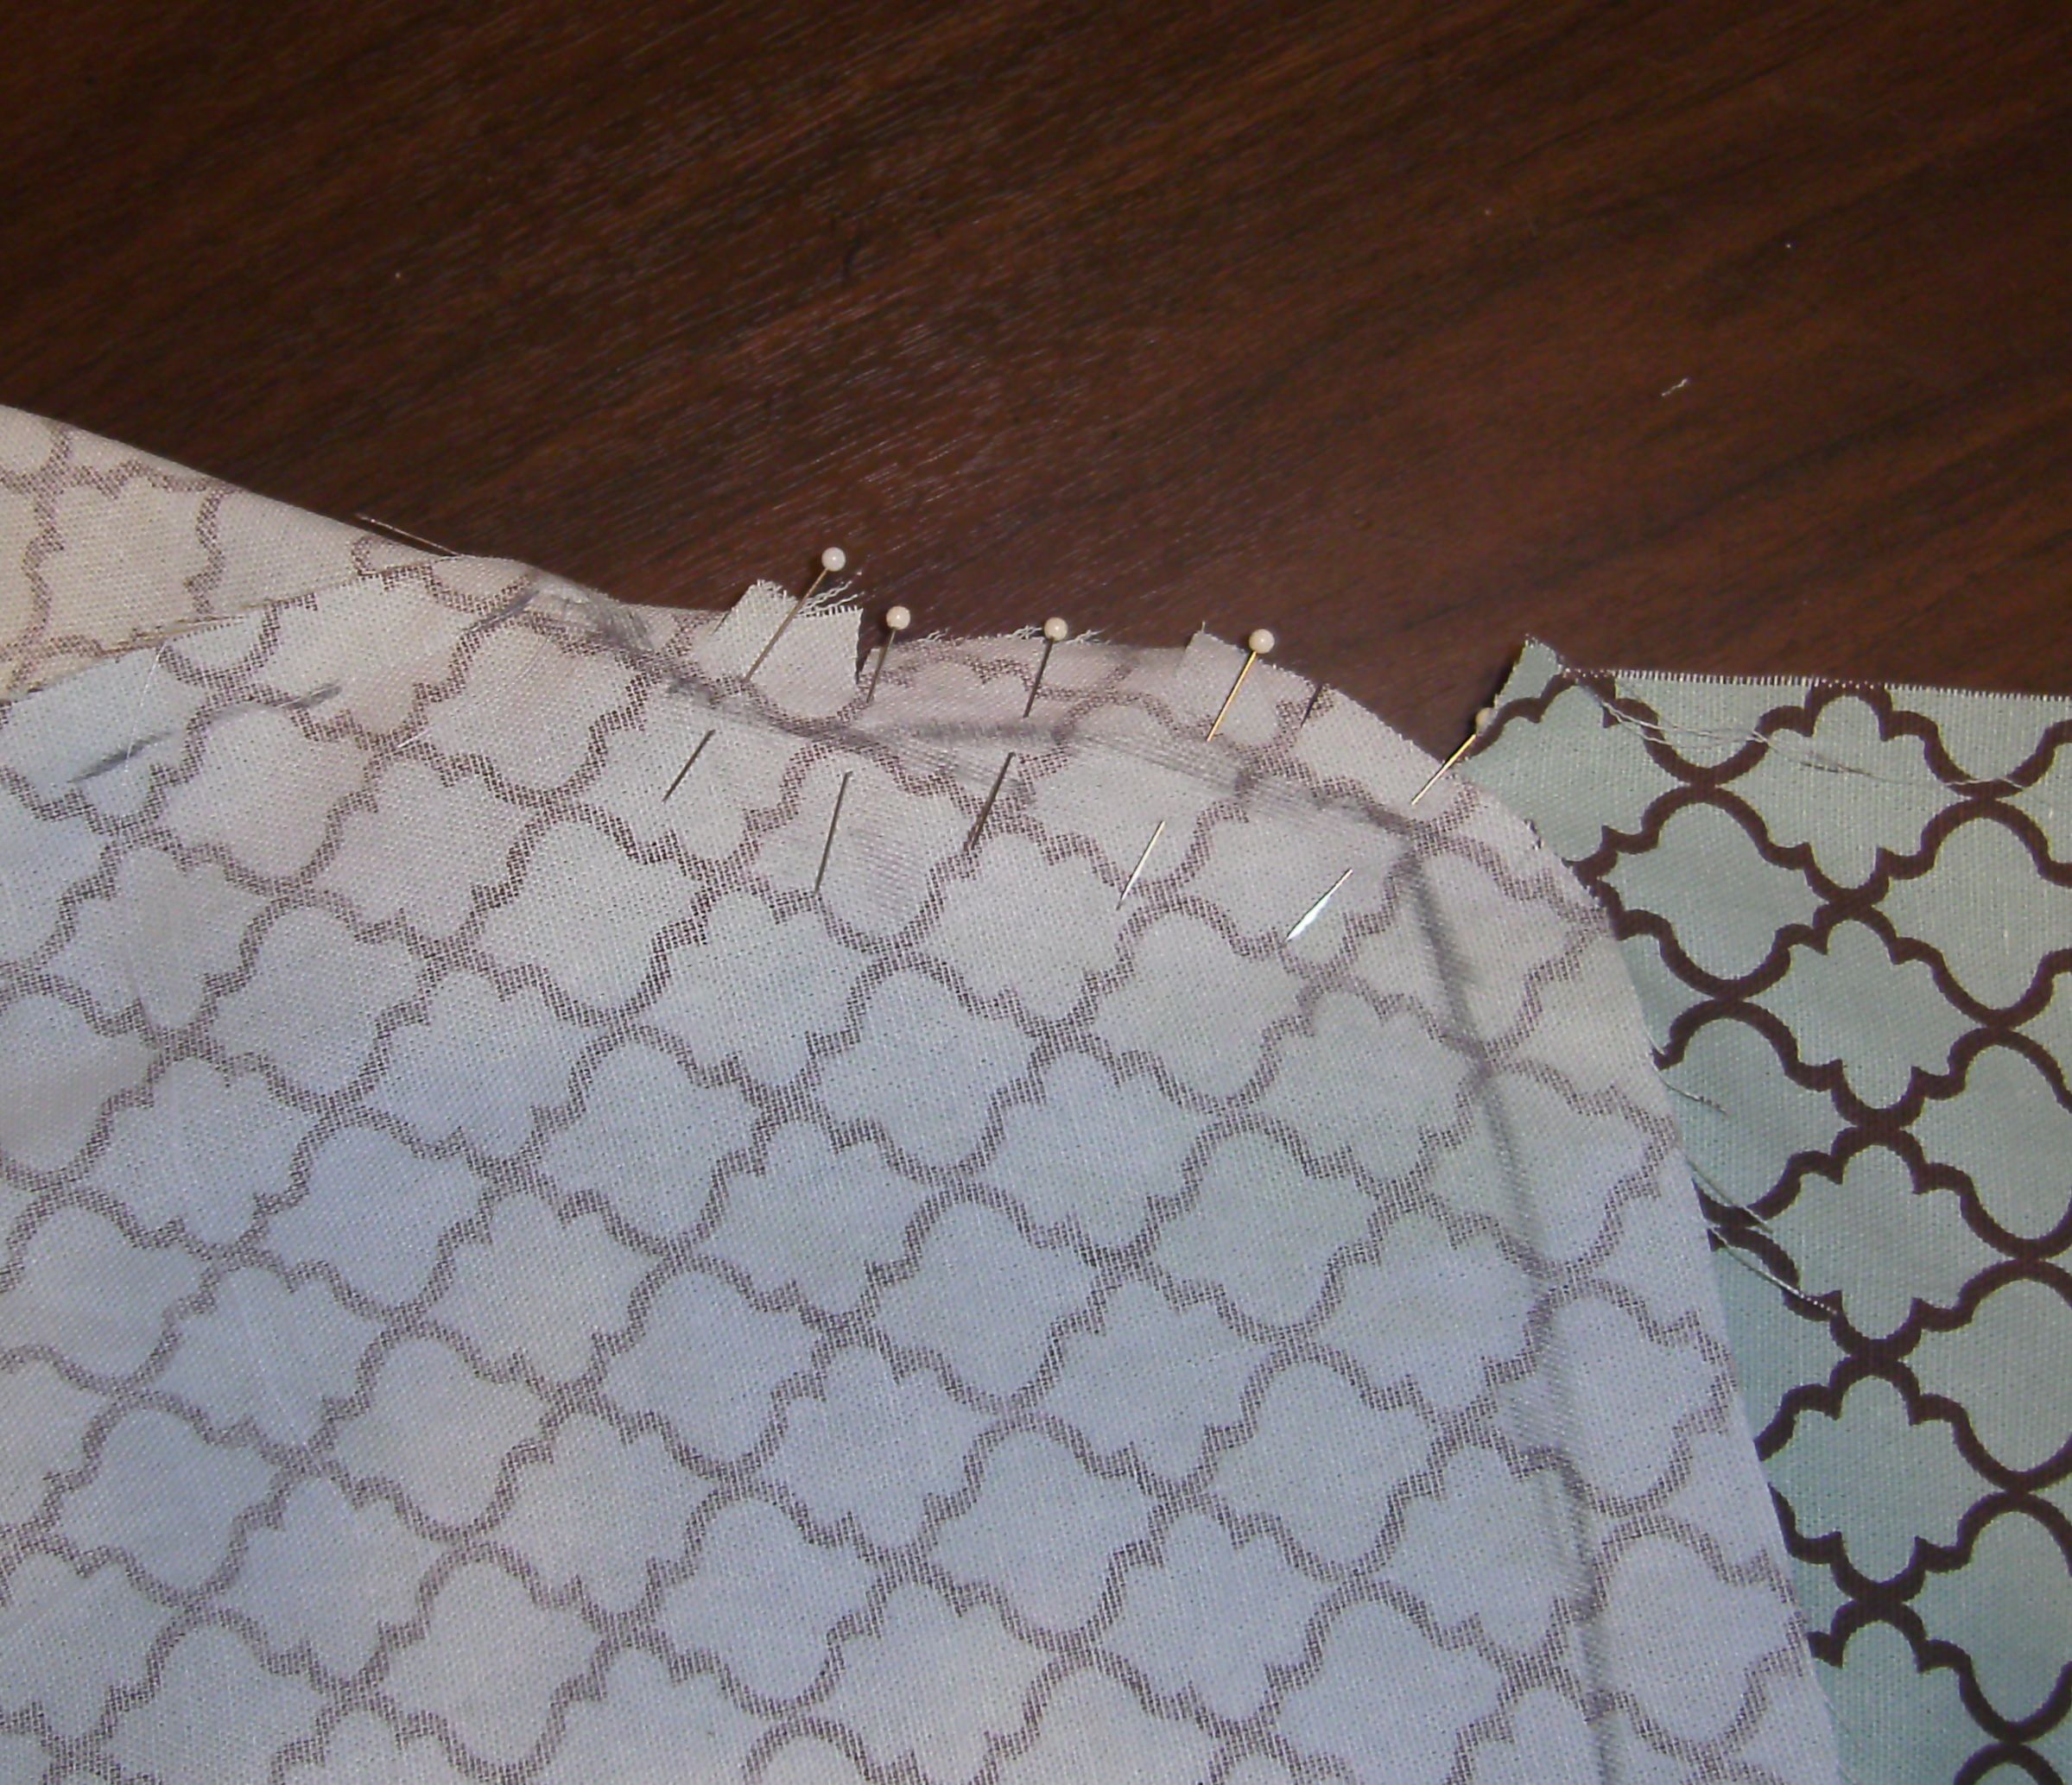
18. Pin the other side and have a good look, do they match up nicely?
19. Change your pins and make sure you have the seam line marked out and sew them up.
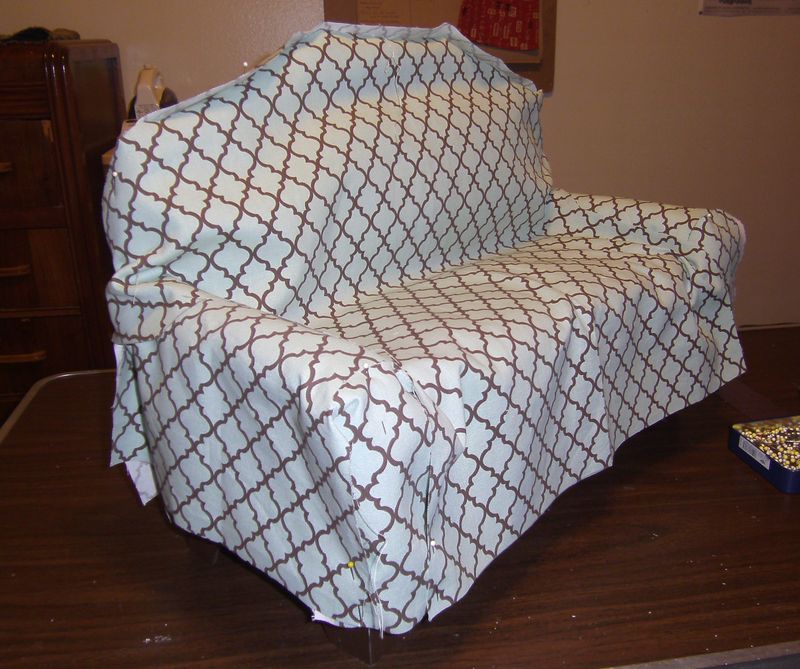
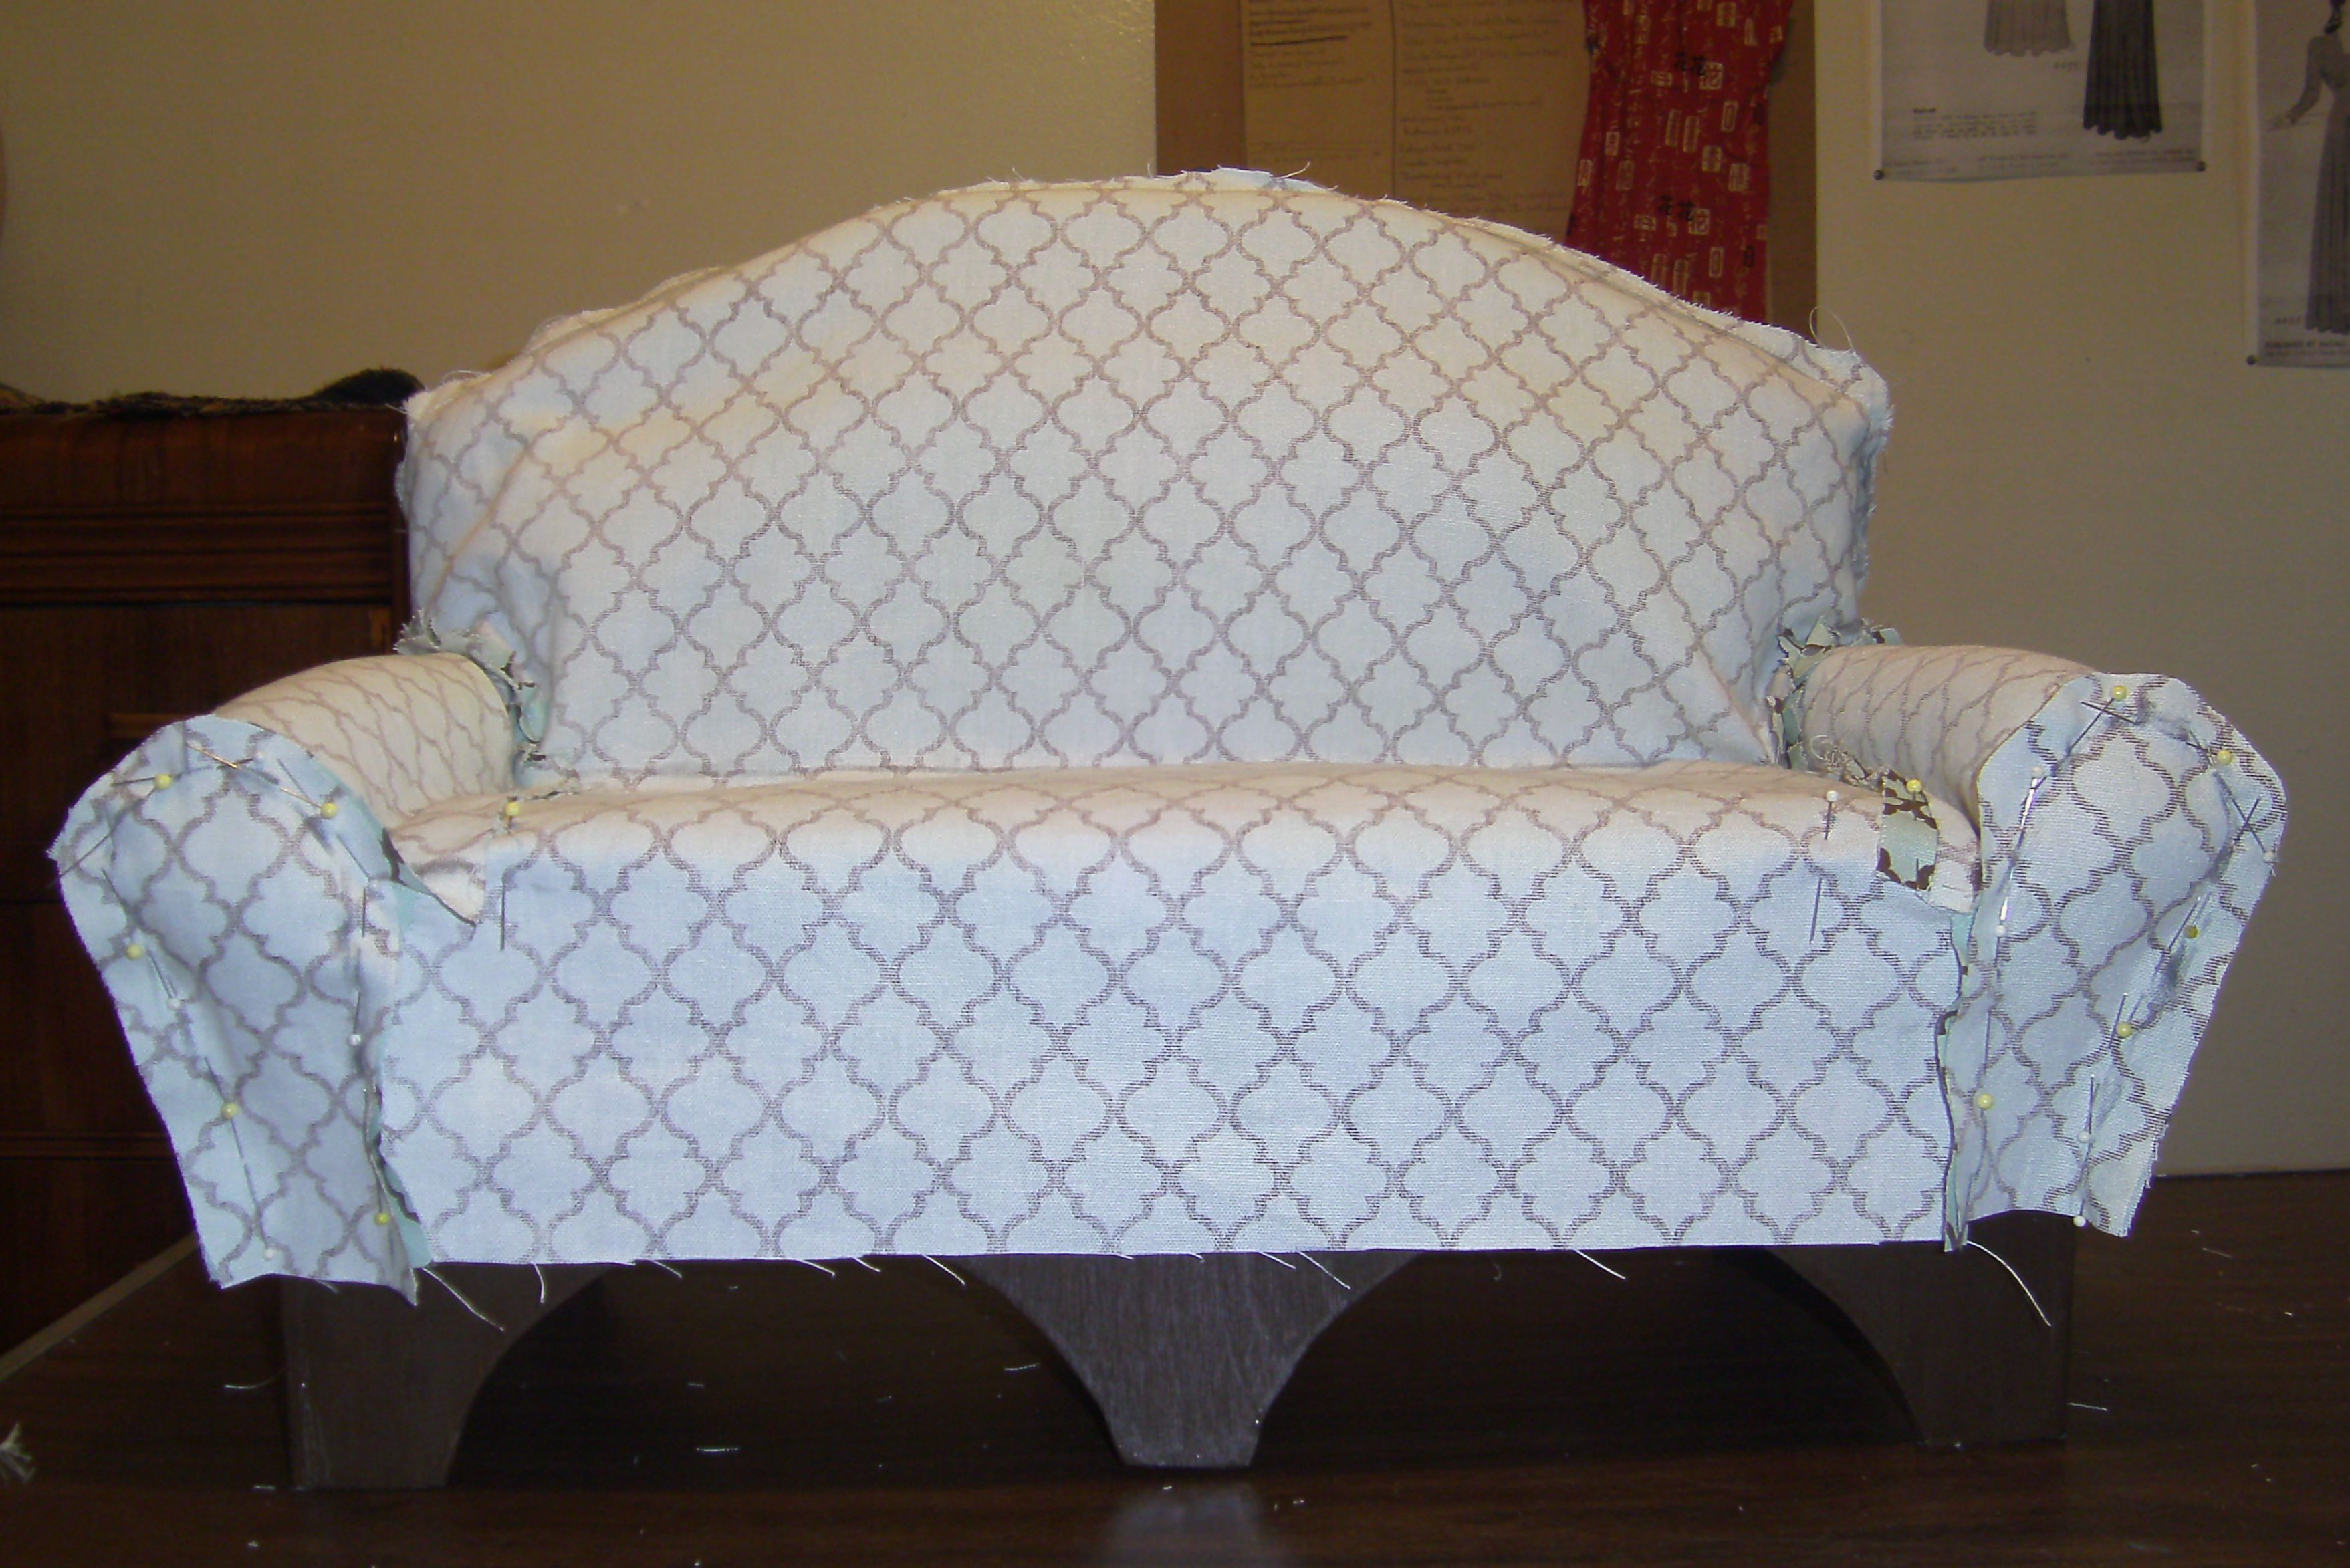
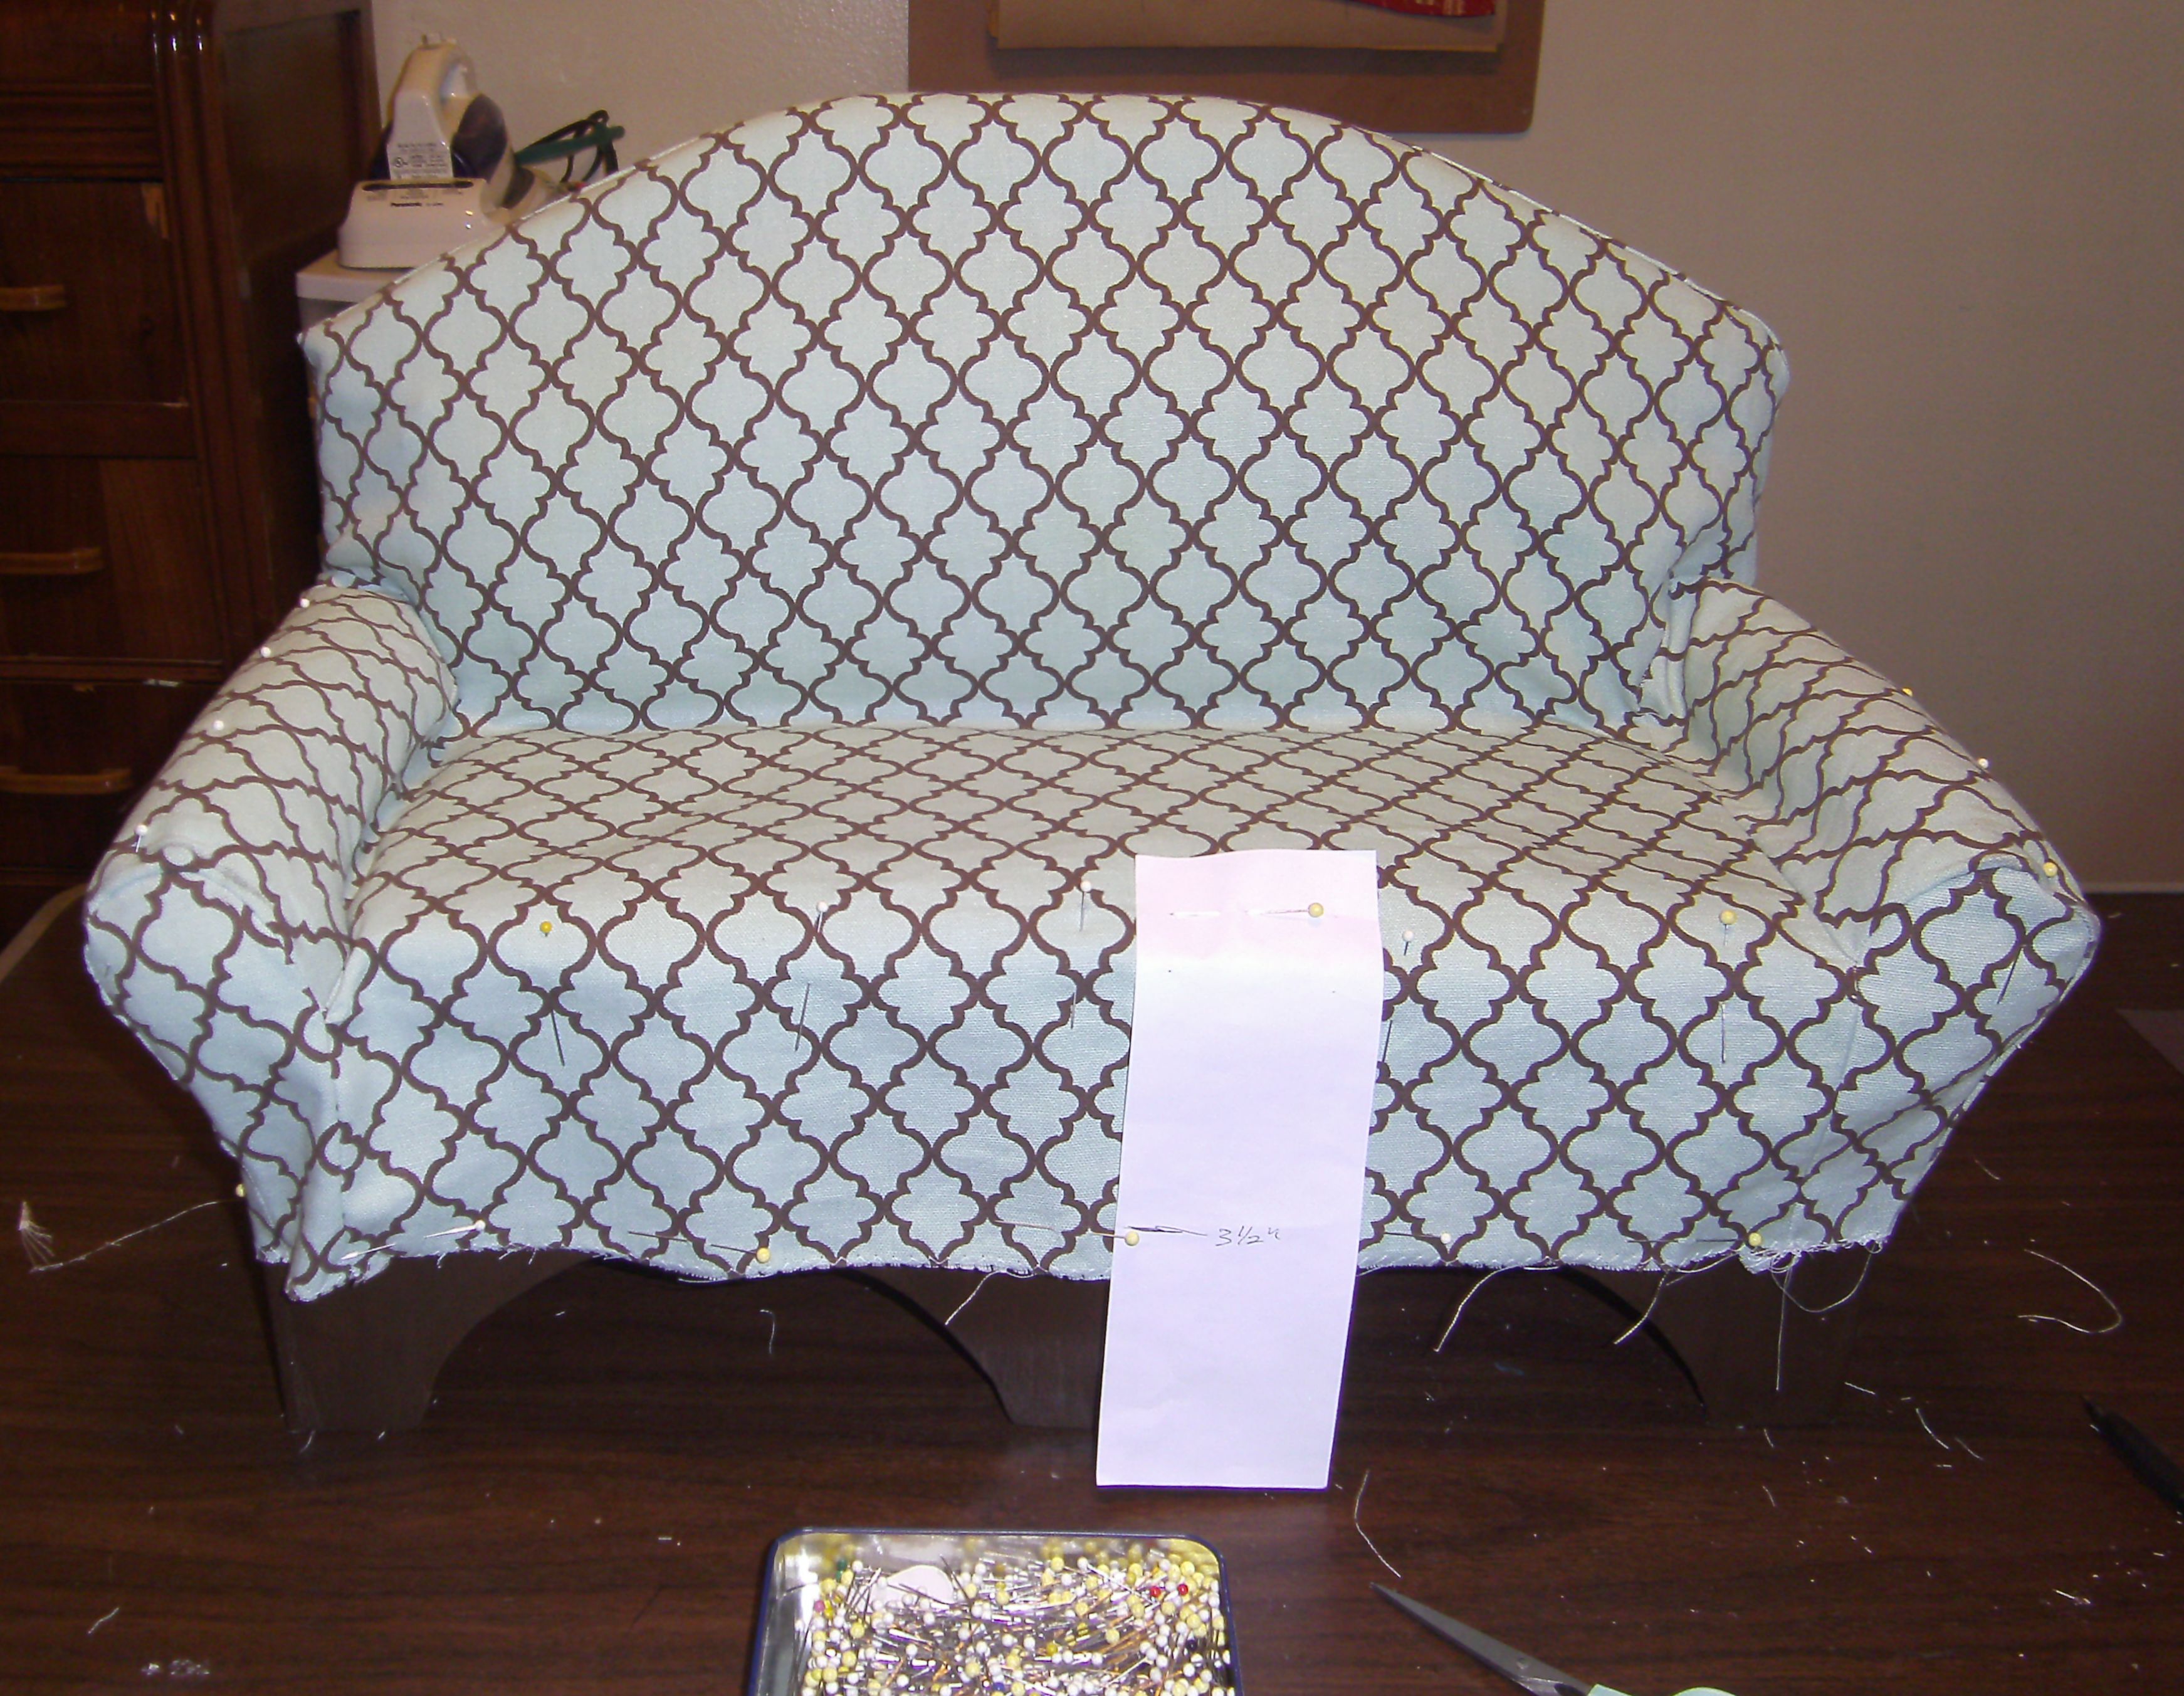
20. Now put your slip cover on the sofa, snug it down and pin it place. I found that putting the back on first, then pulling the front over and down, then tucking in the back corners, was the easiest way to dress the sofa. I wasn’t too thrilled with my right front arm piece. But with the extra seam allowances, I was able to take it apart and push it a bit to look better in the end.
Using a piece of marked paper or cardboard, mark the hem all the way around from the ‘floor’ up. Zig-zag or overlock the edge so that it doesn’t ravel like crazy, and sew your hem. If you like, you can put some elastic or a pull tie string on the bottom edge, or trim or something. I was going to put a pleated skirt on mine, but then decided I liked the simpler lines too much to bother. I might add some dark brown braid trim later to give it a more finished look.
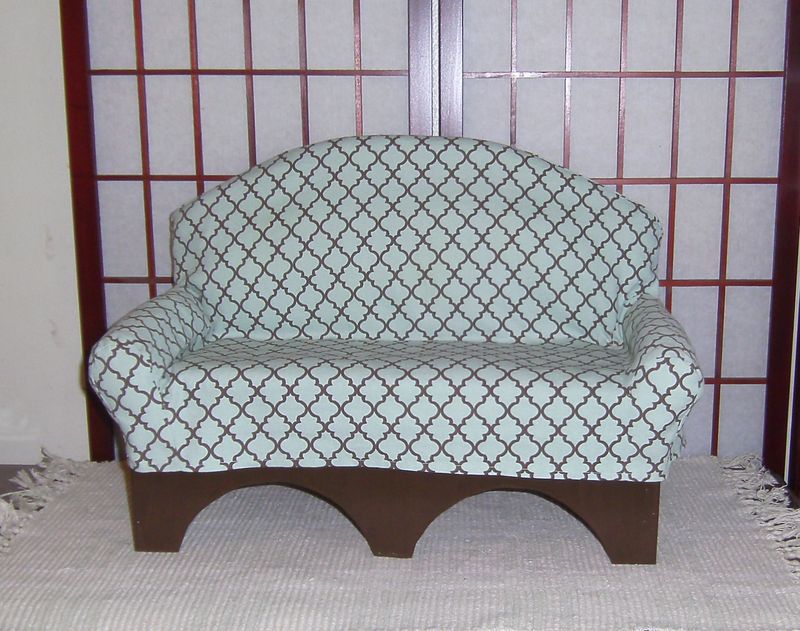
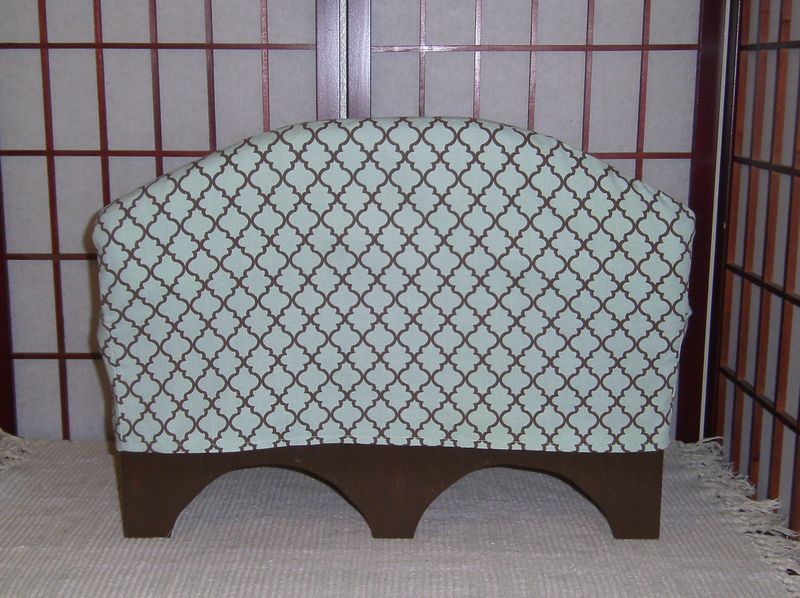
21. By now if your slip cover is smudged with chalk like mine was, hand wash it. You’ll want to press everything before you put it on the sofa for some time. I’m going to make some throw cushions for my new sofa, and maybe knit or crochet a throw to make it look more lived on for my dolls.
~~~~~
1 thought on “~Sofa Tutorial~ Part 2”