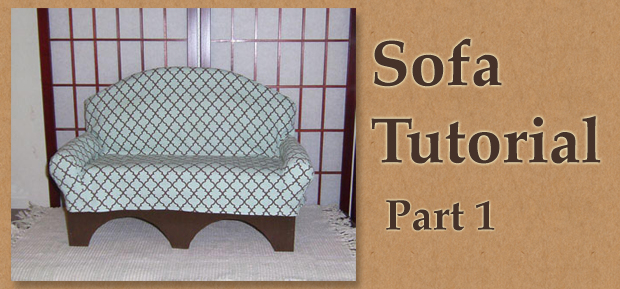
By Rajendora
Want a custom designed sofa for your dolls? Why not make it yourself? This tutorial by Rajendora of Sewing Box Designs shows the basic design for a sofa. This is the first part of a 2 part tutorial. The second part, which will be published on Monday, will show how to slipcover this or any pre-made sofa. Part 2, the slipcover may be found HERE.
~~~~~
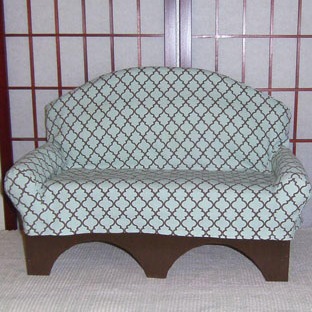
Those incredibly beautiful carved sofas for dolls are wonderful, and expensive. I’ve seen some real beauties out there. However, this is for those of us who are so picky we want to make our own the way we want it to look. This is a two part tutorial. The first part is how to knock together a rough sofa base from reasonably inexpensive plywood and padding. The second part is how to make a slip cover and matching cushions, which will come in handy if you already have a sofa.
This is a simple sofa for beginners that will hold about 40 pounds of dolls without sagging for years. Not only is it a good sturdy sofa, but because it’s made to be slip-covered, there is no complicated upholstering involved. Only a little stapled on padding. This is a time consuming project, so block out about 3 – 4 weekends, to allow for collecting the materials, getting the wood cut, and assembly, including wood putty, sealer and paint drying.
Print out the instructions and read them carefully, until you can picture yourself doing each step. I learned a few things while making my sofa, and corrected some things that were ‘duh!’ moments, so do as I say, not as I photographed. And if you make mistakes, don’t worry, you’re in charge, you can fix it. In the end, the paint and fabric will cover everything.
Skill level: If you’re comfortable with a jig-saw, hammer and nails, and a nail gun, you’re good for this project. Remember to protect your fingers and eyes.
Materials from the Hardware store:
A sheet of 1/4 in. x 2 ft. x 4 ft. Birch Project Panel Plywood
A 3/4 or 1 inch square dowel, usually they come in 36 inch long lengths. You’ll need enough to make four 6 inch long pieces.
The cutting diagram with the measurements on it Wood pieces
3/4 to 1 inch long Wire Nails; the type with a head so it won’t pop through the wood.
Heavy duty staple gun and 5/16 or 8mm staples. Usually they come as a set and are good to have
around for other things.
Elmer’s Carpenter’s Glue (reeks of vinegar, but it’s awesome strong and water wash up)
Sand paper, about 120 grit, comes in a few sheets per package.
Elmer’s Wood Filler ‘Max’. A small 2 oz tube will do. (also water wash up!)
Some canvas work gloves (splinters!)
A small, easy to handle tack hammer.
A yard stick or ruler you can mark true 90 degree angles with.
A pencil
An eraser
1/2 yard of 1 inch thick polyester quilt batting.
1/2 yard of plain muslin or canvas, something that won’t show.
Some paint in a color you like, or to match your fabric choice.
Some paint on type clear gloss.
Optional: A jig saw and blades/ experience using one. Safety goggles. Caution: They are your fingers and eyes, it’s up to you to keep them that way.
Another option is to paint a fancier design on the leg panels, or add pre-molded trim pieces.
~~~~~
A. CUTTING THE WOOD
Option!: You can usually have the hardware store cut the wood for you at a ‘per cut’ cost, then pay for it all at once, the wood and the cut pieces. Make sure you get all the wood you’re paying for, though. Don’t forget to collect your larger scraps for a later project. The measurements are on the print out PDF. You can skip the curved cuts-outs and just paint on fake ones in any design you want in black paint.
1. The wood pieces
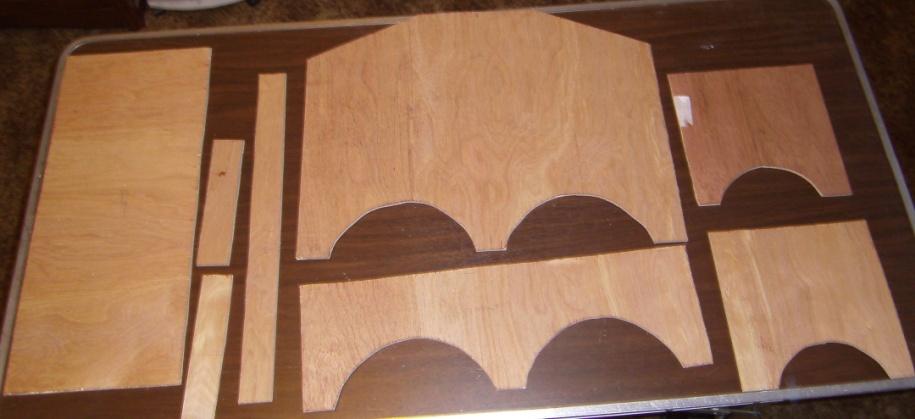
If you’re cutting at home and have your own jig saw, pick out the best side of the wood sheet and mark out the pieces as shown on the measurement page. Use a fine tooth blade and let the blade do the work, so you don’t get too many splintered edges.
Mark the center of each front and back and sides pieces, and position and mark the scallops either with a (circle making tool thingie?) I found it easiest to cut straight into the curve, halving it, then cut it the curve from the sides.
NOTE: You can also get fancy and design your own curves and cut outs, but leave at least 1.25 of an inch for each corner and middle leg ‘foot’ for strength and stability and remember your square dowel has to hide behind them.
3. When your wood is cut, lightly sand all the nasty raw edges. You’ll do the finishing sanding later, but this is to keep you from getting stuck with splinters.
4. Mark the back and side pieces using the front piece as your height ruler. This is your seat board line and has to be even on all three sides.
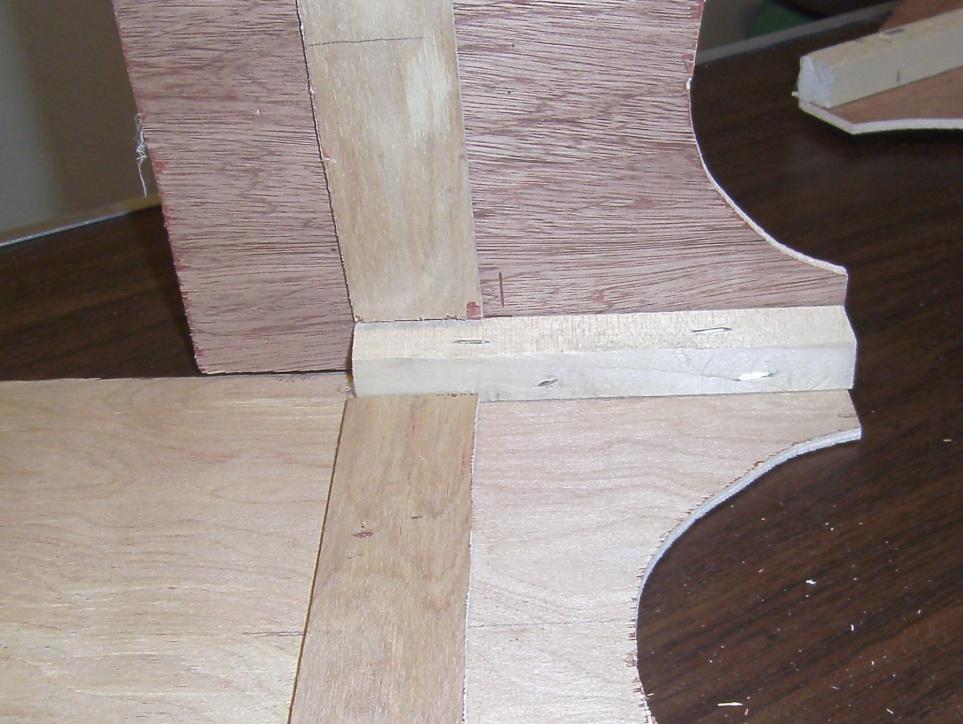
5. Using the carpenters glue, glue the wood strips as shown in the diagram, on the side, and back pieces. The wood strips go right at and below that line to support the seat board. Put the glued pieces under something heavy to squeeze out air bubbles and let it dry over night.
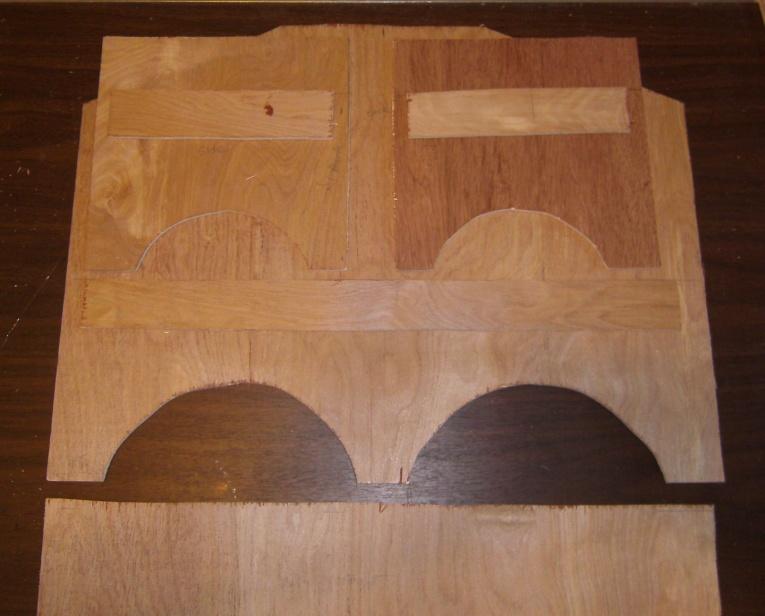
6. Glue the square dowel pieces in the remaining corners exactly as shown. You’ll be nailing into these to hold the sofa together. Glue works. Staples do not. Leave the piece to dry over night again.

B. ASSEMBLING THE SOFA
1. Nail the pieces into the glued on dowels from the outside of the sofa exactly as shown. This is important, because you will be wanting to hammer from the inside of the box shape, so lengthwise will be your last nailing. Any gaps will be filled by the wood filler, so don’t worry if it’s not all square and tight. Just do your best.
If the point of the nail goes through a little, hammer the ends down. (I used too long nails.) They won’t be showing when you are done, but you don’t want them sticking out and catching you when you pick
up the sofa. Because you have used carpenter’s glue, you will need no more than about 2 nails along each line. Stagger them, so that when you nail the other pieces on, your nails won’t crash into each other.
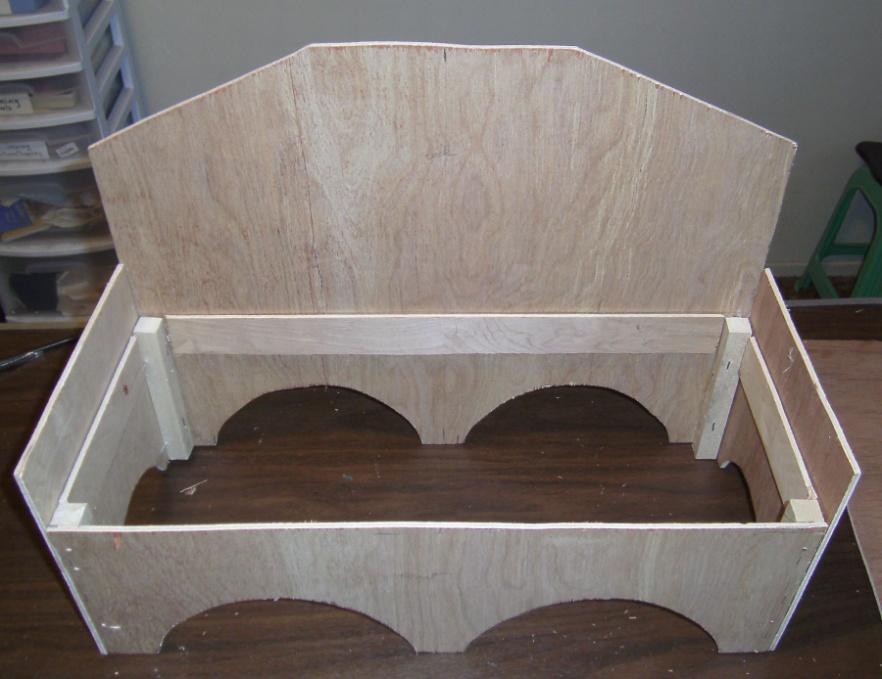
2. Fit the Back piece on to the side pieces and nail that to the dowels. 3. Fit the front piece on and nail the sides pieces into the dowels. Now it will look like this:
4. Fit the seat board in, glue it down. Let it dry over night.
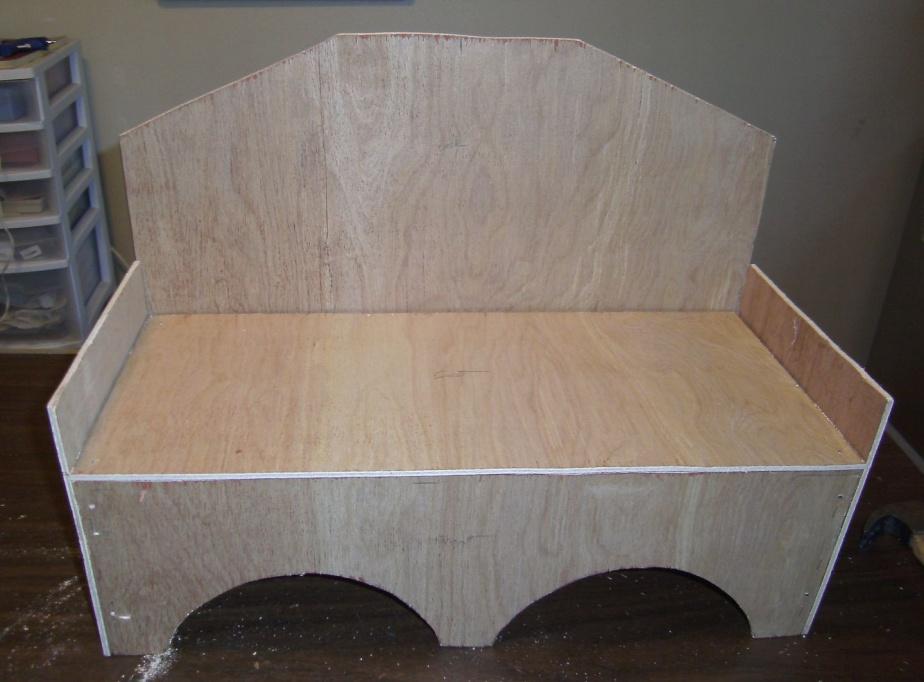
5. Nail the seat board down in the corners, into the dowels.
6. Put the sofa base on a flat surface and make sure it’s not tippy. Even off your ‘feet’ with a little sanding if you need to.
7. The wood filler is gritty, so don’t worry about getting it all perfect that’s what sanding is for. Just fill in all the spaces and cracks that will show where you’re painting the base later. Let it dry for a good six hours, and then sand lightly. Repeat as needed, until it’s nice and smooth.
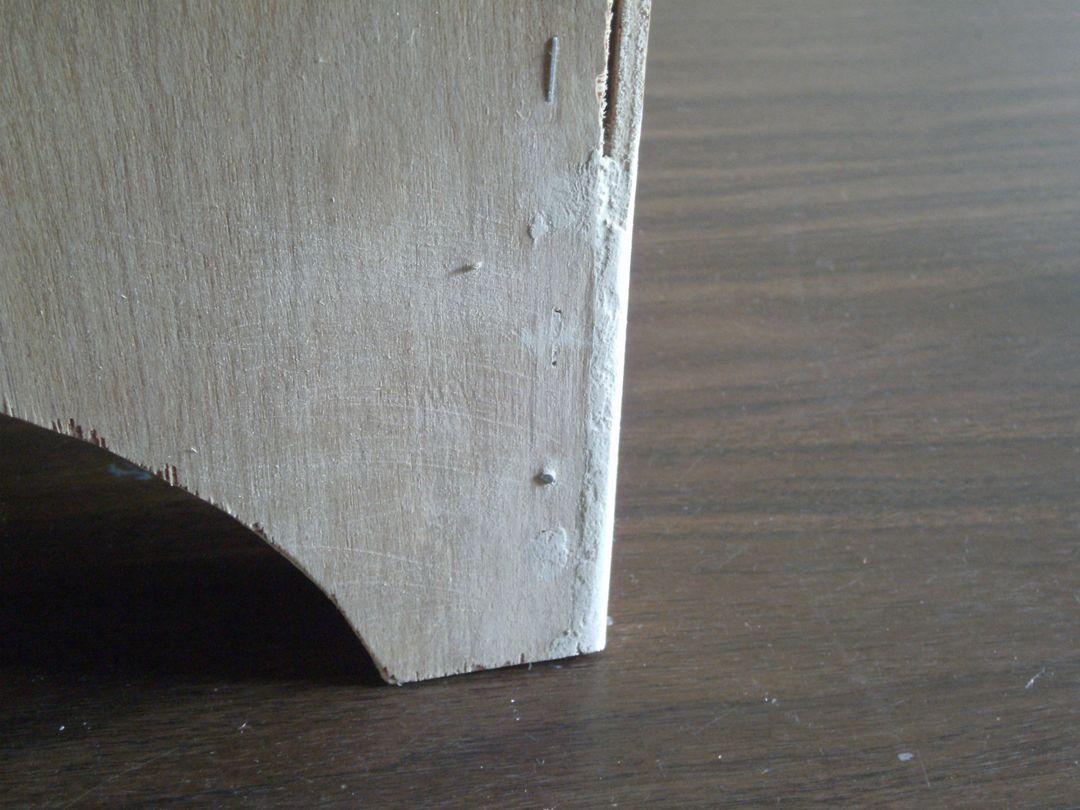
8. Using a ruler and dark enough pencil, mark your sofa bottom about 4 inches up all the way around. You’ll be painting up to this line.
9. Seal the wood with any product you want. Craft store stuff is less expensive than hardware store stuff.
10. Paint the wood however many coats you want. I used DecoArt Patio Paint because if it will survive outside, it will survive my dolls. It’s supposed to be for painting everything from planter clay pots to stenciling concrete, and there’s no mention of a final sealer for it.
C. PADDING THE SOFA
1. You can buy a medium weight canvas or ‘duck’ cloth, but I used an old towel in a light color so it wouldn’t show through my slip cover. Cut it in 10 inch wide strips. One long enough to go over the top and down the sides of the sofa, 2 for the arms, and one for the front edge of the sofa. Make sure you’ve marked your paint line if you haven’t painted yet.
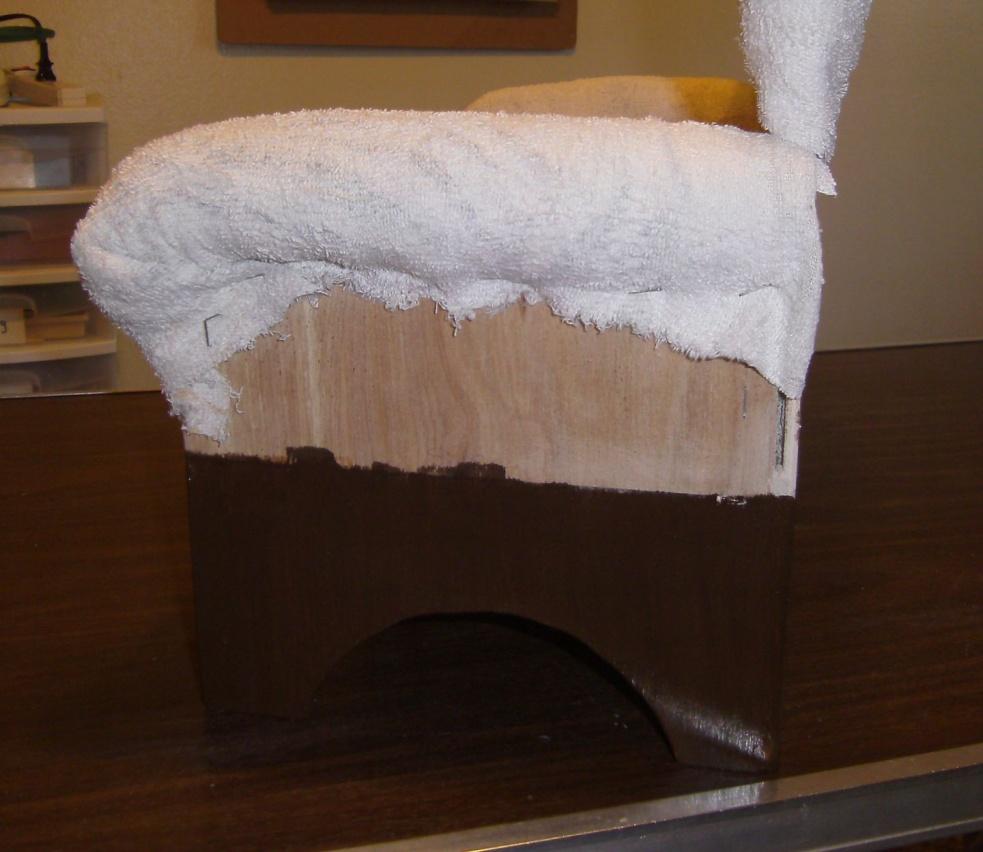
2. Working with your batting (or more worn out towels) the same way you might work with clay, and make a nice pad for the back top of the sofa. For now, just let it set there without glue or staples, you’re just setting things up for this step. Do the same with the arms of the sofa. Put a thin strip over the front edge of the sofa. When it looks and feels the way you want it to, thicker or thinner as you desire, lay your padding out so you can just put it right back where you had it.
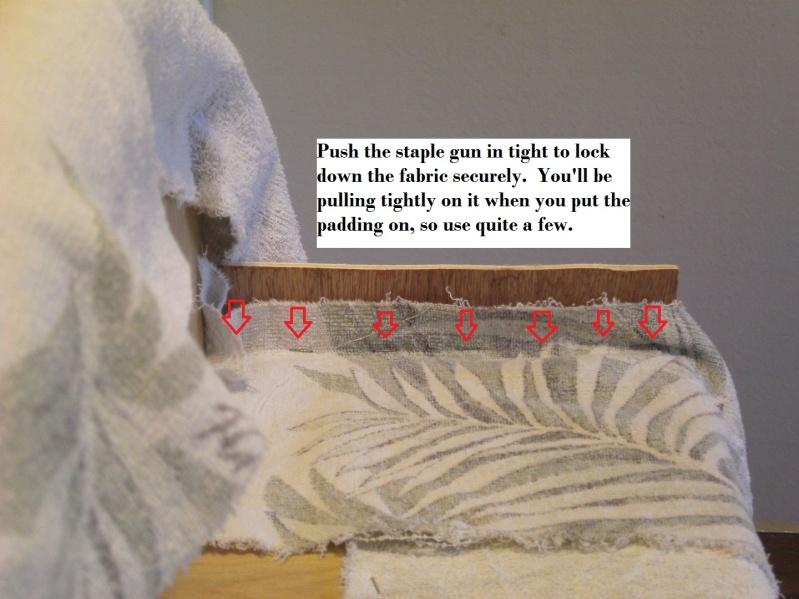
3. Lay your front edge padding on the sofa and center your cover fabric over it. You don’t want to staple through padding, it will pop right out again. Staple down the inner seat edge first. Then pull the cover fabric down over the padding, and allowing for a fold under, cut off any extra length that would get into your painting area. The edge should now be nice and smooth so it won’t damage the back of your doll’s legs.
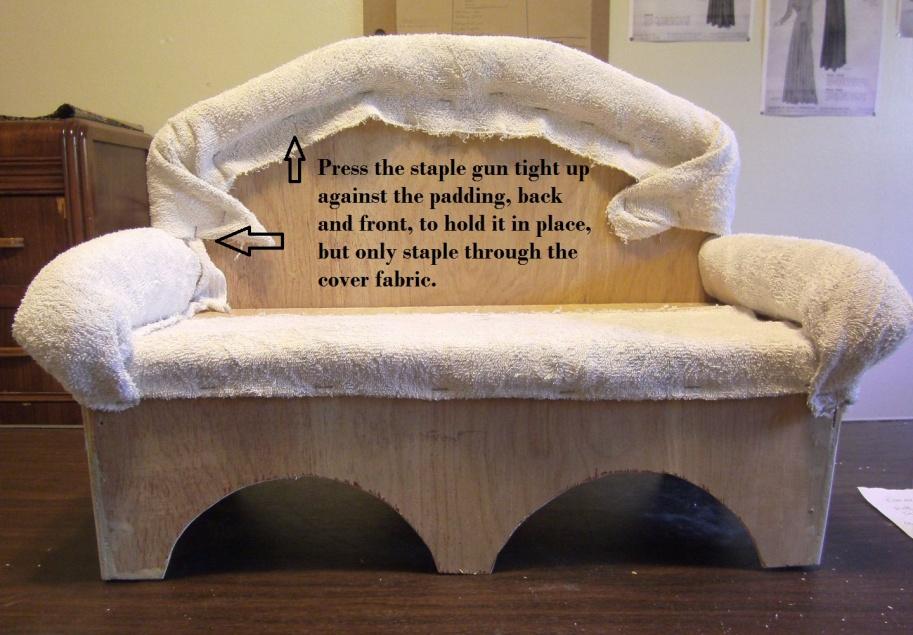
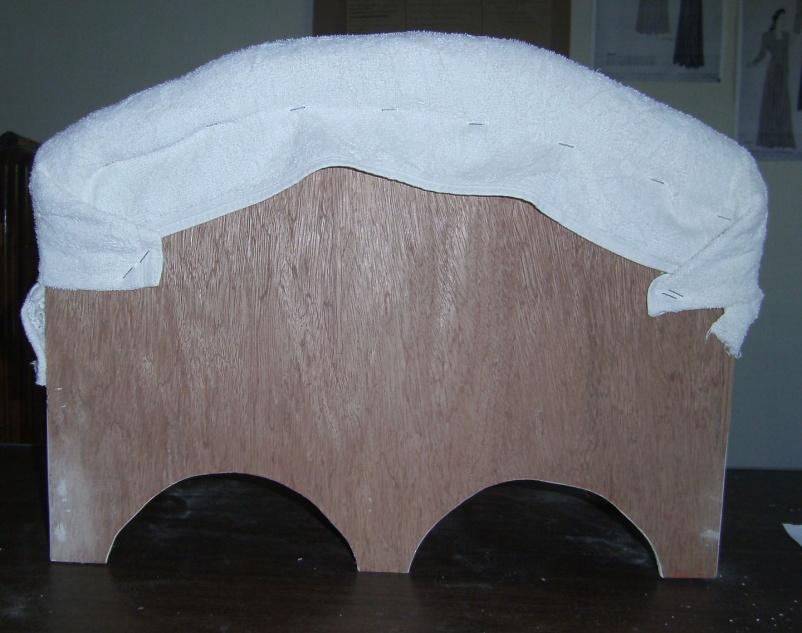
4. Laying your padding on the top and sides of the back of the sofa, working from the center to sides, staple the cover tightly over the padding, tucking the padding up as needed. I used a takeout place chopstick to keep my padding in control. You want to staple close to, but not through the padding, to hold it tightly in place.
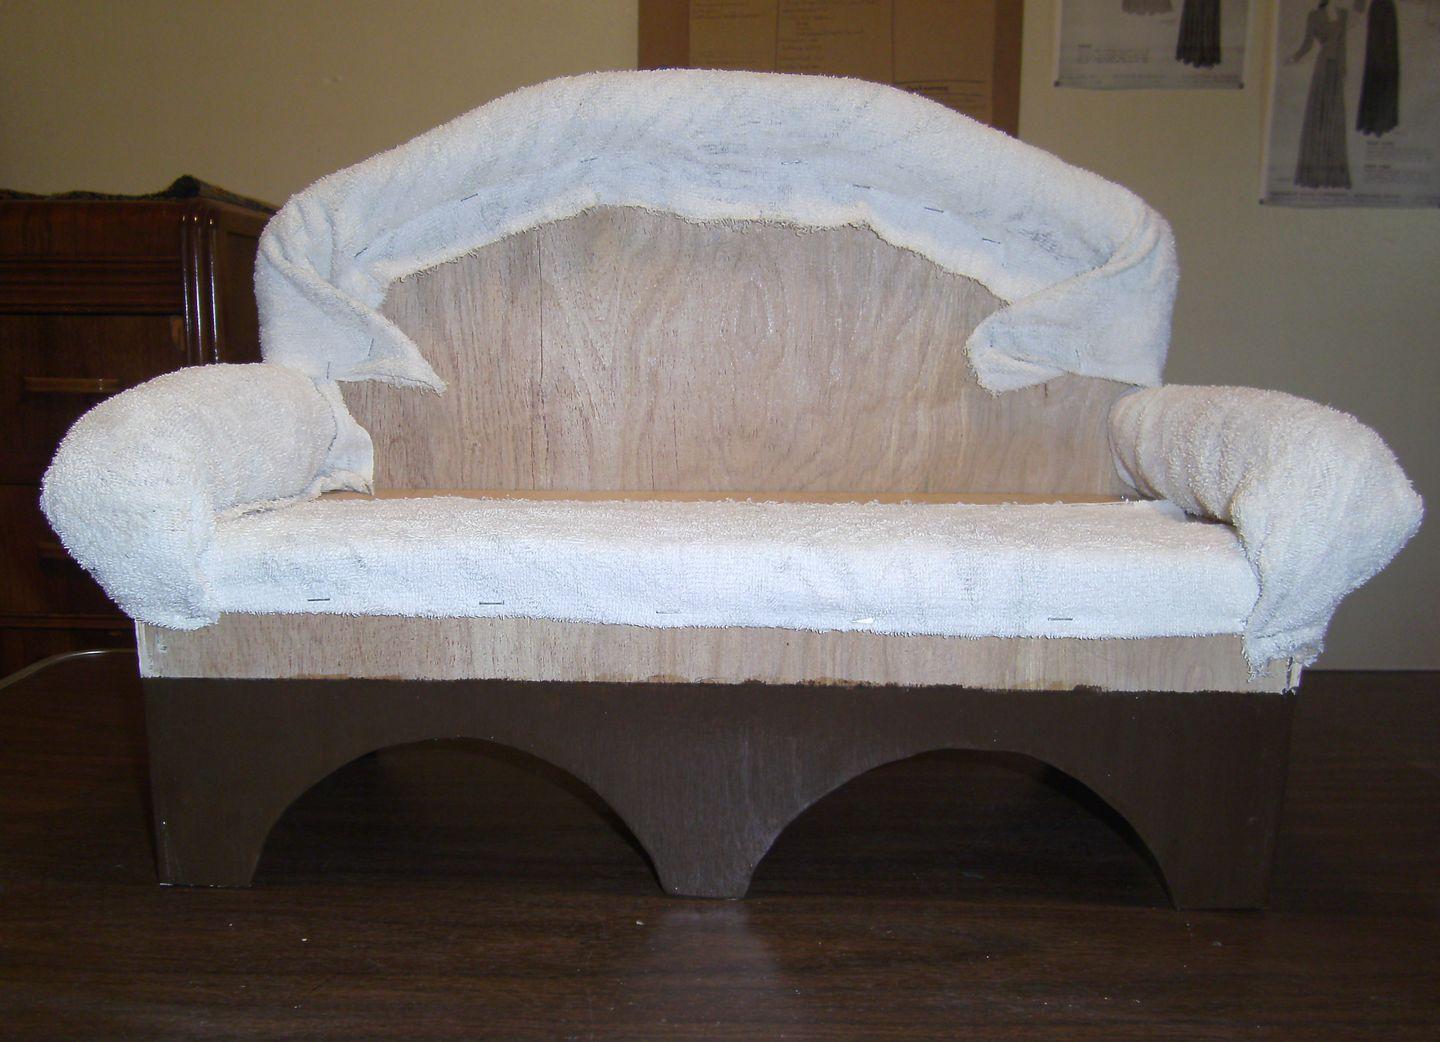
5. Because I wanted a certain look for my sofa, I rolled up the batting and really padded the arms, then shaped them using the cover to mold them into place.
Again, work the padding like clay, folding it or rolling it as needed to achieve your basic sofa shape. You can pad it as much or as little as you like, but I’m making cushions and a cover to deal with the rest of the padding for my sofa.
And now your sofa is ready for the slip cover and cushion part of the project.
Awesome! I made a lifesized one just like this for our first home right after we got married! Brings back memories! Thanks for sharing this.
Mahalo,
Bo Bergemann