By Rajendora of Sewing Box Designs
Description: Now that laptops, and tablets are on the market for dolls, as well as miniature books and magazines, why not a cute carry bag for them? This little project looks like a lot of work but actually can go quite a lot faster than you think, using the technique of strip quilting.
Time factor:
If you have everything ready and the fabric washed and pressed before hand, the project takes about 2 hours with a sewing machine and rotary cutter.
Sewing level: Basic skills
Materials
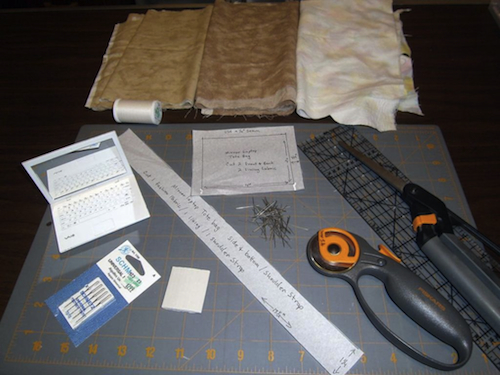
Print out the pattern accompanying this tutorial. It prints on a normal letter size paper with the resizing set to None.
1/4 yard of 3 different thin, woven fabrics, at least 45 inches wide. I’m using quilting cotton and a piece of left over flannel from my scrap box. (You will have enough left over fabric to make two bags, so don’t worry about the first one being a mess. ^_^)
A neutral color thread that matches all your fabrics.
A good pair of scissors for cutting fabric and one for cutting paper.
A long, preferably clear ruler.
Tailor’s chalk for marking your lines.
Sewing pins
A steam iron for pressing. (There will be a lot of pressing in this project.)
Optional:
A rotary cutter and mat.
A sewing machine.
Size 10 or lower sewing machine needles (universal)
Instructions:
1. Print your Pattern out and cut it out neatly.
I’ve included the pattern I made for this tutorial so you can get a quick start and then modify it for your own size tote. The pattern is for the tote I made and will hold a mirror laptop. Once you are comfortable with the process you can scale it up or down, even making a tote for yourself! ^_^
Note: If you just want to make a tote bag without the quilting, skip steps X through Y.
2. Your Fabric
Wash and steam press your fabric, get out any store dirt and excess dye, and pre-shrink it. True up your fabric by making sure the weave is exactly straight. Your fabric should be at least 45 inches long, by 9 inches wide (the 1/4th yard).
3. The first cutting.
The Lining: Cut out a sides and bottom strip, and a front and back lining for your tote bag and set them aside.
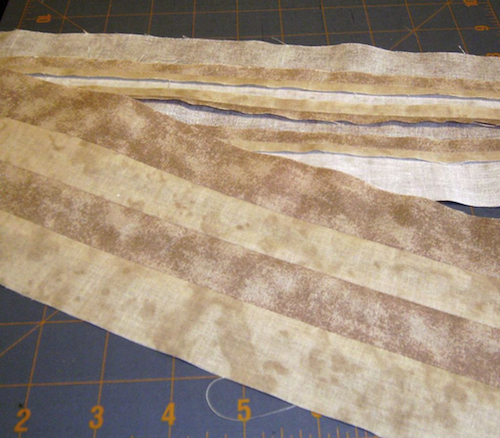
The Outside: Start by cutting, lengthwise, strips 1 1/2 inches wide. (1.5 inches wide). I found that 2 of each color worked to make enough for one bag. The extra is for mistakes, so you don’t have to worry. Any excess can be used to make another bag.

4. Sewing: Part One
Pin a strip of each color together making sure the edges are perfectly even.
Working carefully, sew your first strips together at 1/4 of an inch for the seam allowance. (Use a good tight stitch.)
Now press your seams open. You don’t want the bulk of that seam all to one side.
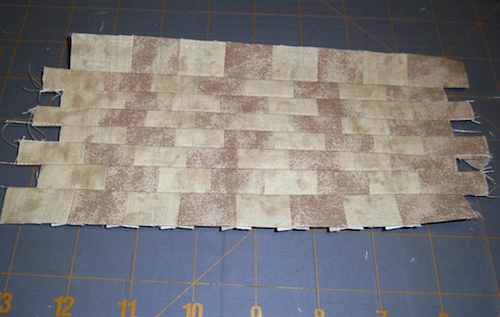
Continue to sew all your strips together until you’re finished. You now have striped fabric. It will look like this back and front.
Cut this strip in half and sew again to make a piece eight stripes wide. This will give you enough for the front and back of your doll’s tote bag.
5. Cut and sew again.
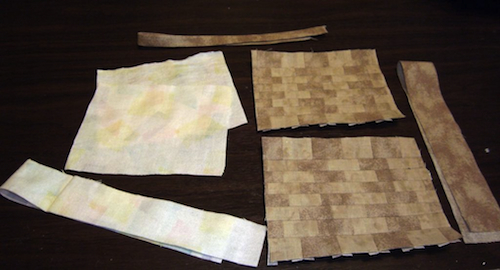
Now cut across your stripes, for 1 inch wide strips.
Lay out the strips in a woven look pattern.
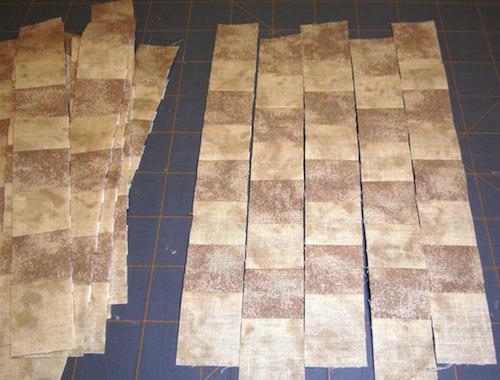
Sew once again with a 1/4 inch seam allowance, pressing as you go. Make
Your finished pieces should look like this:
6. Even more Cutting
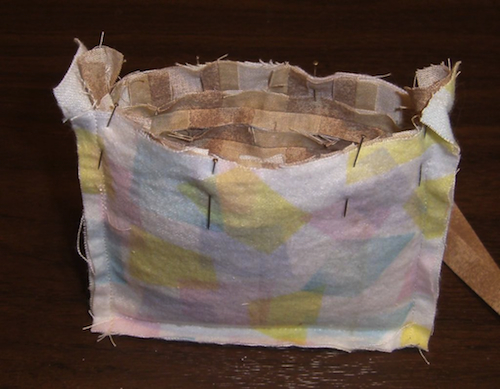
You should now have your pieced fabric, your lining fabric, and fabric for the strap and sides and bottom ready to pin out your pattern and cut out your tote bag.
Here is the tricky part: Because your front and back are piece work, the seams might split a little while you work with them. Before cutting them out, first trace the pattern with chalk, then sew just inside the chalk mark around each piece. Now cut out your back and front pieces.
Cut out the front and back and side/bottom piece of the lining; the strap of the fabric you chose for it, and the piece work.
As an extra note, when you have your chalk outline on your piece worked fabric, you can embellish it before cutting with appliqué or embroidery. Save beading or sequins for afterward, when it won’t get crushed in the sewing machine.
6. Assembling
Starting with your lining, so that you have an idea of what you’re doing. A lining is a good way to test run things and can be taken apart or completely remade if anything goes wrong.
The first side is easy enough.
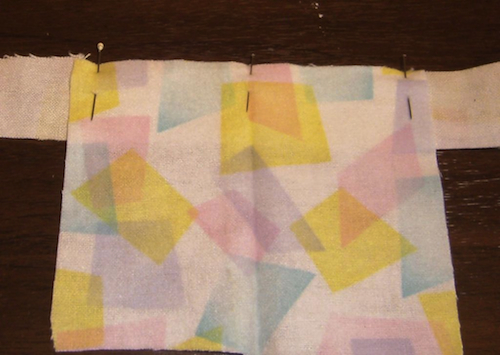
Center and pin the side and bottom strip to one side of the lining and sew stopping just short of 1/4 inch on each side.
Now, clip and pivot your strip and pin and sew the side seams.
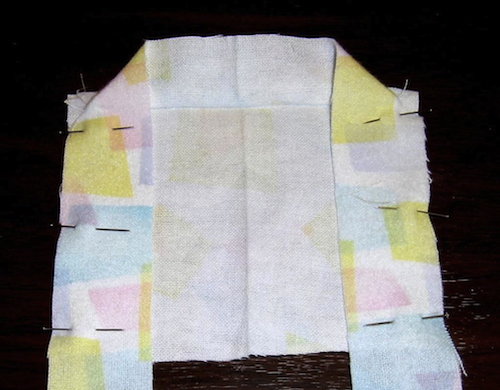
For the next step, do the same thing, pushing the other side out of the way. Simply repeat the previous steps.
6.2 Now Sew the Rest.
Now that you know how to do it, the outside goes together the same way.
When you have your lining and outsides done, slip the right side out of the lining in to the wrong side out of the outside. Pin each corner precisely. Leave a 1 inch long space you won’t sew along a longer edge so you can turn the pieces inside out. Sew around the top edge with a 1/4 inch seam.
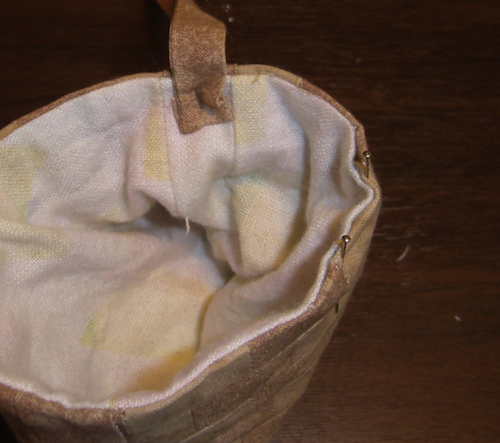
Carefully, through the opening you’ve left, turn the tote back right side out. Tuck the lining in and press the whole thing neatly, folding the raw open seams in to match the rest, and pin them. Sew them together, leaving the opening to turn the back right side out through. Press and pin your bag top neatly but don’t sew yet.
7. Now for the strap.
Fold and pin the length of fashion fabric for the strap and sew it to finish at 1/2 inch wide. Trim off excess seam to 1/8 of an inch. Turn the strap right side out using either a fabric tube turner or a safety pin slid back through.
Press your strap flat so that the seam is on one edge. Keep it straight so it doesn’t twist and make the tote hang wrong.
Press the edges under the same way, don’t twist your strap accidentally.
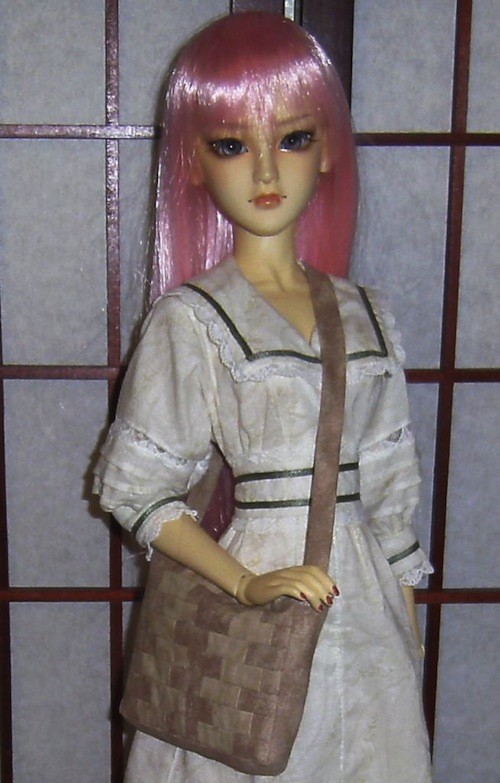
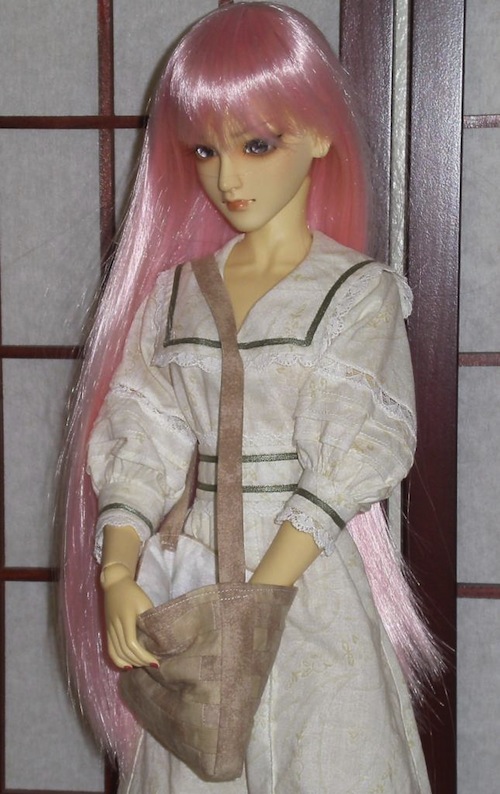
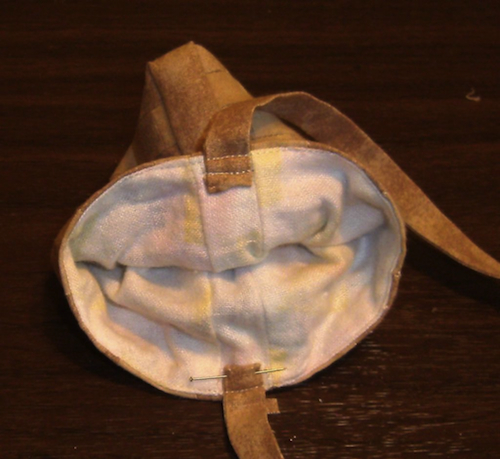
Pin and sew the strap in as shown. The folded in raw seam against the inside of your tote.
Sewing on the side, rolling down the lining just a bit, make a very narrow seam around the top, sewing on the straps and closing the opening.
Go back and make sure your straps are folded under and stitch them again, just at the sides.
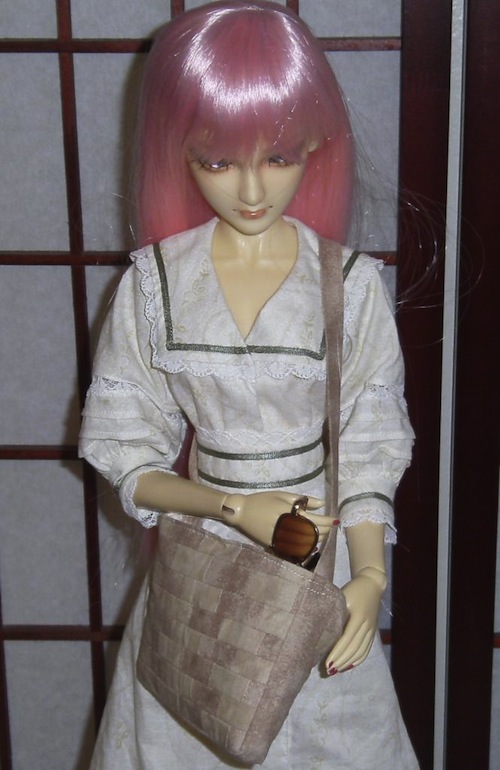
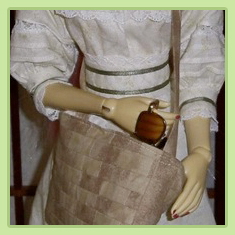
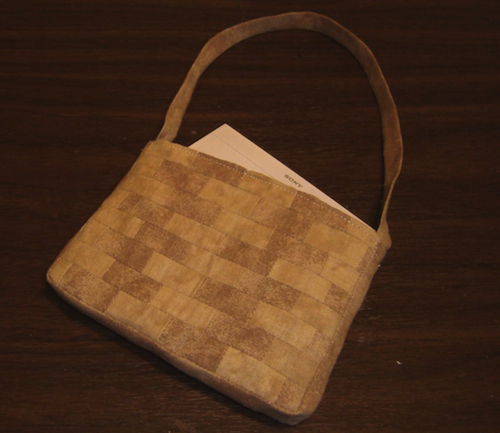
And there you have it; a tote bag that looks like a lot more work went into it than really did, and you have learned how to strip quilt and can apply it to other items, like decorative strips in clothing.
~~~~~~