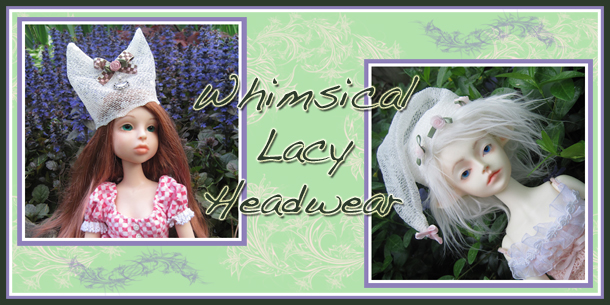
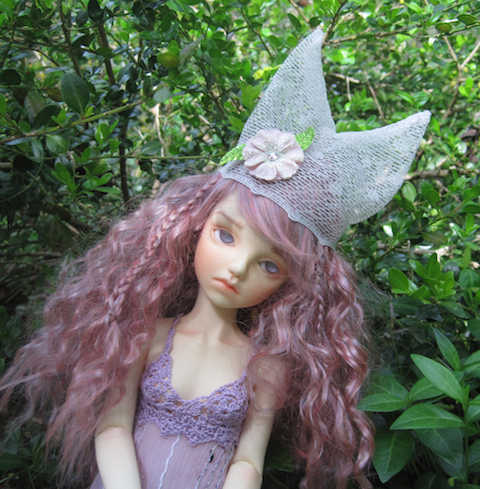
A hat made of lacy materials is a great Spring wardrobe accessory.
Making hats out of lacy materials creates a lovely look with minimal effort. The hats can be decorated in many ways. The trick to using soft lacy materials for headwear is to apply a fabric stiffening agent to help the material hold its shape. This allows the hats to rest crisply on your doll’s head. The hats shown were all made from remnants from a sheer curtain.
(Dolls shown in order of appearance below: PlanetDoll Tara, outfit by Auguste Designs, eyes & wig from Jpopdolls, Bergemann Dolls Ambriel, outfit by Cindi’s BJD Designs, eyes & wig from Jpop Dolls, Doll Leaves Sisley, outfit from Auguste Designs, eyes from Jpop Dolls, handmade wig by BJDcollectasy.)
Materials:
Sewing tools (needle, thread, scissors, pins)
Lacy material
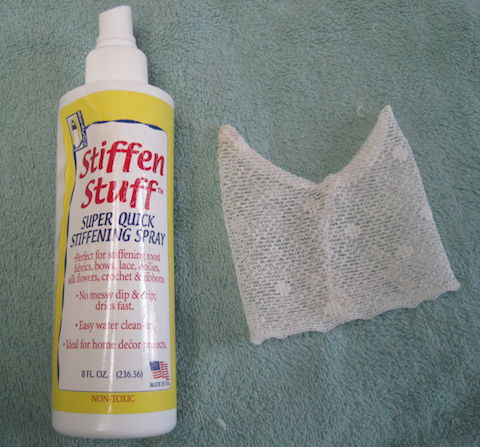
Stiffening Agent – ( mine was “Stiffen Stuff” quick drying material stiffener)
~~~~~
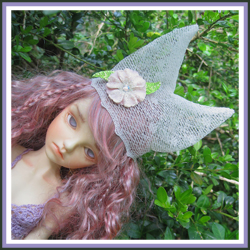
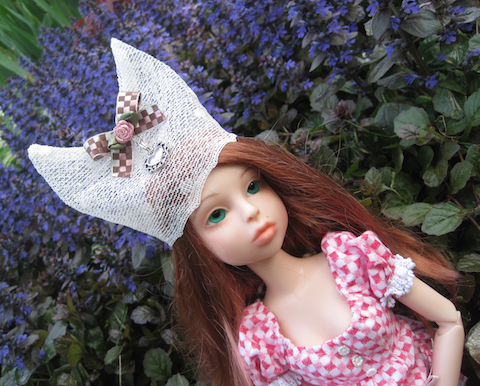
Animal Ear (Horned) Hat
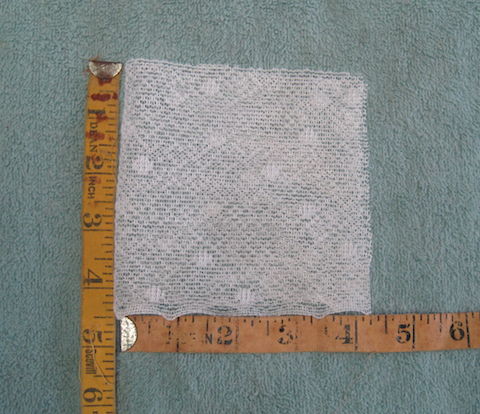
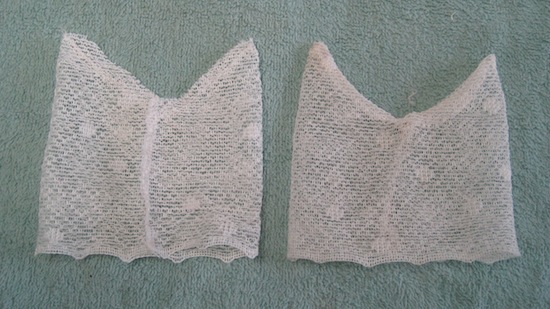
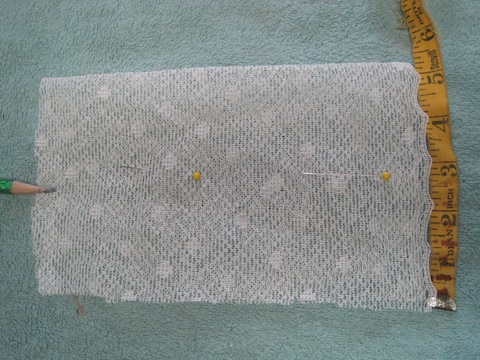
Step 1: Measure the circumference of your doll’s head with a wig on. Add 1/4 of an inch (6 cm) to the measurements and cut out a square on a fold. My hat was made for a 1/4 size doll. I cut out a 4 1/4 (10.8 cm) square piece of material on the fold. (Note, I found it handy to pin the material together so it wouldn’t slip out of place during cutting & sewing)
I used the decorative edge of the fabric as the edge for the hat. If there is no finished edge on your material, include an extra 1/4 inch at the the bottom for a hem.
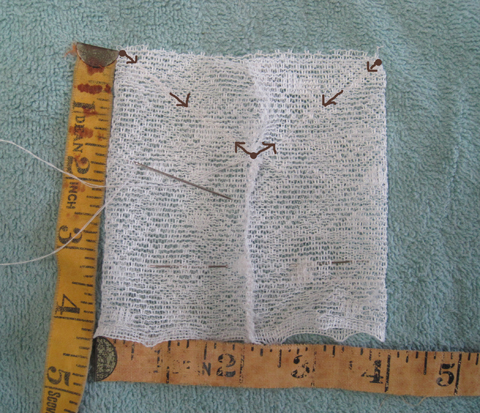
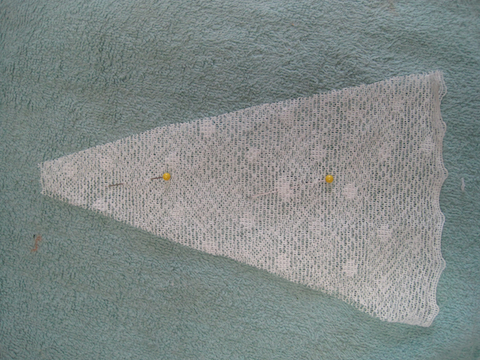
Step 2: Sew the end of the material opposite the fold 1/4 of an inch (6 cm) in from the edge. leave 1 1 /2 inch (3.8 cm) open at the top of the seam. Move the seam to the middle (2 inches or 5.1 cm as seen in the photo below). This will be the seam on the back of the hat. Mark out a line from the end of the back seam to the top corners of the square (see photo) making a “V” at the top. After sewing, trim the excess material along the seams leaving 1/4 inch.
Step 3: If you have an unfinished edge at the bottom, hem the hat opening. Turn the hat inside out.
Step 4: Apply the spray-on stiffening agent on the hat. I used one I found at the local A.C. Moore craft store. Other material stiffeners are also available.
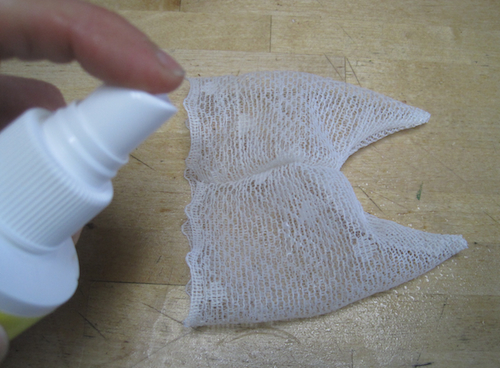
Step 5: Spray your hat on both sides, and inside and outside. If you want the fabric to be pretty stiff, do 2-3 light applications. If necessary, a balled -up plastic bag can be inserted in the hat to allow it to stay open at the bottom. I found that the stiffener worked quickly, so I let my hats stiffen a bit, then stood my hats up to finish drying. A fan on low speed reduced the drying time even more.
Step 6: Decorate your hat. The first hat below has flattened satin flowers combined with metallic leaves and a rhinestone. The second example has a hand-decorated pin (See instructions for making the pin HERE.)
~~~~~
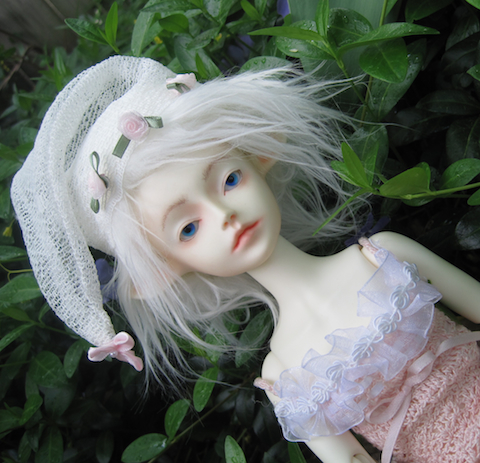
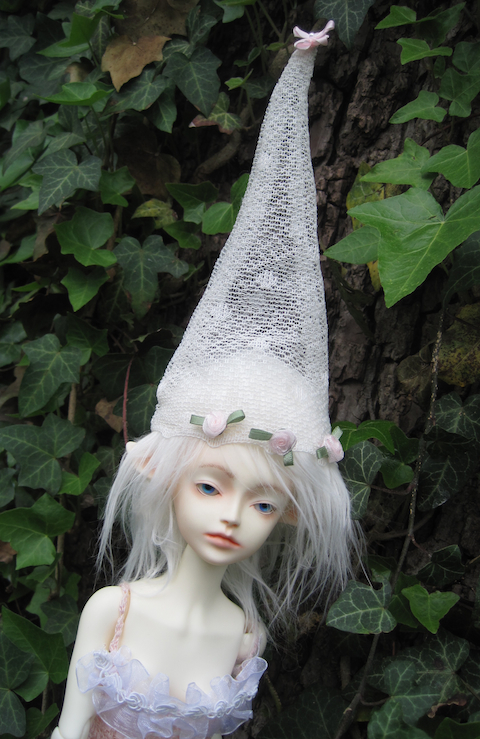
Elf Hat
Step 1: The second hat I made was a pointed elf hat. The material for the hat was about 5 inches (12.7 cm) wide. The height of the hat can be just about any size you like. I cut my material at 9 1/2 inches (24.1 cm). Mark the center point at the one end. That will be where the tip of the hat will be.
Step2: Trim away the excess material leaving a triangle. Sew the two sides together meeting at the point. Turn the hat inside out. Spray the hat lightly inside and outside with the fabric stiffener. Let dry and decorate. The hat can be stiffened lightly for a floppy hat or sprayed a few more times for a pointy hat.
~~~~~
Featured Article