A fun project! Convert a birdcage into a home for little dolls.
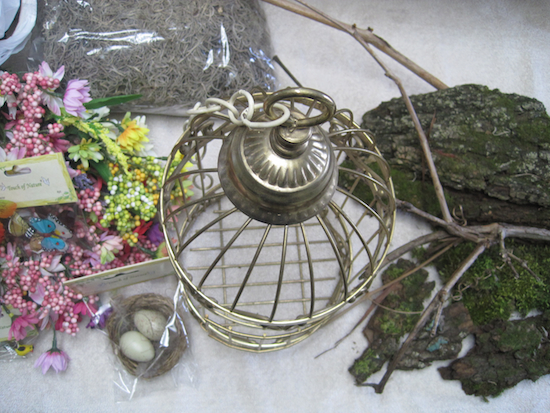
Materials:
Decorative birdcage
Craft foam or poster board
Glue (hot glue or any fast drying glue that dries clear)
Moss
Tiny bird nest
Mushroom birds
Bark pieces
Various decorations (silk flowers, lichen, ribbon, spanish moss, dried flowers etc…)
Optional: Cover for the cage; fabric, elastic or ribbon
~~~~~
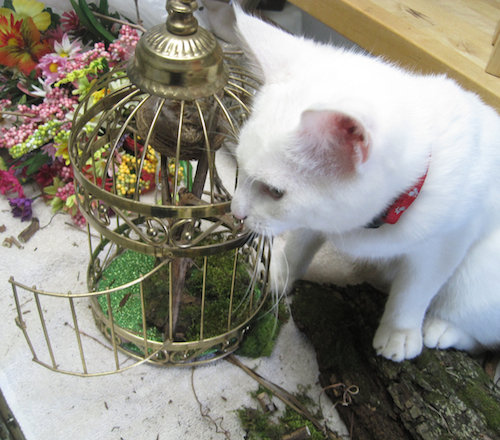
At thrift stores and antique malls, I would regularly find birdcages, some made to hold birds and some used for decorative purposes. Elaborate antique cages can be very pricy, but it was easy to pick up a number of interesting cages for very little money. I decided to convert one of them into a new home for my tiniest Dream High Studio dolls, especially since I’m expecting a new fairy Harpy. She will be my second doll from the 7 cm micro series as I currently have Flora. The smallest birdcage I own, a decorative brass one, looked like the perfect house for the dolls.
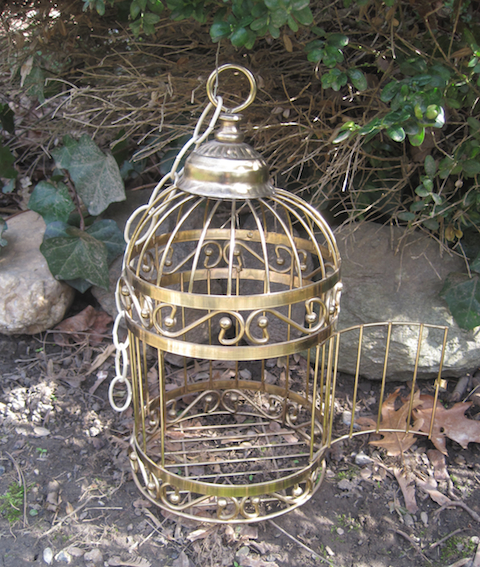
After dusting off the cage, I started to look around for possible items I could use to transform it into my micro-fairy home.
The bars were wide enough that I could imagine the fairies flying in and out, but with the cage hung up somewhere, they would be safe from my playful cats. In fact, Comet the teenage kitten was very interested in my project, as you can see (and he was not very helpful).
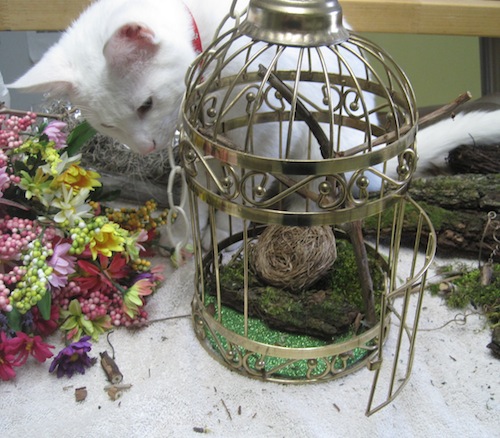
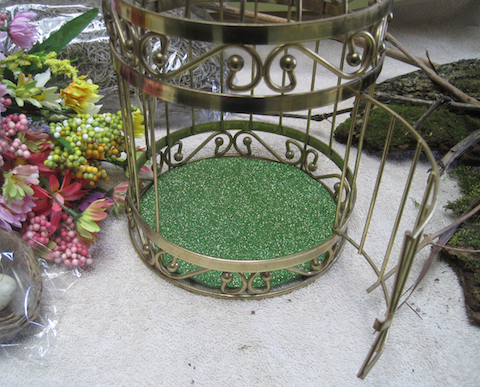
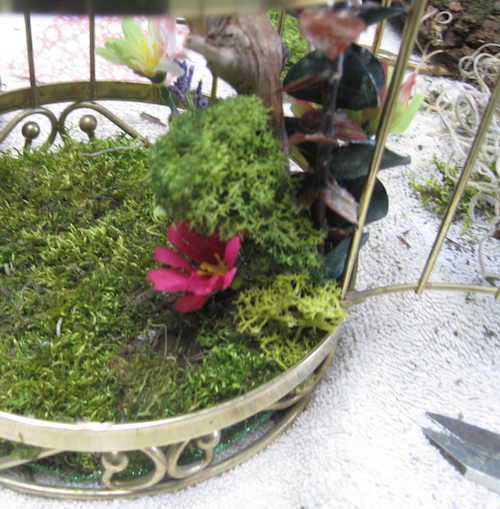
First I needed to line the bottom of the cage. This would provide a platform for my decorating. I traced a rough circle from the inside of the cage and cut it out from a foam sheet. The sheets work well because no matter how small the cage door, it is easy bend the sheet to to place it inside. (Poster board could also be used.)
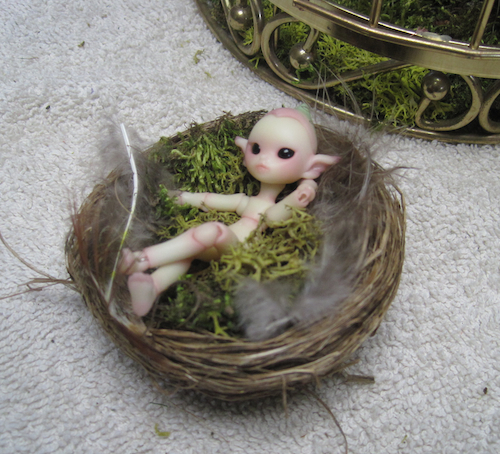
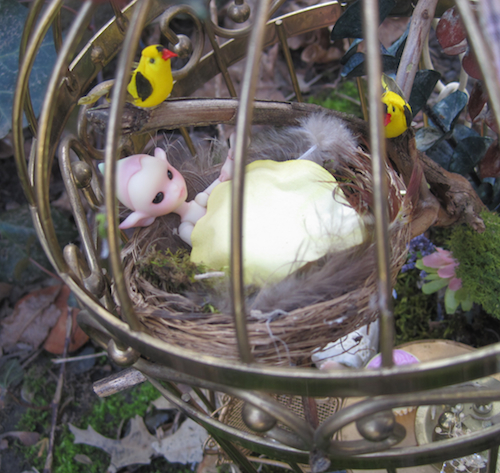
I had a small nest from a craft store that had plastic eggs inside. I removed the eggs so the nest could be a fairy bed.There were feathers already glued in the nest. I added moss and lichen to make it a soft bed for the dolls.
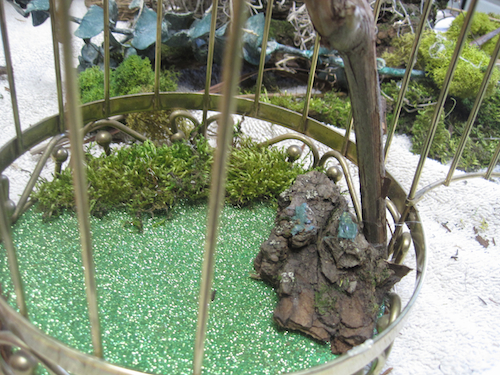
Next I decided to add branches to create a “tree” inside the little home. I wedged upper branches in the ornamental band at the top of the cage. I made sure the main branch was tightly wedged in and then I held it in place by gluing bark chunks around it. The rest of the cage floor I decided should be covered with moss “grass”.
The nest was glued in the branches. (It could also have been attached with thin wire.)
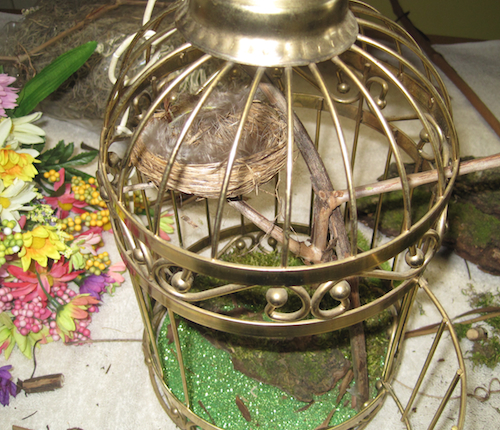
Around the base of the tree branch, there were gaps between the branch and the bark chunks. I “planted” flowers, moss and lichen around this, tucking stems in the gaps and gluing in place. I added two tiny mushroom birds to the upper branches. Any bare spots on the sides of the foam base I covered with bits of moss and lichen.
Flora’s “blanket” is a silk rose petal which came with the doll.
Finally, I added some Spanish moss, eucalyptus and a ribbon to the top of the cage to finish it.
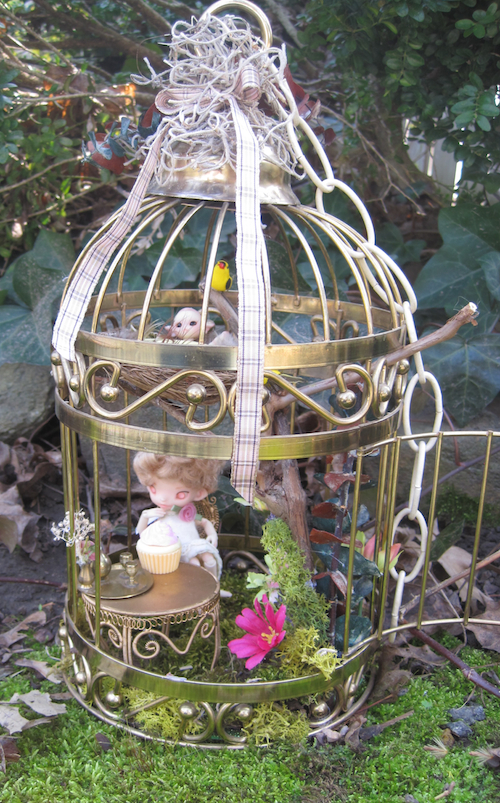
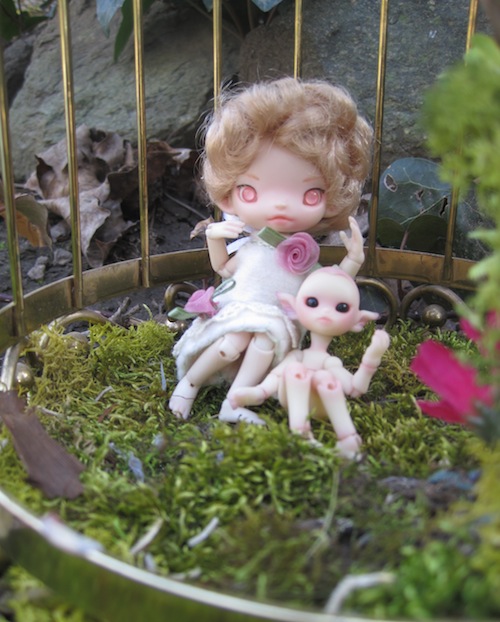
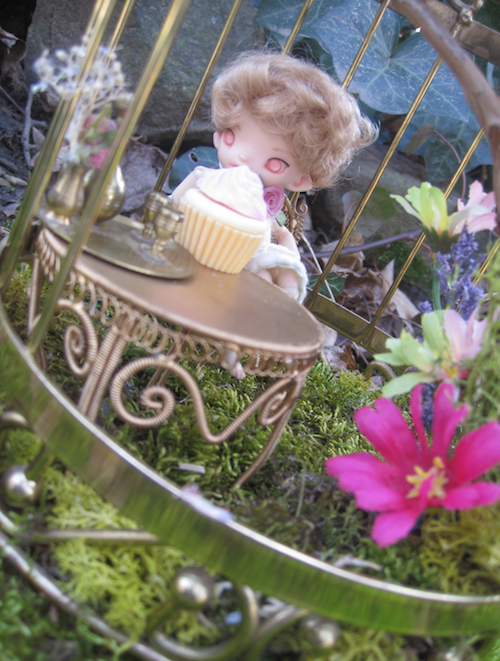
I placed a dollhouse table and chair at the bottom, and they fit perfectly in the mossy little yard. Here Dream High Studio Mimi, who has come to visit, is having a little snack.
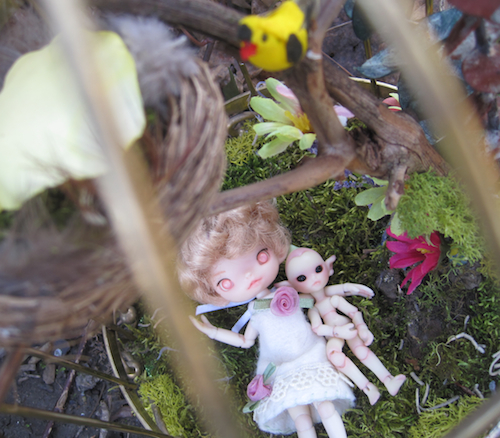
But I also liked leaving that the area open just as much. It would be cute with a picnic lunch laid out. Here the dolls look comfy just stretching out on their “lawn” and relaxing.
To keep dust out of the cage, I also made a cover. I took a length of cotton fabric, folded it, and sewed the edges of the 2 short ends. (Thicker fabric would not need to be doubled.) Then I sewed a casing along the fold and ran ribbon through it. (elastic would work well too.) I hemmed both layers at the bottom and tied the cover round the top of the cage. The tiny dolls could be stored in their cage in little boxes or storage pouches when it is covered. A smaller cage like this one is portable, and it would be easy to take your little dolls, home included, to a doll meet.

Now to wait for the arrival of Harpy!