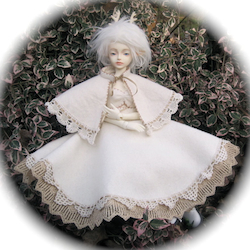
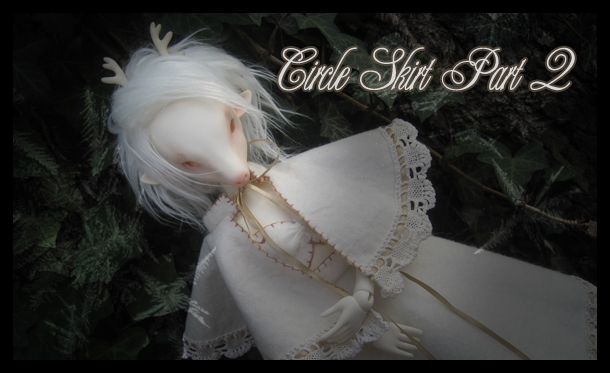
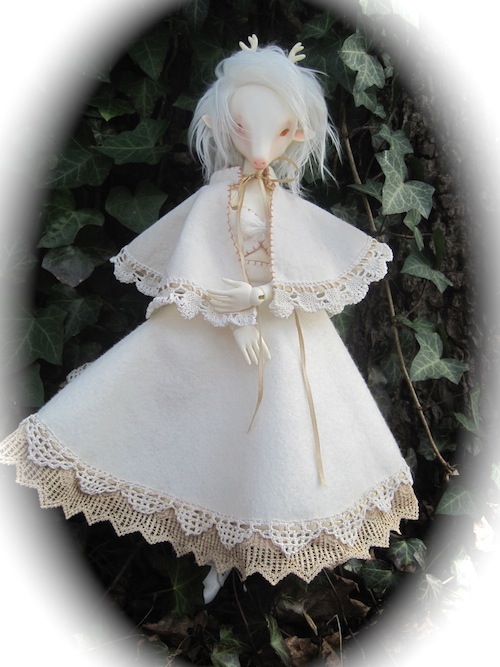
This circle skirt pattern was made to fit my 1/4 size Limited Edition Doll Leaves Sisley purchased from Junkyspot. The skirt is waltz-length but the pattern can be lengthened or shortened as desired. The pattern for the 1/6 size skirt was re-designed to make a cape. The colors of the outfit and face-up were inspired by white fallow deer.
PDF patterns :
Wool or wool blend felt – 1/2 yard or two 12″ x 18″ (30.5 x 45.7 cm) rectangles (mine came from Prairie Point Junction)
Snap fasteners
Skirt and cape decorations (skirt shown has embroidery floss & vintage lace and ribbon for trim)
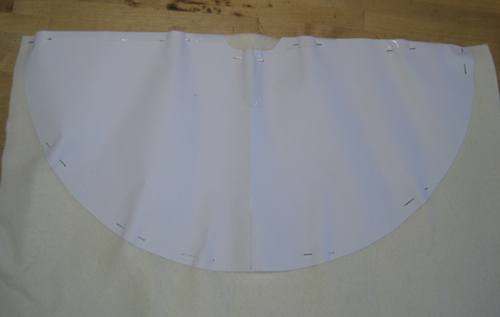
Note:As in the previous skirt pattern for 1/6 dolls, when I created this 1/4 skirt pattern, instead of a circular opening for the waist, I designed it with an oval to better conform to the waist shape. The directions for the larger skirt are almost the same as the smaller skirt.
Skirt Directions:
To make this skirt: See the directions for Circle Skirt Part 1
1. When I cut out this skirt, I decided to try making a half-skirt pattern. Folding the material as shown for cutting out the smaller skirt and using a quarter-circle pattern will also work.
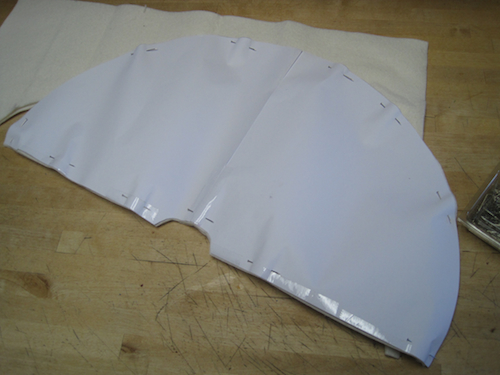
I had two 12″ x 18″ rectangles to make into a skirt. Because they were cut from the rectangles, I had to sew the two half-circles together to make the skirt. The seams are on either side of the doll. If you have felt by the yard, the skirt can be cut out of one piece so it won’t have to be stitched together.
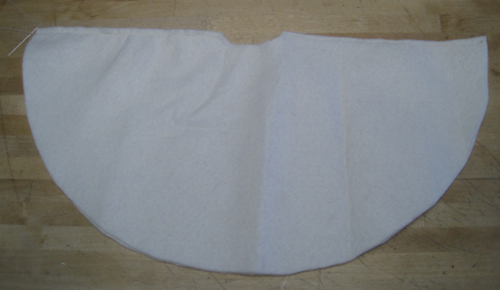
Once I sewed the two sides together, I cut a slit for the back opening as I did for the smaller skirt.
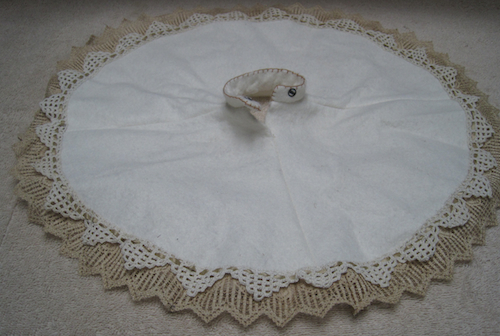
2. As before, I also sewed the back seam partially leaving an opening at the top. I decided to make the skirt band with 1 1/2 inch wide (3.8 cm) strip of felt folded over instead of a 3/4 inch (1.9 cm) strip used for the smaller skirt. I folded the strip in half and sewed it to the skirt. I then cut off any excess and added a snap closure. I decorated the skirt with tan embroidery floss and old lace. I threaded ecru ribbon through the lace for added interest. I then pressed the skirt with an iron on the wool setting.
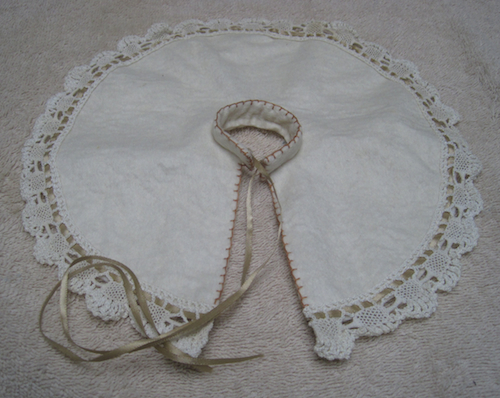
Cape Directions:
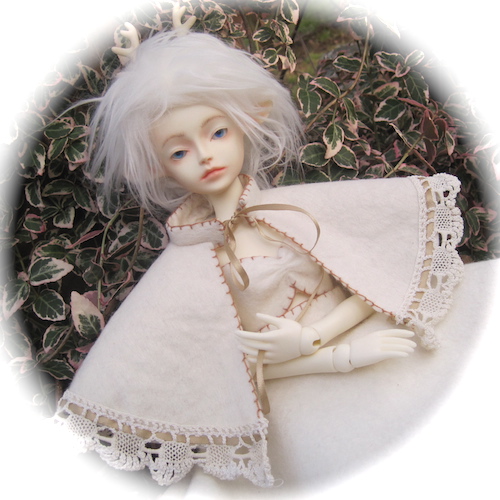
The 1/6 size skirt pattern was modified to make the cape pattern for this doll. The basic instructions are the same as those for the 1/6 size skirt except the slit in the back of the skirt becomes the front of the cape and is not sewn together. Instead of a snap, I substituted ribbon for the fasteners. This cape could be optionally lined. (Due to time constraints, I did not line the cape.)
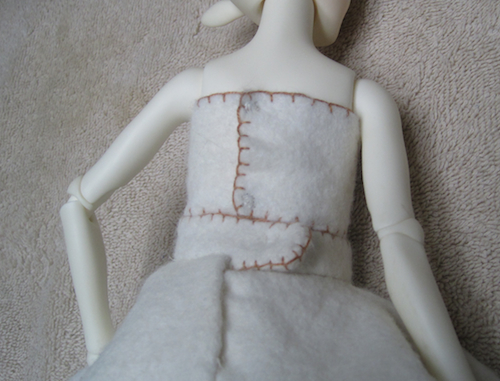
Bra top directions:
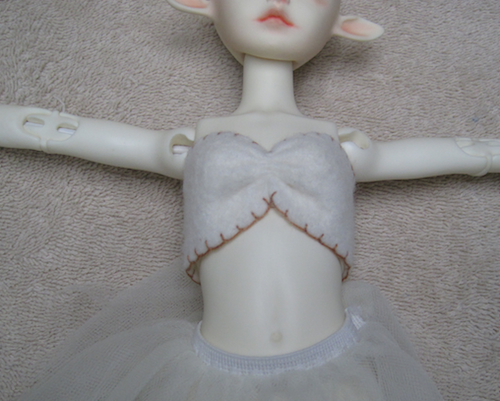
This was simply made with a strip of felt. The width can vary depending on the doll. I used a 1 3/4 inch (3.4 cm) wide strip. I gathered the material in the center, then wrapped the bra around the body. I cut off excess material at the back and added two snaps. Ribbon ties or felt shoulder straps could easily be added. I decorated with blanket stitching to match the skirt and cape.
I added a tulle underskirt to the outfit. This is made with a folded piece of tulle sewn onto a strip of elastic. I also hand-made a fur wig from scraps I purchased from Distinctive Fabric. Directions for making the wig can be found HERE.

The link to the cape pattern doesn’t work.
Sorry about the delay. I fixed it now.