 By Martha Boers of Antique Lilac
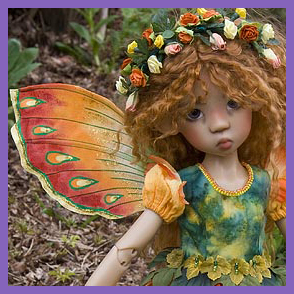
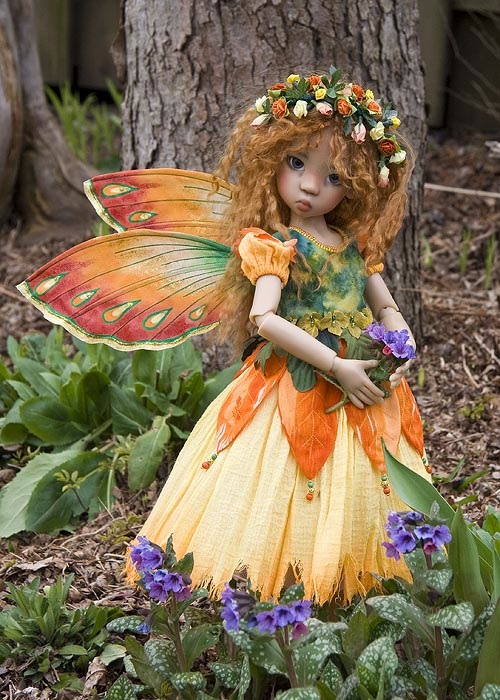
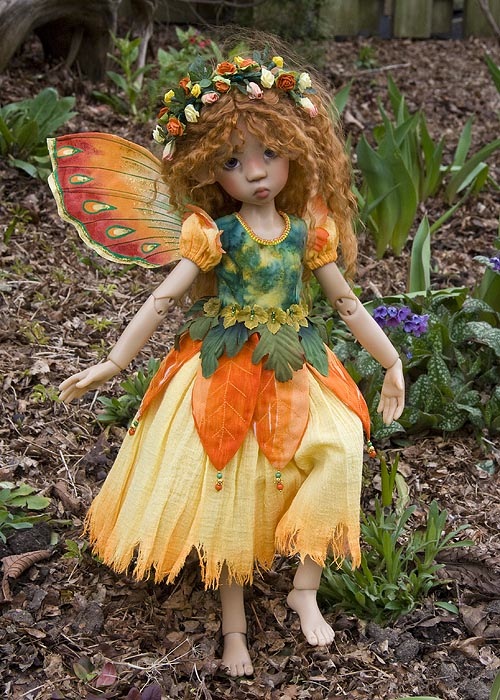
Doll model is KazeKidz light tan Miki elf by doll artist Kaye Wiggs.
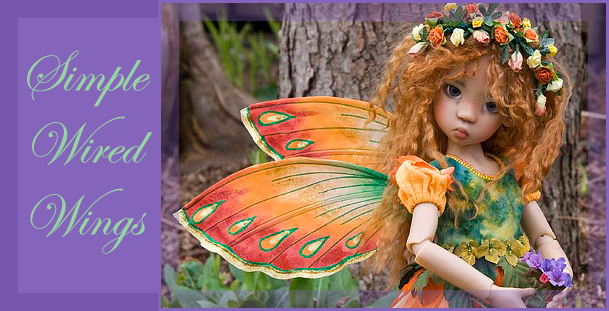
Make a pair of simple wired wings that slip into a pocket on the back of your fairy’s bodice.
Materials:
– sheer fabric
– scissors
– wire – thickness depends on size of wings being made.
– pliers
– thread
– Fray Check
– iron
– needle
– hot glue gun
– acrylic or Folk Art Paint in colours to match fairy outfit
– Textile Medium
– brushes
– glitter paint
Instructions:
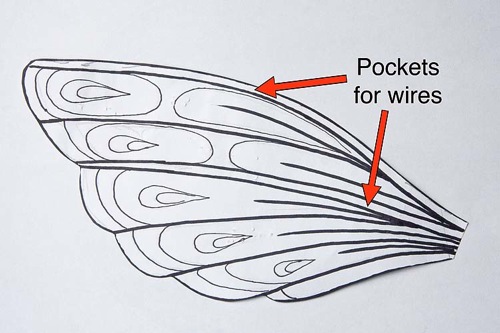
1. Draw a wing design, making sure to include two pockets for wires. Cut out pattern.
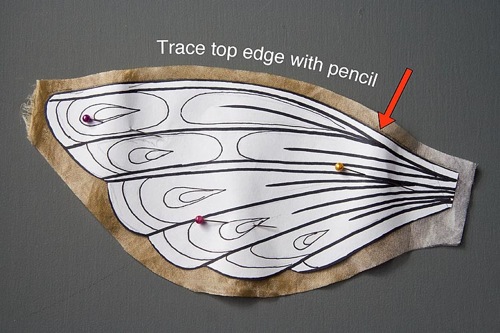
2. Pin pattern onto double layer sheer fabric. Trace upper edge of pattern onto fabric and cut out fabric leaving plenty of excess around outer edges or pattern. *Only the top edge is cut with a 3/8″ seam allowance.
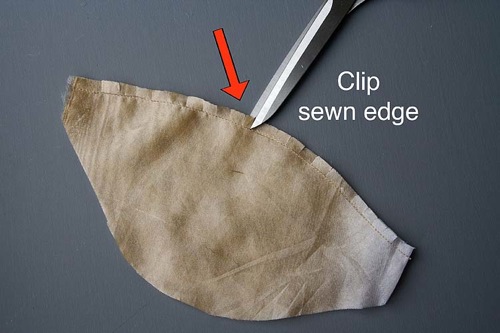
3. Fold back body edge of wing and sew along top edge of wing. Clip the curve with scissors. Turn wing right side out and press using a soft cloth to protect the fabric from direct contact with the iron.
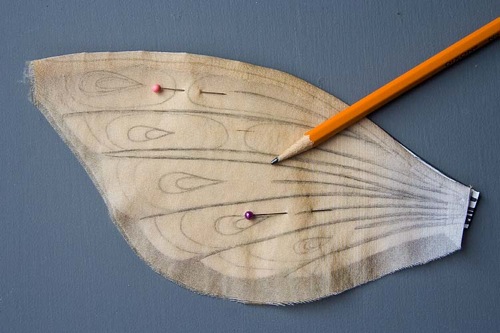
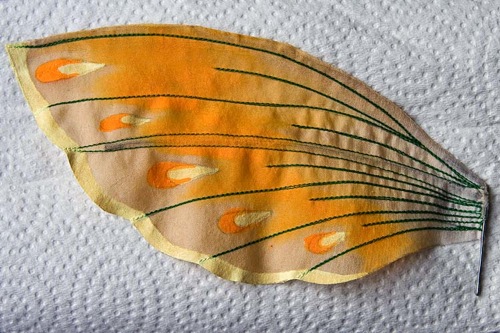
4. Pin sewn wing onto pattern to keep it from moving, and trace veins and designs onto fabric with pencil.
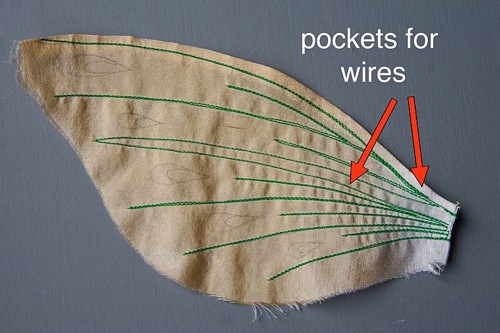
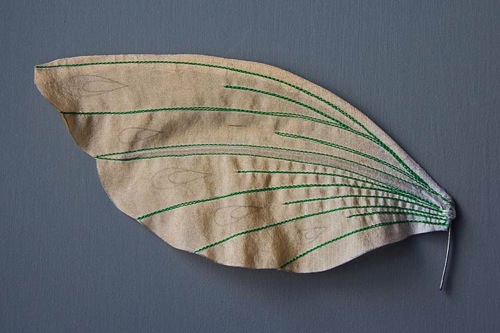
5. Using a thread matching the colour of the bodice, stitch the vein lines. Start at ‘body end’ of wing, stitch out to end of vein line, turn and stitch back, then stitch next vein line. *This is why you have extra fabric beyond edge of wing – to make stitching to edge of wing and turning easier.
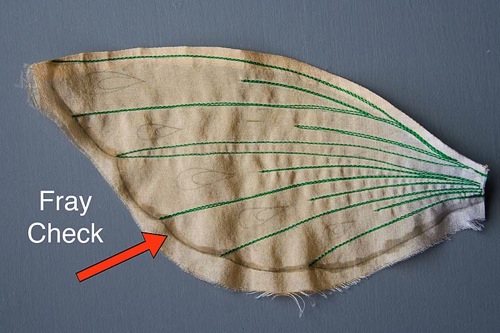
6. Press wing, then trace outer edge onto fabric. Draw a line of Fray Check along outer wing line. Let Dry. Cut outer wing edge being careful not to clip ends of sewn vein lines.
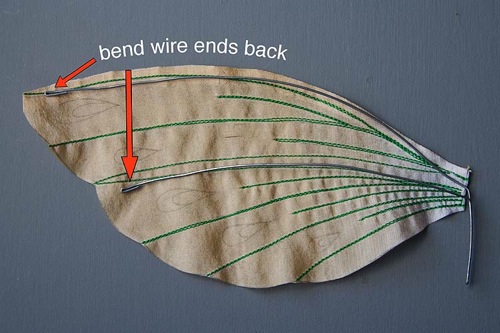
7. Using pliers, bend wire to fit into pockets. The thickness of the wire depends on the size of the wings being made. Very large wings will need a heavier gauge but tiny wings will need a lighter gauge. Start with upper tip, bend a little bit back on itself to create a blunt end, Laying wire along sewn wing, measure wire along upper pocket, then bend down at ‘body end’. Leaving 1 1/2″ of wire for pocket, bend wire back up tightly with pliers. About 1/4″ below upper wire, bend second wire out below it. Measure along fabric wing, cut end and bend under the end of the wire to make a blunt end.
8. Insert wires into fabric pockets. Thread needle with strong thread, knot end, and thread through one of the wing pockets. Pull fabric back along wires, apply a bit of hot glue to the two wire ends and pull fabric back over wires. Quickly stitch securely with needle and thread.
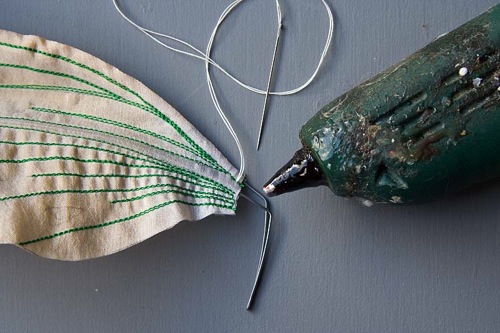
9. Tie off thread, and smooth any bumps of cooled glue with tip of hot glue gun.
10. Paint any ‘hard-edged’ parts of your wing design with acrylic or folk art paint mixed with Textile medium. Let dry, then paint same designs on other side. Let dry.
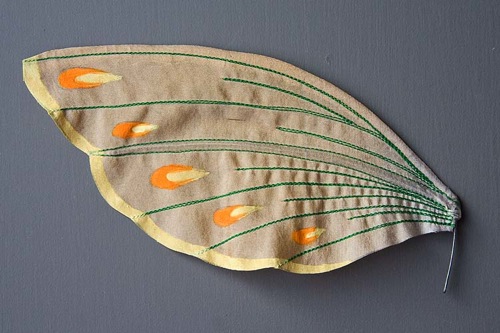
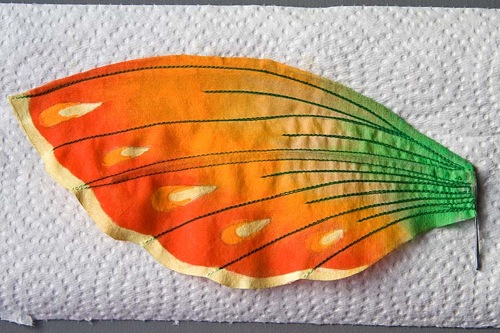
11. Soak wing with water, lay on paper towel. Mix desired paint colour with equal part textile medium and dilute with water. Using a soft brush ‘bleed’ the paint onto the wet wing.
12. Repeat with outer and inner wing colours. Let dry.
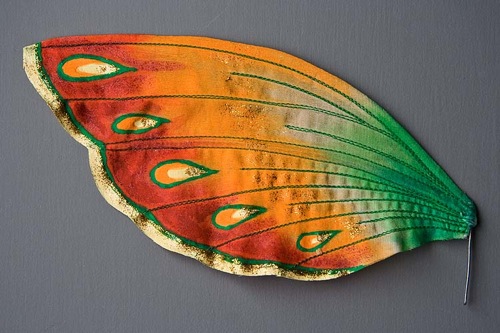
13. Add any decorative details and glitter (if desired)
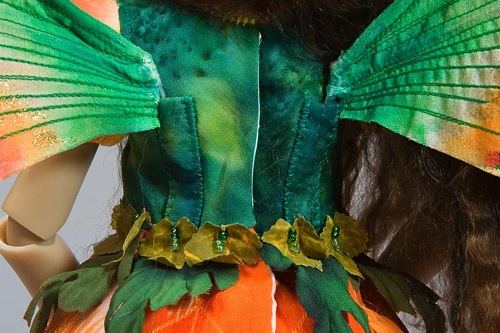
14. Sew long thin pockets of the same fabric as bodice onto back of bodice. Insert wing wires.
Thank you for this awesome tutorial! I am wondering where you find the precious dolls that you use? I would love to try to make a angel doll for my granddaughter and the face on the fairy in this pic is beautiful. Can you put me in touch with any places that may carry something similar to the dolls that you use? (Please know that I am in no way in business in making dolls of any kind nor am I looking to get into this business.) I would just love to be able to make something like this as an heirloom that I leave behind for her. Thank you so much for your time and your giving nature with the tutorial. It is awesome!
All of the dolls shown are resin BJDs. There are many companies that make them, and they come in many sizes. Try looking on this website to see lots of the dolls. Hope that helps!
Can you tell me how much the fairy doll is
That particular doll is a limited edition Kaye Wiggs doll. She is no longer available. Kaye’s dolls are sold through Jpop Dolls. Her dolls are on the expensive side. That size runs over $500. Dolls from other companies for that size are generally $250 and up. BJDs are hand cast in high quality resin so they are not cheap.
thanks… wonderful creations…. love
splendid
it’s very interseting to read all of yours
congratulations! you are a great artist
lots of good things from france 😉
Hi, Fantastic tutorial, love the work its very inspiring. Could you tell me what ‘fray check’ is? Is it a product to buy?
regards Diana
I am overwhelmed at the beauty of your Fairy Wings and the ease of your tutorial. Question: Where can you order and buy Fray Check? I’ve never heard of it, but it makes perfect since. If I were to use a glue mixture, would that work? Or does the fray check accept paint as well? Thanks so much for sharing your BEAUTIFUL WINGS! Donna ;))
My website is total other than the things you made. Your dolls are amazing and eather one has its own caracter. Beatifull. I am trying too make one on a barbie doll. It will not reach your standerd, but it gaves me much pleasure. I have too lay in bed for a very long time, so my glasswork and drawings have too wait. But your dolls inspire me to do something else.Thank you
I hope you have found “fraycheck” but as I just ran across this post I thought I would comment. It is liquid and you run it along the edge of snipped fabric to stop fraying. http://www.amazon.com/Dritz-1674-Liquid-Sealant-0-75-Ounce/dp/B000YQKIDY
Is this fairy going to be made to be sold? I LOVE her and would love to buy her.
The artist was offering the costume only. The doll is by Kaye Wiggs who sells exclusively through Jpop Dolls.
http://www.jpopdolls.net/store/home.php